
Easy Spooky Halloween Cookies Recipe
I will never forget the first time I tried to make these Easy Spooky Halloween Cookies. I was so excited for a party that I completely forgot to chill the dough. My first batch spread into one giant, ghost-shaped blob on the baking sheet. It looked more like a sad pancake than a spooky treat. My husband still calls it the ‘Cookie Puddle Incident’ to this day. But hey, you live and you learn, right? Now I’ve made them so many times I could probably do it in my sleep, mistakes and all.
Recipe Card
| Recipe Title | Easy Spooky Halloween Cookies Recipe |
|---|---|
| Servings | About 2 dozen cookies |
| Prep Time | 30 minutes (plus 1 hour chilling) |
| Cooking Time | 10-12 minutes per batch |
| Calories | Approx. 180 per cookie |
Ingredients
- 1 cup (2 sticks) unsalted butter, softened
- 3/4 cup granulated sugar
- 3/4 cup packed brown sugar
- 2 large eggs
- 1 teaspoon vanilla extract
- 2 1/4 cups all-purpose flour
- 1 teaspoon baking soda
- 1/2 teaspoon salt
- 1 cup semi-sweet chocolate chips
- Orange and black gel food coloring
- Black and white decorating icing
- Sprinkles (optional)
That softened butter is so key. One year I was impatient and used melted butter because I forgot to take it out of the fridge. Big mistake. The dough was a greasy mess and the cookies were flat as coasters. And the gel food coloring is a must. The liquid kind I used once made the dough way too wet and they never really baked right. Learned that the hard way for sure.
Directions
- In a big bowl, cream together the softened butter and both sugars until it’s light and fluffy. This takes a few minutes, don’t rush it.
- Beat in the eggs one at a time, then mix in the vanilla.
- In a separate bowl, whisk together the flour, baking soda, and salt.
- Gradually add the dry ingredients to the wet ingredients, mixing on low speed until just combined.
- Stir in the chocolate chips by hand.
- Now, divide your dough into two equal halves. This is where the fun begins.
- Add orange gel food coloring to one half and black gel food coloring to the other. Mix it in really well with a spatula or your hands (gloves help!).
- Cover both bowls of dough with plastic wrap and chill in the fridge for at least an hour. Seriously, don’t skip this.
- Preheat your oven to 375°F (190°C) and line baking sheets with parchment paper.
- Take small scoops of each color of dough and roll them into 1-inch balls. You can make them all one color, or mix and match for a marbled effect.
- Place the dough balls on your prepared baking sheets, leaving about 2 inches between them because they will spread a little.
- Bake for 10-12 minutes, or until the edges are just starting to turn golden. The centers might look a tiny bit underdone, that’s perfect.
- Let the cookies cool on the baking sheet for 5 minutes before moving them to a wire rack to cool completely.
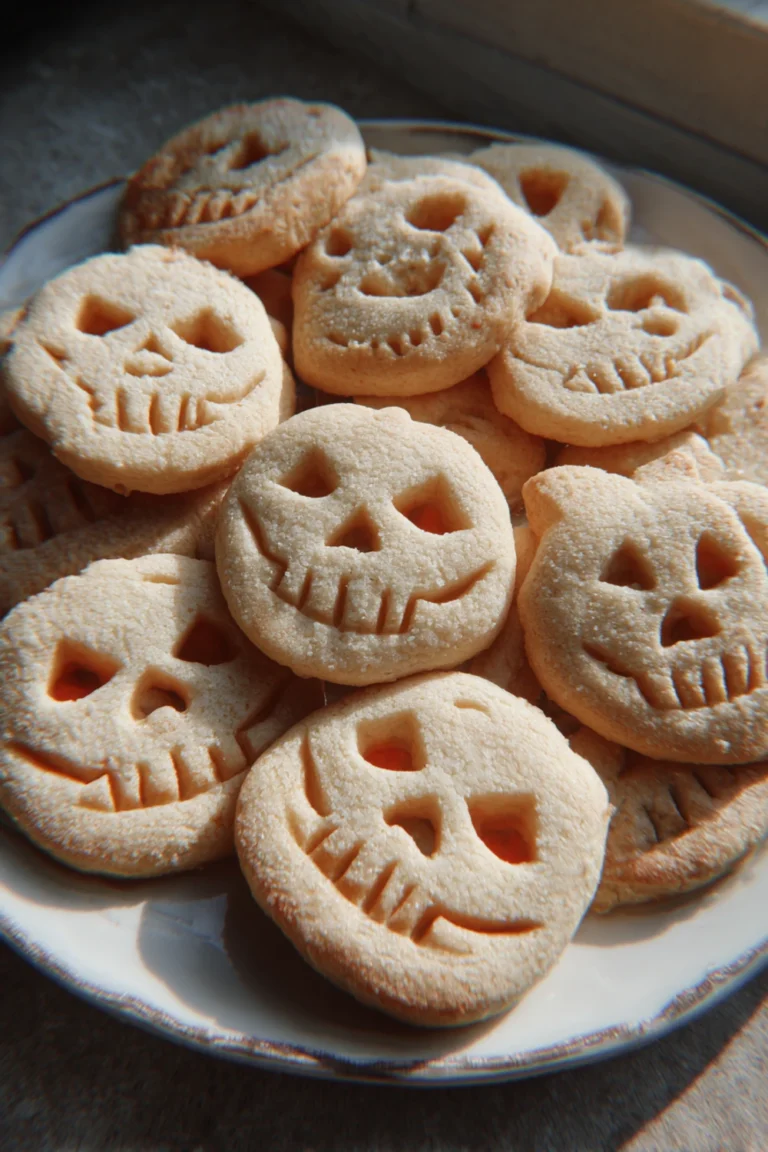
- Once totally cool, get creative with the decorating icing to make spider webs, jack-o-lantern faces, ghosts, or whatever spooky design you like. Add sprinkles now if you’re using them.
The most important step is chilling the dough. I know, I know, it’s boring and you just want to get to the baking. But trust me, if you don’t, you’ll end up with my famous cookie puddle. I’ve tried to shortcut it so many times and it never, ever works out. The dough is just too soft and the butter melts way too fast in the oven. Just set a timer, watch a show, and let the fridge do its magic.
Another thing I messed up was the decorating. I was so excited one year that I iced the cookies while they were still warm. The icing just melted and slid right off, creating a gloopy, scary mess that was not the good kind of spooky. Let them cool all the way down, even if it tests your patience. It makes all the difference.
I love making these cookies because they’re such a fun project. It’s not just about the eating, it’s about the whole process. My kids love helping with the coloring and decorating, and it’s become a real family favorite for our Halloween season. The leftovers, if there are any, are amazing with my morning coffee the next day. They’re the perfect easy dinner dessert to have waiting.
Nutrition Info (per serving)
| Calories | Carbs | Fat | Protein |
|---|---|---|---|
| 180 | 25g | 8g | 2g |
Okay, let’s be real, these are a treat. They’re not a health food, but that’s okay! I’ve tried making a “healthier” version with applesauce instead of butter and whole wheat flour. They were… not great. Dense and cakey, not cookie-like at all. Sometimes you just gotta enjoy the real deal. For my gluten-free friends, a 1-to-1 gluten-free flour blend works pretty well here, just don’t over-mix the dough.
Ingredient Swaps
| Ingredient | Substitution |
|---|---|
| Chocolate Chips | M&M’s, Reese’s Pieces, or white chocolate chips |
| All-Purpose Flour | Gluten-Free 1-to-1 Baking Flour |
| Granulated Sugar | Coconut Sugar (it will change the color a bit) |
| Butter | Vegan Butter Stick (not margarine from a tub) |
I’ve tried a bunch of these swaps over the years. Using M&M’s instead of chocolate chips is a total win, especially the Halloween colors. They look so cute poking out of the dough. The vegan butter works surprisingly well, just make sure it’s the kind that comes in a stick, not the soft tub kind. That one I learned the hard way—it made the dough way too soft. Coconut sugar gives a deeper, almost molasses-like flavor, which is nice, but it does make your orange dough look a little muddy.
Tips
- Use a cookie scoop for evenly sized cookies that bake at the same rate. My first batches were all different sizes and some were burnt while others were raw.
- If your dough gets too soft while you’re working with it, just pop it back in the fridge for 10-15 minutes. This is a lifesaver, especially if your kitchen is warm.
- Don’t crowd the baking sheet! I know you want to bake them all at once, but giving them space is what gives you that perfect cookie texture instead of one giant cookie cake.
- Let the cookies cool on the baking sheet for a few minutes before moving them. They are very soft coming out of the oven and will fall apart if you’re too hasty.
The cookie scoop tip is something I wish I knew years ago. I used to just use two spoons and my cookies were all over the place. Some were tiny and burnt, others were huge and doughy in the middle. Getting a cheap cookie scoop from the store was a total game-changer for me. Now they all look uniform and, more importantly, they all bake evenly. It seems like a small thing but it makes a huge difference.
FAQ
Can I make the dough ahead of time?
Oh yeah, for sure. You can make the dough, color it, and keep it wrapped tightly in the fridge for up to 2 days. Sometimes I even do this on a Thursday for a weekend party. It actually improves the flavor! Just let it sit out for like 10-15 minutes before scooping so it’s not a rock-hard brick.
Why are my cookies cakey and puffy?
This happened to me once and I was so confused. Turns out I accidentally used baking powder instead of baking soda. They were like little orange and black muffin tops. Not terrible, but not the classic cookie texture we’re going for. Double-check your containers!
My black dough isn’t getting dark enough, what gives?
This is a common one. It takes a lot of black gel coloring to get a true black. Don’t be shy with it! Also, using a chocolate cookie base can help. I sometimes swap out a 1/4 cup of the flour for 1/4 cup of black cocoa powder for the black dough half. It gives it a deep, dark color and a cool Oreo-like flavor.
That’s everything I know about making these Easy Spooky Halloween Cookies! Hope you give it a try. And if you mess it up, you’re in good company—I still have a kitchen disaster every now and then. It’s all part of the fun!
Easy Spooky Halloween Cookies
Fun and festive Halloween cookies with orange and black colored dough that are perfect for decorating with spooky designs. These easy cookies are a family favorite for Halloween celebrations.

Ingredients
- 1 cup (2 sticks) unsalted butter, softened
- 3/4 cup granulated sugar
- 3/4 cup packed brown sugar
- 2 large eggs
- 1 teaspoon vanilla extract
- 2 1/4 cups all-purpose flour
- 1 teaspoon baking soda
- 1/2 teaspoon salt
- 1 cup semi-sweet chocolate chips
- Orange gel food coloring
- Black gel food coloring
- Black decorating icing
- White decorating icing
- Halloween sprinkles (optional)
Instructions
-
In a large bowl, cream together softened butter and both sugars until light and fluffy (about 3-4 minutes)
-
Beat in eggs one at a time, then mix in vanilla extract
-
In separate bowl, whisk together flour, baking soda, and salt
-
Gradually add dry ingredients to wet ingredients, mixing on low speed until just combined
-
Stir in chocolate chips by hand
-
Divide dough into two equal halves
-
Add orange gel food coloring to one half and black gel food coloring to the other, mixing thoroughly
-
Cover both bowls with plastic wrap and chill in refrigerator for at least 1 hour
-
Preheat oven to 375°F (190°C) and line baking sheets with parchment paper
-
Roll chilled dough into 1-inch balls, using one color or mixing for marbled effect
-
Place dough balls 2 inches apart on prepared baking sheets
-
Bake for 10-12 minutes until edges are lightly golden
-
Let cookies cool on baking sheet for 5 minutes before transferring to wire rack
-
Cool completely before decorating with icing to create spider webs, jack-o-lantern faces, or ghosts
-
Add sprinkles if desired while icing is still wet
Nutrition (Per Serving)

