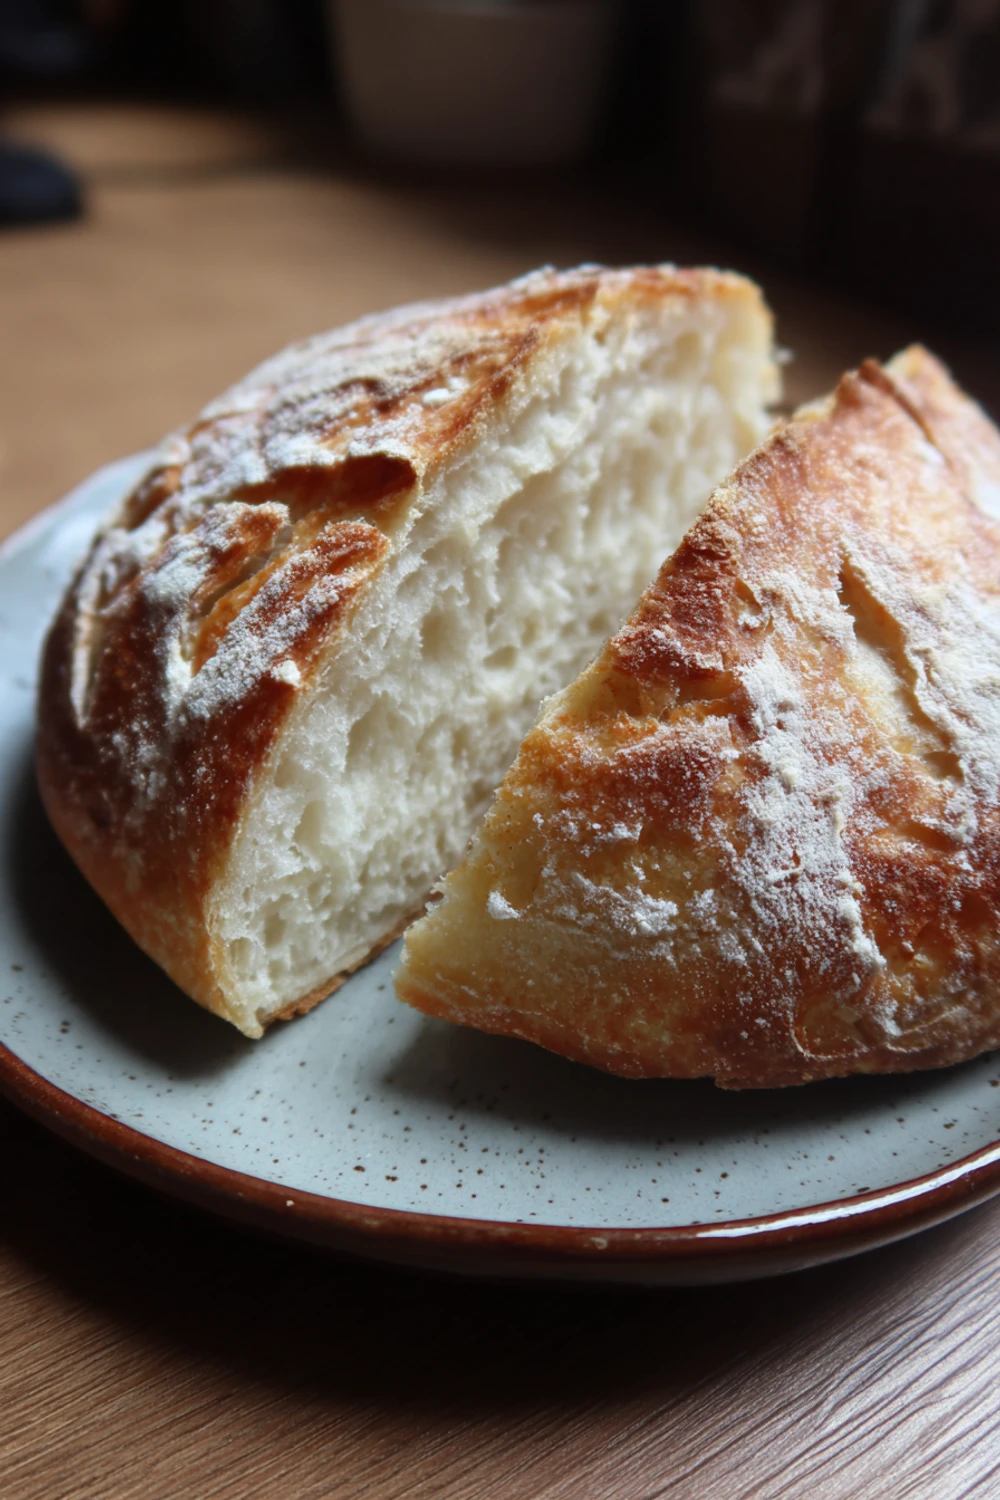
Easy Artisan Bread Recipe for Beginners
I’ll never forget the first time I tried this easy artisan bread recipe for beginners. I was so nervous, convinced I’d end up with a brick. My husband walked in as I was pulling this lumpy, pale blob from the oven. We both just stared at it. But then we cut it open, and the smell… it was pure magic. It was crusty, chewy, and actually looked like real bread. That little victory made me feel like a kitchen superhero, and I’ve been hooked ever since.
Recipe Card
| Recipe Title | Easy Artisan Bread Recipe for Beginners |
|---|---|
| Servings | 1 loaf (about 8 slices) |
| Prep Time | 15 minutes, plus 12-18 hours rising |
| Cooking Time | 45 minutes |
| Calories | Approx. 160 per slice |
Ingredients
- 3 cups (360g) all-purpose flour
- 1 ½ cups (350ml) warm water
- 1 ¼ teaspoons salt
- ¼ teaspoon instant yeast
That first time, I used active dry yeast instead of instant because it’s what I had. I didn’t adjust anything, just threw it in. The dough took forever to rise and was so dense. I learned the hard way that instant yeast is your friend here, it’s just easier for this lazy method. The salt is crucial too, I once forgot it and the bread tasted so bland, like eating a flour cloud.
Directions
- In a big bowl, whisk the flour, salt, and yeast together.
- Pour in the warm water and mix with a wooden spoon until it’s a shaggy, sticky ball. No kneading needed!
- Cover the bowl tightly with plastic wrap and let it sit on the counter for 12 to 18 hours. Go do something else!
- When the time’s up, flour your hands and a surface. Gently shape the dough into a rough ball.
- Let the dough ball rest for 30 minutes while you preheat your oven to 450°F (230°C) with a Dutch oven inside.
- Carefully take the hot Dutch oven out. Place your dough inside. You can put a piece of parchment under it if you’re nervous.
- Put the lid on and bake for 30 minutes.
- Take the lid off and bake for another 15 minutes until it’s deep golden and gorgeous.
- Let it cool on a wire rack for at least an hour before you slice it. I know, it’s hard to wait!
The step I messed up the most was the shaping. I used to manhandle the dough, punching it down and kneading it like I was mad at it. All the air would come out and I’d get a flat, sad loaf. Now I know you just gently fold it over itself a few times, it doesn’t need to be perfect. It’s supposed to be rustic, after all.
I can’t tell you how many times I’ve burned my fingers on that Dutch oven. One time I was in a hurry and tried to plop the dough in without the parchment paper. It kind of folded on itself and stuck to the side. I ended up with a weird, lopsided loaf that my kids called “the mushroom.” It still tasted great, but it was definitely a funny-looking family favorite.
The hardest part is honestly waiting for it to cool. I used to slice right in, steam pouring out, and the inside would be a little gummy. I learned that the bread is still cooking inside from its own heat. Letting it cool completely gives you that perfect, airy crumb. It makes the best leftovers for toast the next day, so it’s worth the patience.
Nutrition Info (per serving)
| Calories | Carbs | Fat | Protein |
|---|---|---|---|
| 160 | 32g | 0.5g | 5g |
I know, it’s basically just flour and water, so the nutrition is pretty straightforward. It’s not a health food, but it’s real food with no weird preservatives. I’ve tried swapping in some whole wheat flour to make it a bit healthier, but you can’t go more than half or it gets too dense. It’s a comfort food, and sometimes you just need that.
Ingredient Swaps
| Ingredient | Substitution |
|---|---|
| All-purpose flour | Up to 1.5 cups can be whole wheat or bread flour |
| Instant yeast | Active dry yeast (use same amount, but rise time may be longer) |
| Salt | Sea salt or kosher salt (use a tiny bit more if using kosher) |
I’ve tried a lot of these swaps. The whole wheat one is the most common in my house. It works, but it definitely makes a heavier, denser loaf. My biggest fail was trying to use rye flour. I didn’t realize it acts so differently. The dough was a sticky mess that never really held its shape. We ended up with something that resembled a very large, flat cracker.
Tips
- Your water should feel warm like a bath, not hot. Too hot and you’ll kill the yeast.
- Don’t skip preheating the Dutch oven! A cold pot means no instant steam and a pale crust.
- Use a sharp knife or razor blade to score the top right before baking. It lets the bread expand beautifully.
I learned the scoring tip the hard way. For my first five loaves, I just didn’t do it. I couldn’t figure out why my bread always had these weird, torn-looking splits on the side instead of a pretty top. Then I saw a video of someone scoring their dough and it was a total lightbulb moment. It seems like a small thing, but it makes a huge difference in how it looks.
FAQ
My dough didn’t rise much, what happened?
Oh, I’ve been there. It’s usually one of two things. Either your yeast was old (check the expiration date!) or your kitchen was too cold. Yeast is lazy, it likes a warm spot. Now I sometimes let it rise in my oven with just the light on, it creates the perfect little warm environment.
Can I speed up the rise time?
You can try, but I don’t love the results. I once got impatient and used more yeast to make it rise faster. The bread had this weird, yeasty beer smell and the texture was off. The long, slow rise is what develops that amazing flavor and open crumb. It’s a lesson in patience, for sure.
Do I really need a Dutch oven?
You can bake it on a sheet pan, but the crust won’t be as incredible. The Dutch oven traps the steam from the dough, which is what gives you that crackly, professional-looking crust. I used an old, cheap one from a thrift store for years before I got a fancy one. They both worked great.
That’s everything I know about making this easy artisan bread recipe for beginners! Hope you give it a try. And if you mess it up, you’re in good company—I still do it sometimes.
Easy Artisan Bread Recipe for Beginners
A foolproof, no-knead artisan bread with a crispy crust and chewy interior that requires minimal effort but delivers bakery-quality results.
Ingredients
- 3 cups (360g) all-purpose flour
- 1 ½ cups (350ml) warm water
- 1 ¼ teaspoons salt
- ¼ teaspoon instant yeast
Instructions
-
In a large bowl, whisk together flour, salt, and instant yeast
-
Pour in warm water and mix with a wooden spoon until a shaggy, sticky dough forms
-
Cover bowl tightly with plastic wrap and let rest on counter for 12-18 hours
-
After rising, flour hands and surface, then gently shape dough into a rough ball
-
Let dough rest for 30 minutes while preheating oven to 450°F (230°C) with Dutch oven inside
-
Carefully remove hot Dutch oven and place dough inside (use parchment paper if desired)
-
Cover with lid and bake for 30 minutes
-
Remove lid and bake for additional 15 minutes until deep golden brown
-
Transfer bread to wire rack and cool completely for at least 1 hour before slicing
Nutrition (Per Serving)