

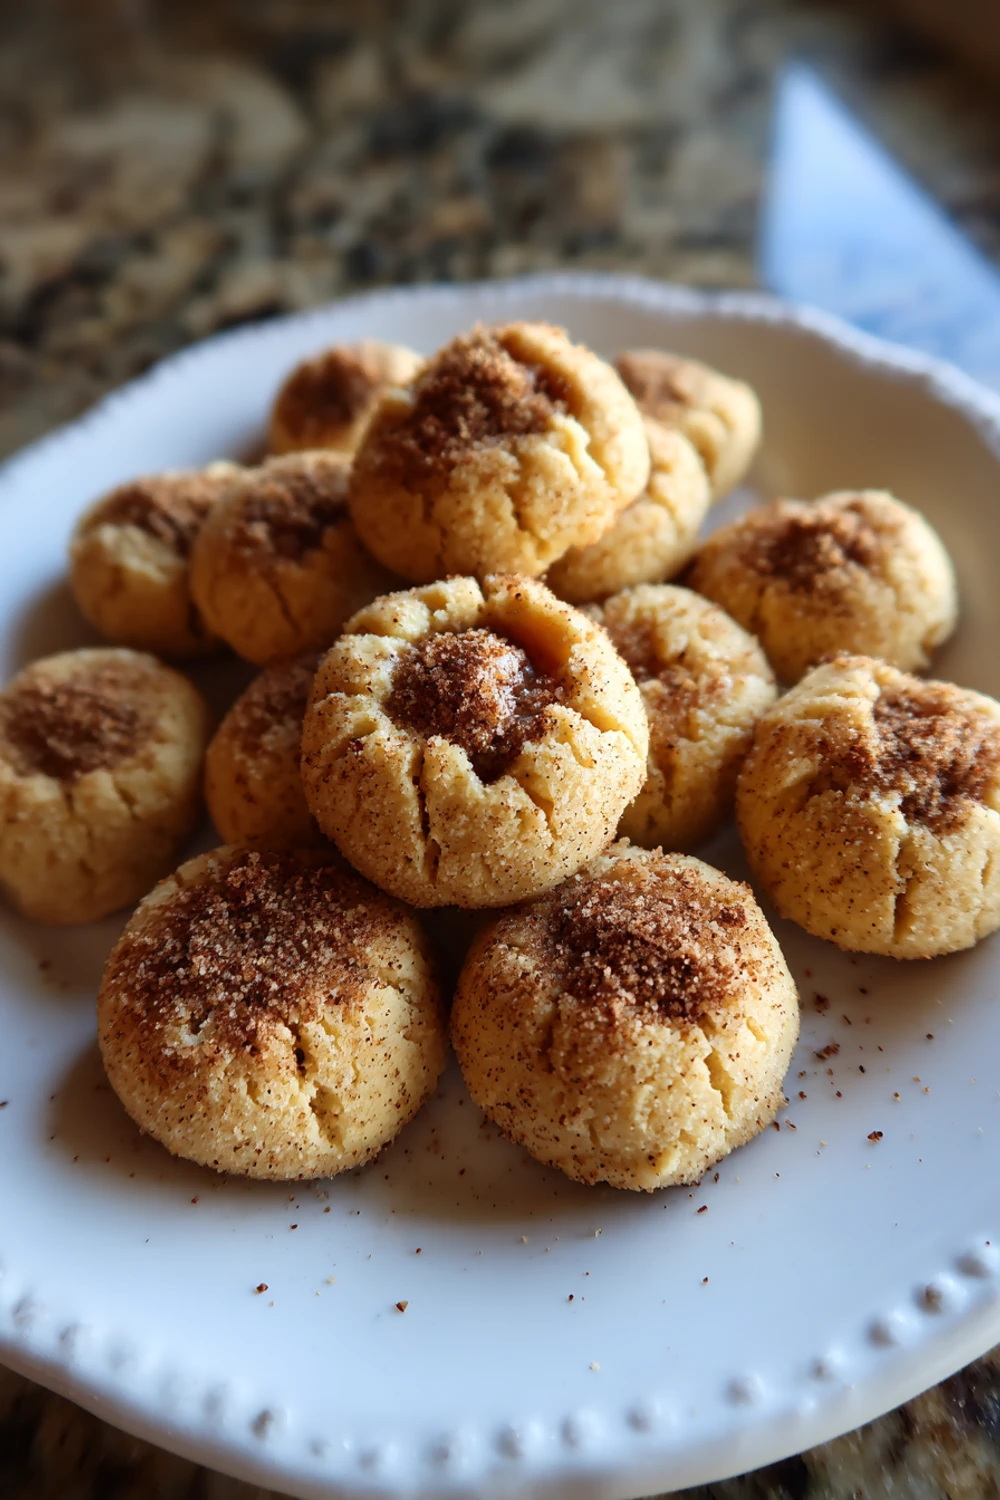
Easy Eggnog Thumbprints Cookie Recipe
My first time making these eggnog thumbprints was a total holiday disaster. I was so excited to impress my family that I completely forgot to chill the dough. I ended up with one giant, flat, buttery blob on the cookie sheet instead of cute little thumbprints. My brother walked in and asked if I was making “egg-nog pancakes.” It was hilarious and a little heartbreaking, but it taught me that even the easiest recipes have their secrets. Now, after many, many batches, I finally feel like I’ve got this easy eggnog thumbprint cookie recipe down, and I’m so excited to share all my hard-earned lessons with you.
Recipe Card
| Recipe Title | Easy Eggnog Thumbprints Cookie Recipe |
|---|---|
| Servings | About 2 dozen cookies |
| Prep Time | 20 minutes (plus 1 hour chilling) |
| Cooking Time | 12-14 minutes |
| Calories | Approx. 140 per cookie |
Ingredients
- 1 cup (2 sticks) unsalted butter, softened
- 3/4 cup granulated sugar
- 1/2 cup real eggnog
- 1 large egg yolk
- 1 teaspoon vanilla extract
- 2 1/2 cups all-purpose flour
- 1/2 teaspoon salt
- 1/4 teaspoon ground nutmeg, plus more for sprinkling
- For the Filling: 1/2 cup store-bought or homemade vanilla buttercream frosting, or your favorite jam
That butter needs to be properly softened, not melted. I once got impatient and nuked it in the microwave for too long. I ended up with a greasy soup that made the cookies spread everywhere. Now I just leave it on the counter for an hour before I start. And for the eggnog, don’t use the low-fat kind. The fat is flavor, and you need it for that rich, holiday taste. I learned that the hard way with a sadly bland batch one year.
Directions
- In a large bowl, beat the softened butter and sugar together with an electric mixer until it’s light and fluffy. This should take about 2-3 minutes.
- Beat in the egg yolk, vanilla extract, and the 1/2 cup of eggnog until everything is just combined.
- In a separate bowl, whisk together the flour, salt, and that 1/4 teaspoon of nutmeg.
- Gradually add the dry ingredients to the wet ingredients, mixing on low speed until a soft dough forms. Don’t overmix!
- This is the most important step: cover the bowl with plastic wrap and chill the dough in the fridge for at least 1 hour, or up to 2 days.
- When you’re ready to bake, preheat your oven to 350°F (175°C) and line your baking sheets with parchment paper.
- Roll the chilled dough into 1-inch balls and place them about 2 inches apart on your prepared baking sheets.
- Now, use your thumb (or the back of a small spoon) to make a deep indent in the center of each dough ball.
- Bake for 12 to 14 minutes, until the edges are just starting to turn a light golden brown.
- Let the cookies cool on the baking sheet for 5 minutes. If the thumbprints have puffed up, gently press them down again with the spoon.
- Transfer the cookies to a wire rack to cool completely before filling.
- Once completely cool, fill the indentations with your buttercream frosting or jam. Sprinkle a little extra nutmeg on top for that classic eggnog look.
The chilling step is non-negotiable, trust me. I’ve skipped it, thinking I could get away with it, and I ended up with the “cookie pancake” situation I mentioned. The dough is just too soft and needs that firm-up time in the fridge to hold its shape. Also, when you make the thumbprint, press deeper than you think you need to. The first time, I made dainty little dips, and they baked shut. You want a good, solid well for all that yummy filling.
I love how these cookies make the whole house smell like Christmas. They’re my go-to comfort food for holiday movie nights. The best part is that they’re actually a great make-ahead treat. You can make the dough days in advance, or freeze the baked cookies (without the filling) for a few weeks. It makes the hectic holiday season so much easier. If I were to change one thing, I might try a sprinkle of cinnamon in the dough next time for a little extra warmth.
These are a total family favorite in my house now. My mom always hovers near the kitchen, hoping to snag one while they’re still warm. The leftovers, if you have any, are fantastic with a cup of coffee the next morning. They soften up a bit and are just delicious. It’s one of those recipes that feels fancy but is honestly so simple once you get the hang of it.
I’ve even played around with a slightly healthier swap by using half whole wheat flour, and you know what? It worked pretty well! It gives them a heartier texture that’s nice, though it’s definitely not as classic. For a real treat, I stick with the all-purpose. It’s holiday baking, after all, a little indulgence is the whole point.
Nutrition Info (per serving)
| Calories | Carbs | Fat | Protein |
|---|---|---|---|
| 140 | 18g | 7g | 1g |
Okay, so these aren’t a health food, I’ll be the first to admit it. The nutrition info always surprises me a little because they seem so innocent, but that butter and sugar add up. I have made them a bit lighter by using a sugar substitute blend once, but the texture was a bit off. For people with special diets, a gluten-free flour blend works surprisingly well here, just make sure it’s a 1:1 kind.
Ingredient Swaps
| Ingredient | Substitution |
|---|---|
| Real Eggnog | 1/2 cup milk + 1/2 tsp rum extract + extra nutmeg |
| Buttercream Frosting | Jam, lemon curd, or even a simple powdered sugar glaze |
| All-Purpose Flour | 1:1 Gluten-Free Flour Blend |
| Granulated Sugar | An equal amount of brown sugar for a deeper flavor |
I’ve tried almost all of these swaps. The milk and rum extract combo is a lifesaver if you realize you’re out of eggnog halfway through. It works great! Swapping the frosting for jam is my personal favorite—raspberry jam with the nutmeg is an amazing combo. The one swap that failed me was using margarine instead of butter. The cookies tasted… fake. And they spread way too much. Just stick with real butter for the best flavor and texture.
Tips
- Chill your dough, no excuses. Seriously, it’s the difference between a cookie and a puddle.
- Use parchment paper on your baking sheets. It prevents sticking and makes cleanup a dream.
- Let the cookies cool completely before you add the filling. If you don’t, the frosting will just melt into a sad, messy pool.
- If your dough is too crumbly after chilling, let it sit on the counter for 5-10 minutes before rolling.
I learned that last tip the hard way. One time I chilled my dough overnight and it was like trying to roll rocks. I got so frustrated I almost gave up. Then I let it warm up just a tiny bit and it was perfect. It’s all about finding that sweet spot between too soft and too hard. I wish I’d known that earlier, it would have saved me a lot of kitchen stress.
FAQ
Can I freeze these cookies?
Oh yeah, absolutely. I do it all the time. Freeze the baked, unfilled cookies in a single layer on a sheet, then toss them in a freezer bag. They’ll keep for a month or two. Just thaw and fill when you’re ready. It’s a total game-changer for getting a head start on holiday baking.
My thumbprints puffed up in the oven! What did I do wrong?
You probably didn’t press deep enough, I’ve done that. Or your dough might have been a touch too warm. It’s an easy fix! As soon as they come out of the oven, take the back of that spoon and re-press the indentations. They’re still soft and malleable, so you can save them.
Why do my cookies taste bland?
You might have been shy with the nutmeg. That and the eggnog are where all the flavor comes from! Don’t be afraid to add a tiny pinch more nutmeg to the dough. Also, make sure you’re using real eggnog, not the “eggnog flavored” drink, there’s a big difference in taste.
That’s everything I know about making Easy Eggnog Thumbprints Cookie Recipe! Hope you give it a try, and if you mess it up, you’re in good company—I do it all the time. Happy baking!
Easy Eggnog Thumbprints Cookie Recipe
Buttery, festive thumbprint cookies infused with rich eggnog flavor and filled with vanilla buttercream or jam, perfect for holiday gatherings.
Ingredients
- 1 cup (2 sticks) unsalted butter, softened
- 3/4 cup granulated sugar
- 1/2 cup real eggnog
- 1 large egg yolk
- 1 teaspoon vanilla extract
- 2 1/2 cups all-purpose flour
- 1/2 teaspoon salt
- 1/4 teaspoon ground nutmeg, plus more for sprinkling
- 1/2 cup store-bought or homemade vanilla buttercream frosting, or your favorite jam
Instructions
-
In a large bowl, beat the softened butter and sugar together with an electric mixer until light and fluffy, about 2-3 minutes.
-
Beat in the egg yolk, vanilla extract, and eggnog until just combined.
-
In a separate bowl, whisk together the flour, salt, and nutmeg.
-
Gradually add the dry ingredients to the wet ingredients, mixing on low speed until a soft dough forms.
-
Cover the bowl with plastic wrap and chill the dough in the fridge for at least 1 hour.
-
Preheat oven to 350°F (175°C) and line baking sheets with parchment paper.
-
Roll the chilled dough into 1-inch balls and place them 2 inches apart on prepared baking sheets.
-
Use your thumb or the back of a small spoon to make a deep indent in the center of each dough ball.
-
Bake for 12 to 14 minutes until edges are just starting to turn light golden brown.
-
Let cookies cool on baking sheet for 5 minutes, then re-press indentations if needed.
-
Transfer cookies to a wire rack to cool completely before filling.
-
Fill indentations with buttercream frosting or jam and sprinkle with extra nutmeg.
Nutrition (Per Serving)

