Awesome Blossom Onion Bites Recipe
The first time I tried to make these Awesome Blossom Onion Bites, I nearly set off every smoke alarm in my apartment building. I was so proud of my little onion petals, but I had the oil way too hot. They went from golden brown to little black charcoal briquettes in about thirty seconds. My kitchen looked like a scene from a disaster movie, but my dog thought it was the best day ever because he got so many “treats.” After that, I was determined to get it right, and now it’s my go-to snack for game day. It’s a real crowd-pleaser, once you learn the tricks.
Recipe Card
| Recipe Title | Awesome Blossom Onion Bites Recipe |
|---|---|
| Servings | 4-6 people |
| Prep Time | 25 minutes |
| Cooking Time | 10-12 minutes |
| Calories | About 320 per serving |
I learned the hard way that the prep time is no joke. The first time, I told my friends they’d be eating in 15 minutes. An hour later, we were still waiting. Cutting the onion takes a steady hand and a little patience, something I was seriously lacking that day. Now I know to just be honest with myself and everyone else about how long it really takes.
Ingredients
- 1 large sweet onion (like Vidalia)
- 1 cup all-purpose flour
- 1 teaspoon paprika
- 1/2 teaspoon garlic powder
- 1/2 teaspoon salt
- 1/4 teaspoon black pepper
- 1 cup buttermilk
- 1 large egg
- Vegetable oil, for frying
That large sweet onion is key. I once tried to use a regular yellow onion because it was cheaper, and wow, the flavor was so much sharper and almost bitter. It just wasn’t the same sweet, mellow bite. And the buttermilk? I ran out once and used regular milk with a squeeze of lemon. It worked okay, but the coating wasn’t nearly as tangy or thick. Stick with the real stuff if you can.
Directions
- First, peel your onion and slice off the top and a tiny bit from the root end, but leave the root intact. This is your handle.
- Place the onion root-side down. Make cuts downward all around the onion, about 1/2 inch apart, stopping about 1/2 inch from the root. You want it to stay together.
- Gently turn the onion over and use your fingers to separate the layers into “petals.” It’s okay if a few break off.
- In a medium bowl, whisk together the flour, paprika, garlic powder, salt, and pepper.
- In another bowl, whisk the buttermilk and egg until smooth.
- Now, dip the whole cut onion into the flour mixture, making sure to get it in all the cracks. Shake off the excess.
- Next, dip the floured onion into the buttermilk mixture. Let the excess drip off.
- Give it one more good dredge in the flour mixture. This double-dip is what gives you that awesome, craggy coating.
- In a large, heavy pot, heat about 2 inches of oil to 375°F. A candy or deep-fry thermometer is your best friend here.
- Carefully lower the onion into the hot oil, root-end up. Fry for 3-4 minutes, then carefully flip it over.
- Fry for another 3-4 minutes until it’s a deep, golden brown all over.
- Use a slotted spoon or spider to lift it out and place it on a wire rack over a baking sheet to drain. Sprinkle with a little extra salt right away.
- Let it cool for a few minutes before pulling it apart into bites and serving.
The step where you cut the onion but leave the root intact? Yeah, I butchered that the first time. I cut clean through the root and my whole onion just fell apart into a pile of sad little slices. I had to start over with a new onion. The root is like the anchor that holds your whole blossom together, so be gentle with it. It feels weird, but trust the process.
After the recipe card, write at least 3 full paragraphs about your honest experience with “Awesome Blossom Onion Bites Recipe”: funny moments, big mistakes, why you love it, why it works for meal prep or family, and what you’d change next time. Mention related keywords like easy dinner, comfort food, family favorite, leftovers, one-pot, healthy swap, etc., only if they fit naturally.
I love making these for my family because it feels like such a treat. It’s definitely not an easy dinner for a busy Tuesday, but for a lazy Saturday watching the game, it’s perfect. My nephew calls them “onion flowers” and gets a huge kick out of pulling them apart. It’s one of those fun, interactive comfort foods that gets everyone talking and laughing around the table.
The biggest mistake I made, besides the burnt first attempt, was not having my dipping sauce ready. The onion bites are best served piping hot, right out of the oil. I was so focused on not burning them that I completely forgot to mix up the sauce. We had to eat them plain while I scrambled to whisk things together. Now I make the sauce first, before I even turn on the stove for the oil.
As for leftovers, they’re okay, but not great. They lose their incredible crunch and get a bit soggy. If I do have some left, I’ll chop them up and throw them on top of a salad the next day for a bit of a crispy onion crunch. It’s a nice way to use them up without feeling like you’re eating sad, limp onion bites.
Nutrition Info (per serving)
| Calories | Carbs | Fat | Protein |
|---|---|---|---|
| 320 | 35g | 18g | 6g |
Okay, let’s be real, this isn’t health food. It’s a fried appetizer, and the nutrition info shows it. I’ve tried baking them to make it a bit lighter, and it works… kinda. You still get the flavor, but the texture is just not the same magical, shatteringly crisp experience. If you’re watching your diet, just enjoy a few as a treat and balance it out with a big salad. Life’s too short to never have a proper Awesome Blossom Onion Bite.
Ingredient Swaps
| Ingredient | Substitution |
|---|---|
| All-purpose flour | Gluten-free 1-to-1 baking flour |
| Buttermilk | Plain yogurt thinned with a little milk |
| Paprika | Smoked paprika or cayenne for heat |
I used the gluten-free flour once when a friend with celiac came over, and it worked surprisingly well! The coating was maybe a tiny bit less sturdy, but the flavor and color were perfect. The yogurt swap was a disaster for me, though. It was too thick and gloppy and didn’t let the flour coating stick right. It just slid off in the oil. Stick with buttermilk or the classic milk-and-lemon juice trick if you’re in a pinch.
Tips
- Use a thermometer for the oil. Guessing will lead to burnt outsides and raw insides.
- Let the coated onion sit for 5 minutes before frying. It helps the coating really set up.
- Don’t crowd the pot. Fry one onion at a time so the oil temperature doesn’t drop.
- Drain on a wire rack, not paper towels. This keeps the bottom from getting soggy.
That tip about the wire rack? I learned that after a dozen batches of soggy-bottomed onions. I’d lay them on a big pile of paper towels, and the steam would just get trapped, making the underside soft and sad. Switching to a rack was a total game-changer for crispiness. It seems like a small thing, but it makes a huge difference in the final product.
FAQ
Can I make these ahead of time?
You can do the first coating of flour and buttermilk an hour or so ahead and keep the onion in the fridge. But do the final flour dredge right before frying. I pre-coated one once and the flour just turned into a pasty, wet mess. It was not pretty.
My onion keeps falling apart! What am I doing wrong?
You’re probably cutting too close to the root. That little half-inch at the bottom is everything. It’s the foundation of your whole edible sculpture. If a few outer petals break off, no big deal, just fry them up as little bonus crunchies.
What’s the best dipping sauce?
My personal favorite is super simple: half mayo, half ketchup, a big splash of horseradish, and a sprinkle of that same paprika from the coating. It’s creamy, tangy, and has a little kick. I once tried a fancy sriracha-lime aioli, but honestly, the classic combo just hits the spot.
That’s everything I know about making Awesome Blossom Onion Bites! Hope you give it a try. And if you mess it up, you’re in good company—I still burn a batch every now and then when I get too confident. Just open a window and tell everyone you like them “extra crispy.”
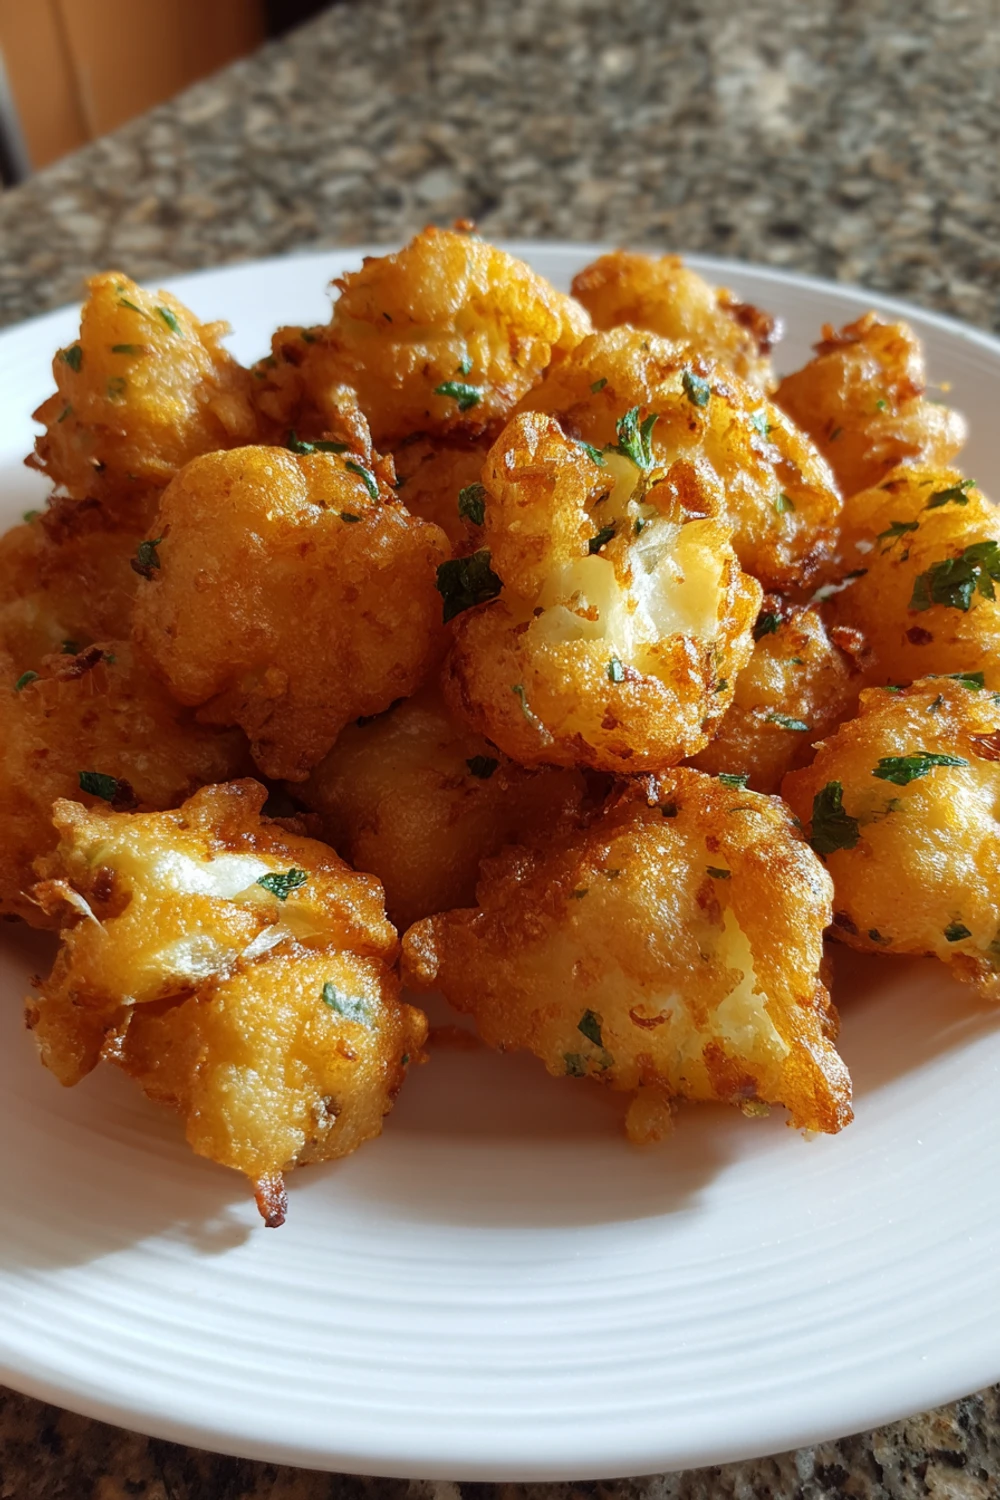
Awesome Blossom Onion Bites Recipe
Crispy, golden-fried onion petals with a perfectly seasoned coating that make the ultimate game day snack or fun family appetizer.
Ingredients
- 1 large sweet onion (like Vidalia)
- 1 cup all-purpose flour
- 1 teaspoon paprika
- 1/2 teaspoon garlic powder
- 1/2 teaspoon salt
- 1/4 teaspoon black pepper
- 1 cup buttermilk
- 1 large egg
- Vegetable oil, for frying
Instructions
-
Peel the onion and slice off the top and a tiny bit from the root end, but leave the root intact to serve as a handle.
-
Place the onion root-side down. Make cuts downward all around the onion, about 1/2 inch apart, stopping about 1/2 inch from the root to keep it intact.
-
Gently turn the onion over and use your fingers to separate the layers into ‘petals.’
-
In a medium bowl, whisk together the flour, paprika, garlic powder, salt, and pepper.
-
In another bowl, whisk the buttermilk and egg until smooth.
-
Dip the whole cut onion into the flour mixture, making sure to coat all the cracks, then shake off excess.
-
Dip the floured onion into the buttermilk mixture, letting excess drip off.
-
Give it one final dredge in the flour mixture for a craggy, textured coating.
-
In a large, heavy pot, heat about 2 inches of oil to 375°F (use a candy or deep-fry thermometer).
-
Carefully lower the onion into the hot oil, root-end up. Fry for 3-4 minutes, then carefully flip.
-
Fry for another 3-4 minutes until deep golden brown all over.
-
Use a slotted spoon to lift it out and place on a wire rack over a baking sheet to drain. Sprinkle with extra salt immediately.
-
Let cool for a few minutes before pulling apart into bites and serving.
Nutrition (Per Serving)