Awesome Blossom Onion Bites Recipe
I’ll never forget the first time I tried to make these Awesome Blossom Onion Bites. I was having friends over for the big game and thought, how hard could it be? Famous last words. I ended up with a pile of burnt, oily onion shreds that looked nothing like the picture. My buddy Mark, god love him, still calls them my “onion funeral pyre.” But that disaster made me determined to get it right, and after a lot of trial and error, I finally nailed it. Now it’s my go-to snack for any gathering.
Recipe Card
| Recipe Title | Awesome Blossom Onion Bites Recipe |
|---|---|
| Servings | 4-6 people |
| Prep Time | 25 minutes |
| Cooking Time | 10-12 minutes |
| Calories | About 320 per serving |
Ingredients
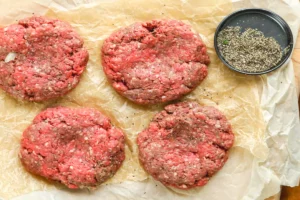
- 2 large sweet onions
- 1 cup all-purpose flour
- 2 teaspoons paprika
- 1 teaspoon garlic powder
- 1/2 teaspoon cayenne pepper (optional)
- 1 teaspoon salt
- 1/2 teaspoon black pepper
- 1 cup buttermilk
- 1 large egg
- Oil for frying (like vegetable or canola)
The first time, I used a regular yellow onion and it was way too sharp. Sweet onions are the secret, they get so much sweeter when you fry them. And don’t skip the buttermilk like I did once, I used regular milk and the batter just slid right off. The egg helps it all stick. The cayenne is my little kick, but you can totally leave it out if you’re not into spice.
Directions
- First, peel your onions and slice off a tiny bit from the top and root end so they sit flat.
- Now, this is the tricky part. Make cuts down through the top of the onion, but don’t cut all the way through the root end. You want it to stay connected.
- Gently fan the onion layers out a bit so it looks like a flower opening up.
- In a big bowl, whisk together the flour, paprika, garlic powder, cayenne, salt, and pepper.
- In another bowl, whisk the buttermilk and egg together until it’s smooth.
- Take your fanned-out onion and carefully dredge it in the flour mixture, making sure to get it in between all the layers.
- Then, dip the floured onion into the buttermilk mixture, again getting it all over.
- One more time, give it a final dredge in the flour mixture. This double coating is what makes it extra crispy.
- Heat about 2 inches of oil in a heavy pot to 375°F. If you don’t have a thermometer, a little piece of bread should sizzle and brown in about 30 seconds.
- Carefully lower the onion into the hot oil, root-end up. Fry for about 3 minutes, then carefully flip it over.
- Fry for another 4-5 minutes until it’s a deep golden brown and super crispy.
- Lift it out with a slotted spoon or spider and let it drain on a wire rack or paper towels.
- Sprinkle with a little extra salt right away and serve with your favorite dipping sauce.
The first time I did the cutting step, I sliced clean through the root and the whole thing fell apart into a million pieces. You HAVE to leave that root end intact, it’s the glue that holds your whole blossom together. It feels wrong to not cut it all the way, but trust me, it’s right. And the double coating seems like a pain, but it’s the difference between a sad, soggy coating and that amazing, restaurant-style crunch.
I can’t tell you how many times I’ve burned my mouth on these things. The smell is just too good to wait, but you have to let them cool for a minute or two. I once served them so hot that my cousin literally had to spit a piece into a napkin. Not my finest hostess moment. But that’s the sign of a good comfort food, right? It’s too delicious to resist.
As for leftovers, they’re never as good the next day, but if you have any, don’t microwave them. It makes them super soggy. Crank your oven or toaster oven to 400 and reheat them for a few minutes to get some of that crispness back. They make a pretty great easy dinner side dish, especially with a simple burger.
What would I change next time? Honestly, I’d love to figure out a way to make them a tiny bit healthier, but let’s be real, it’s fried onion. It’s a treat. Maybe I’ll try an air fryer version one day, but I’m a little scared it won’t live up to the real thing. Some things are just worth the extra calories.
Nutrition Info (per serving)
| Calories | Carbs | Fat | Protein |
|---|---|---|---|
| 320 | 38g | 16g | 6g |
Okay, so it’s not a salad. I know the nutrition looks a little scary, but it’s a fun snack, not something you eat every day. I did try a baked version once to make it lighter, but it just wasn’t the same. The texture was all wrong. If you’re watching your diet, just share this with a bunch of friends so you only have a few bites. Everything in moderation, right?
Ingredient Swaps
| Ingredient | Substitution |
|---|---|
| Buttermilk | 1 cup milk + 1 tbsp lemon juice or vinegar, let it sit for 5 min |
| All-purpose flour | Gluten-free 1-to-1 baking flour |
| Vegetable oil | Peanut oil or canola oil |
I’ve had to make that buttermilk substitute in a pinch and it works just fine, no problem. I used the gluten-free flour for a friend who has celiac and it turned out great, the coating was still super crispy. I wouldn’t recommend using olive oil for frying though, its smoke point is too low and it can make the whole thing taste a bit bitter. Learned that one the hard way.
Tips
- Use a sharp, thin knife for cutting the onion. A dull knife will crush it.
- Let your oil come back to temp between batches. If you crowd the pot, the temperature drops and you get greasy onion bites.
- Season the flour mixture well. This is where a lot of the flavor comes from.
- Serve it immediately! They get soggy fast, so have your guests ready to eat.
The oil temperature tip I learned after a seriously greasy fail. I was in a rush and dumped a second onion in while the first was still cooking. The oil temp plummeted and they just soaked up all the oil like little sponges. It was a mess. Now I’m patient and do one at a time. It’s worth the wait for that perfect crunch.
FAQ
Can I make these ahead of time?
Not really, unfortunately. I’ve tried pre-cutting the onions and coating them, but they get watery and the batter gets gummy. This is definitely a “make and serve right away” kind of deal. The one thing you can do is mix your dry ingredients and your wet ingredients in separate bowls ahead of time to save a few minutes.
Why did my onion fall apart?
Oh, I feel your pain. This happened to me more than once. You almost definitely cut through the root end. That little hairy bit at the bottom is your best friend here. It holds the whole structure together. Just slice a tiny bit off to make it flat, but leave the main root base totally intact.
My coating isn’t sticking, what gives?
This is almost always a buttermilk issue. If you don’t have that slightly thick, acidic buttermilk, the batter doesn’t have anything to grip onto. That’s why the homemade buttermilk substitute (milk and lemon juice) works better than just plain milk. Also, make sure you’re really getting in there with your hands, separating the layers and pressing the flour into all the nooks and crannies during that first dredge.
That’s everything I know about making Awesome Blossom Onion Bites! Hope you give it a try, and if you mess it up, you’re in good company—I’ve had my share of kitchen disasters with this one. It’s all part of the fun.
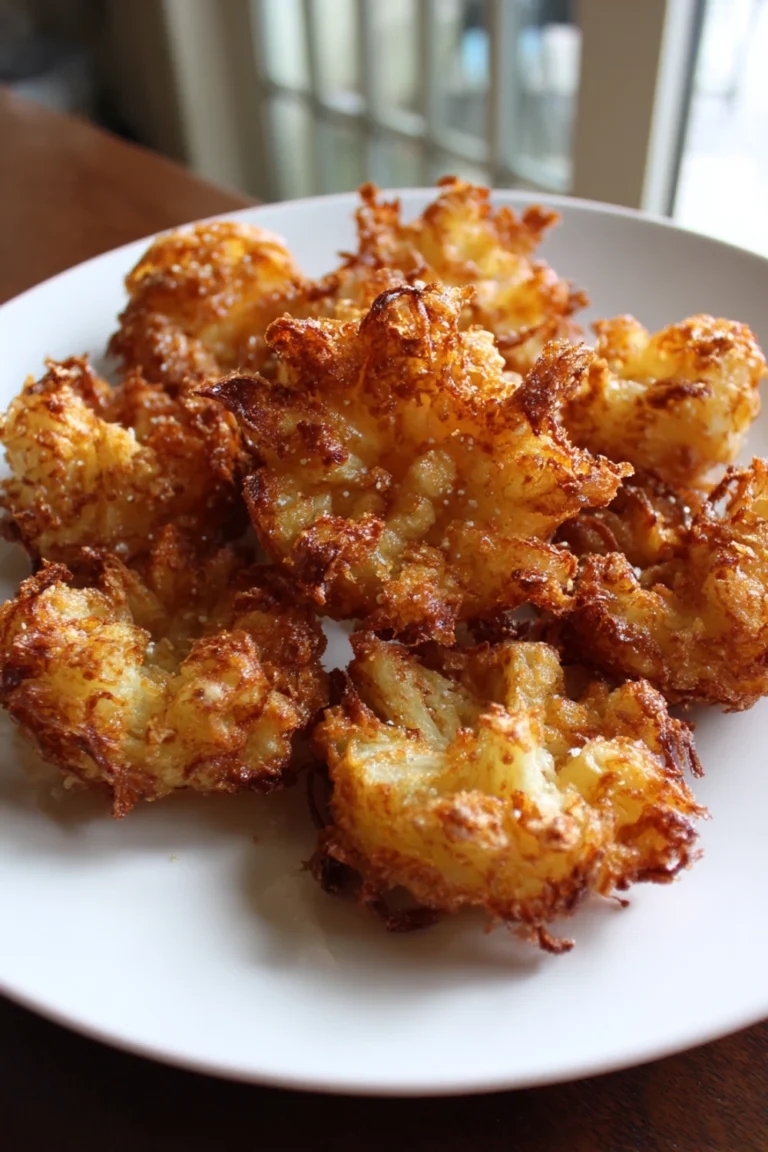
Awesome Blossom Onion Bites Recipe
Crispy, golden-fried onion bites with a perfect blend of spices that make an irresistible game day snack or party appetizer.

Ingredients
- 2 large sweet onions
- 1 cup all-purpose flour
- 2 teaspoons paprika
- 1 teaspoon garlic powder
- 1/2 teaspoon cayenne pepper (optional)
- 1 teaspoon salt
- 1/2 teaspoon black pepper
- 1 cup buttermilk
- 1 large egg
- Oil for frying (vegetable or canola)
Instructions
-
Peel onions and slice off a tiny bit from the top and root end so they sit flat
-
Make cuts down through the top of the onion without cutting through the root end
-
Gently fan the onion layers out to resemble a flower opening up
-
Whisk together flour, paprika, garlic powder, cayenne, salt, and pepper in a large bowl
-
Whisk buttermilk and egg together in another bowl until smooth
-
Carefully dredge the fanned-out onion in the flour mixture, getting between all layers
-
Dip the floured onion into the buttermilk mixture, coating thoroughly
-
Give the onion a final dredge in the flour mixture for extra crispiness
-
Heat 2 inches of oil in a heavy pot to 375°F
-
Carefully lower onion into hot oil, root-end up, and fry for 3 minutes
-
Flip onion over and fry for another 4-5 minutes until deep golden brown
-
Remove with slotted spoon and drain on wire rack or paper towels
-
Sprinkle with extra salt immediately and serve with dipping sauce
Nutrition (Per Serving)