
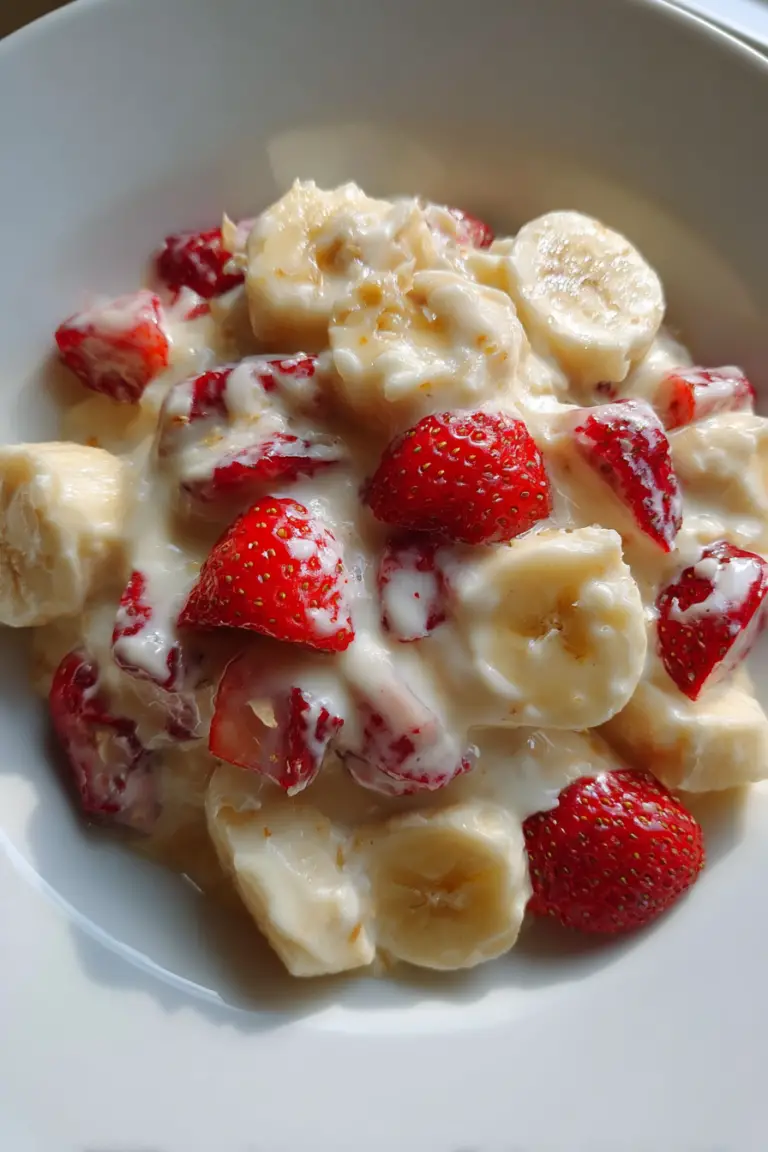
Easy Strawberry Banana Pudding Dream Recipe
Oh my goodness, let me tell you, this recipe? It’s been a ride. The very first time I tried to make what I now lovingly call “Easy Strawberry Banana Pudding Dream,” it was for a potluck at my old job. Everyone brought their A-game, and I wanted to impress. I’d seen a picture online and thought, “How hard can layering cookies, fruit, and pudding be?” Famous last words, right? I remember standing in my kitchen, feeling all Martha Stewart-y, whisking the pudding with what I *thought* was enough oomph. But apparently, my oomph wasn’t oomph-y enough, because when I took it out of the fridge a few hours later, it was less “pudding” and more “sweet, milky soup with bits of cookie floating tragically.” I had to pretend it was some kind of deconstructed pudding parfait, which, bless their hearts, my co-workers politely ate. Now, after countless tries and a few solid wins, I’ve got this recipe down, and trust me, it’s a total dream – the kind you don’t mess up anymore!
Recipe Card
| Recipe Title | Easy Strawberry Banana Pudding Dream Recipe |
|---|---|
| Servings | 8-10 people (depending on how greedy they are, haha) |
| Prep Time | 20 minutes |
| Cooking Time | 0 minutes (it’s a no-bake wonder!) |
| Calories | About 450 per serving (it’s a dream, not a diet, okay?) |
Ingredients
- 1 (14.3 oz) box Nilla Wafers
Nilla Wafers are the classic for a reason. They get that perfect soft-but-not-soggy texture when they soak up the pudding. I once tried to swap them out for shortbread cookies because that’s all I had. It was… not the same. The shortbread just kinda dissolved into a gritty mess, and the flavor clashed a bit too much with the banana. Stick to the Nillas, trust me on this one.
- 4-5 ripe bananas, sliced
Okay, “ripe” is key here. Not green and hard, definitely not brown and mushy (unless you *like* that fermented banana taste, which, bless your heart, you do you). You want them yellow with just a few tiny brown freckles. I learned this the hard way when I used super green bananas once, and they just stayed firm and kinda starchy, which messed with the creamy texture of the pudding. It’s all about that soft, sweet banana goodness.
- 1 lb fresh strawberries, hulled and sliced
Fresh is always best for this one. I made the mistake of trying frozen strawberries once, thinking they’d thaw beautifully. Nope. They let out so much extra water as they thawed that the whole pudding got a little… watery. It wasn’t ruined, but it definitely wasn’t the “dream” consistency. Plus, fresh strawberries just look so much prettier and taste brighter!
- 2 (3.4 oz) boxes instant vanilla pudding mix
Instant is the name of the game for “easy” in this recipe. Don’t try to use cook-and-serve or make it from scratch unless you’re ready for a whole different adventure! I once accidentally grabbed cook-and-serve and didn’t realize until I was halfway through. Had to start all over because it just wouldn’t set up the same way with cold milk. Read those boxes, folks!
- 4 cups cold milk (whole or 2% works best)
COLD milk. Seriously, this is important. I’ve used room temp milk before because I was in a hurry, and the pudding just took ages to thicken, and even then, it was a little slacker than it should’ve been. The colder the milk, the faster and firmer your instant pudding will set. Whole or 2% gives it that rich, creamy mouthfeel. Skim milk works, but it’ll be a little less dreamy, if you know what I mean.
- 1 (8 oz) tub whipped topping, thawed (like Cool Whip)
Cool Whip is a lifesaver for convenience. Just make sure it’s thawed in the fridge, not at room temperature, or it can get too runny. I once forgot to thaw it and tried to mix it in while it was still partially frozen, and it left icy chunks throughout the pudding. Not exactly a “dream” experience! You can definitely make your own whipped cream, but this is the “easy” version, remember?
Directions
- In a large mixing bowl, whisk together the instant vanilla pudding mixes with the 4 cups of cold milk. Whisk continuously for about 2-3 minutes until the mixture starts to thicken. Don’t stop too soon!
- Let the pudding sit for 5 minutes to fully set up. It should be nice and thick.
- Gently fold in about half of the thawed whipped topping into the pudding mixture until just combined. This makes it extra creamy and dreamy.
- In a large, clear serving dish (like a 9×13 inch casserole dish or a trifle bowl), spread a thin layer of the pudding mixture on the bottom.
- Arrange a single layer of Nilla Wafers over the pudding.
- Layer about half of the sliced bananas over the wafers.
- Layer about half of the sliced strawberries over the bananas.
- Spoon about half of the remaining pudding mixture over the fruit layers, spreading it gently to cover.
- Repeat with another layer of Nilla Wafers, the rest of the bananas, and the rest of the strawberries.
- Top with the remaining pudding mixture, spreading evenly.
- Cover the dish tightly with plastic wrap and refrigerate for at least 4 hours, or preferably overnight, for the best results.
- Before serving, spread the remaining whipped topping over the top of the pudding. You can garnish with a few extra Nilla Wafers, banana slices, or strawberry halves if you’re feeling fancy.
Okay, let’s talk about step 1 and 2: whisking and setting the pudding. This is where I messed up big time on my “soup” potluck disaster. I got impatient and only whisked for maybe a minute, thinking “that looks thick enough.” It was not. It needs that full 2-3 minutes of vigorous whisking, and then those 5 minutes to just sit and do its thing. If you cut corners here, your whole pudding will be too loose, and your layers will just slide around. Another mishap I had was using slightly warm milk, which just made the setting process take even longer, and it never got super firm. Don’t rush these first two steps, they’re the foundation of your dream!
So, why do I love this Easy Strawberry Banana Pudding Dream Recipe so much? Honestly, it’s just so forgiving after you get past the initial pudding-setting hurdle. It’s the ultimate crowd-pleaser and total comfort food. Every time I bring it to a family gathering, it vanishes almost immediately. My kids beg for it. It works great for meal prep if you assemble it the night before a party, which is a lifesaver for busy weeknights. The wafers soften just enough, the fruit sweetens, and the pudding gets perfectly chilled. It’s also super adaptable, which I appreciate.
One funny moment was when my youngest, who was a toddler at the time, decided he wanted to “help” with the layering. I turned my back for literally thirty seconds, and he’d somehow managed to unstack the entire box of Nilla Wafers and was just scattering them like confetti into the empty serving dish. We ended up with a wafer-heavy bottom layer that time, but it was still delicious, just… crunchy in spots you didn’t expect!
My biggest mistake, besides the pudding soup, was probably not letting it chill long enough. One time, I was trying to serve it after only about 2 hours, and while it was somewhat set, the flavors hadn’t really melded, and the wafers were still a bit too hard. It’s not quite the same experience. That overnight chill really is the secret sauce. What would I change next time? Maybe I’d try to make my own homemade vanilla pudding just for kicks, but honestly, the instant kind is just so darn easy and tasty, it’s hard to justify the extra work unless I’m really feeling ambitious.
Nutrition Info (per serving)
| Calories | Carbs | Fat | Protein |
|---|---|---|---|
| 450 | 65g | 18g | 8g |
The nutrition info might surprise you a little, huh? It’s definitely a treat, not a health food. I mean, between the cookies, pudding, and whipped topping, it’s a calorie bomb, but a delicious one! I have tried to make it lighter before, using sugar-free pudding mix and skim milk, and it actually turns out pretty good! It’s not quite as rich and creamy, but it definitely satisfies the craving. For people with special diets, you could look into gluten-free vanilla wafers or even just do a fruit-and-pudding parfait without the cookies for a lighter, gluten-free option. Almond milk works, but like I said before, it makes it a little thinner, so stick to the sugar-free pudding to compensate for that richness loss.
Ingredient Swaps
| Ingredient | Substitution |
|---|---|
| Nilla Wafers | Graham crackers, shortbread cookies, or even butter cookies |
| Bananas | Peaches, mango, or even sliced cooked apples (but then it’s not banana pudding, duh!) |
| Strawberries | Raspberries, blueberries, or mixed berries |
| Vanilla Pudding Mix | Banana pudding mix for an extra banana kick, or sugar-free vanilla pudding |
| Milk | Almond milk, soy milk, or oat milk (just be aware of thickness) |
| Whipped Topping | Homemade whipped cream (sweetened to taste) |
So, about these swaps. I’ve experimented a lot, mostly when I was missing an ingredient and too lazy to go to the store. Graham crackers work pretty well instead of Nilla Wafers, they give it a slightly different, more crumbly texture and a hint of cinnamon that’s actually kinda nice. Shortbread, as I mentioned, was a flop for me. As for fruit, raspberries and blueberries are awesome! They add a tartness that cuts through the sweetness nicely. Mango is also super good but totally changes the vibe. I tried oat milk once, and while it was okay, the pudding didn’t set quite as firm, and it had a slight oat-y taste. Homemade whipped cream is always a winner if you have the time, it’s richer but also more effort. I’d say swap the fruit and the pudding flavor first, those are the easiest and most successful changes without messing with the texture too much.
Tips
- **Chill Time is NOT Optional:** Seriously, give it at least 4 hours, but overnight is where the magic happens.
- **Bananas are Fickle:** Use ripe but not overripe bananas. Slice them just before layering to minimize browning, or toss lightly with a tiny bit of lemon juice if you’re really worried (though I usually don’t bother).
- **Whisk Like You Mean It:** Don’t under-whisk that pudding. It needs to get thick, and fast, for the best results.
- **Clear Dish for the Win:** Using a clear glass dish or trifle bowl really lets you show off those beautiful layers. It makes it look so much fancier than it is!
Let me tell you a story about that “Chill Time is NOT Optional” tip. There was this one time I was making it for a spontaneous BBQ, and I only had about two hours before guests arrived. I thought, “Eh, it’ll be fine, it’s just pudding!” Oh, how wrong I was. When I scooped it out, it was still a bit too liquidy, and the wafers were still crunchy instead of perfectly tender. It just wasn’t the “dream” texture. Everyone still ate it, of course, because, well, it’s pudding. But I vowed never again to disrespect the chill time. That’s when the wafers soak up all that yummy moisture and become cake-like, and the flavors really get to know each other. Learn from my impatience, friends!
FAQ
Q: Can I make this pudding ahead of time? How far in advance?
A: Oh my goodness, YES! That’s honestly the best way to do it. Making it the night before is my go-to. It gives everything a chance to really meld together and for those Nilla Wafers to get perfectly soft. You can make it up to 2 days in advance. Any longer than that, and the bananas might start to get a little too mushy or brown, and the wafers can get a bit *too* soggy for some people’s taste. So, 1-2 days ahead is perfect for maximum dreaminess!
Q: Why is my pudding mixture still runny after whisking?
A: Okay, this is a common one, and I’ve been there! There are a few culprits. First, double-check that you used *instant* pudding mix and not cook-and-serve. Big difference! Second, was your milk super cold? Room temperature milk makes it harder for the pudding to set. Third, did you whisk long enough and vigorously enough? You need to keep at it for a full 2-3 minutes, and sometimes even a little more, until it really starts to thicken. Don’t be afraid to give it some elbow grease! If it’s still a bit runny, pop it in the fridge for 15-20 minutes, sometimes that extra chill helps it firm up.
Q: My bananas are browning! How can I prevent this?
A: Ugh, the browning banana struggle is real! The best way to combat this is to slice your bananas right before you’re about to layer them into the pudding. If you’re super concerned, you can lightly brush or toss the sliced bananas with a tiny bit of lemon juice (like, half a teaspoon for all the bananas) to slow down oxidation. I usually don’t bother with the lemon juice for this recipe because they get covered by pudding pretty fast, and the minimal browning inside doesn’t really affect the taste much once it’s all chilled. But for presentation, slice them right then and there!
Q: Can I freeze this dessert?
A: Hmm, I wouldn’t recommend freezing this one. The texture of the bananas and strawberries really changes after freezing and thawing – they get pretty watery and mushy, which would definitely ruin the “dream” consistency of the pudding. The wafers also get really weird and super soggy. This is definitely a dessert meant to be enjoyed fresh from the fridge, ideally within a couple of days of making it!
That’s everything I know about making Easy Strawberry Banana Pudding Dream Recipe! Hope you give it a try. And if you mess it up, you’re in good company—I still do it sometimes.
Easy Strawberry Banana Pudding Dream Recipe
This beloved no-bake dessert combines creamy vanilla pudding with fresh strawberries, ripe bananas, and classic Nilla Wafers for a truly dreamy treat. Perfect for potlucks and family gatherings, this recipe guarantees a crowd-pleasing, easy-to-make indulgence.
Ingredients
- 1 (14.3 oz) box Nilla Wafers
- 4-5 ripe bananas, sliced
- 1 lb fresh strawberries, hulled and sliced
- 2 (3.4 oz) boxes instant vanilla pudding mix
- 4 cups cold milk (whole or 2% works best)
- 1 (8 oz) tub whipped topping, thawed (like Cool Whip)
Instructions
-
In a large mixing bowl, whisk together the instant vanilla pudding mixes with the 4 cups of cold milk. Whisk continuously for about 2-3 minutes until the mixture starts to thicken. Don’t stop too soon!
-
Let the pudding sit for 5 minutes to fully set up. It should be nice and thick.
-
Gently fold in about half of the thawed whipped topping into the pudding mixture until just combined. This makes it extra creamy and dreamy.
-
In a large, clear serving dish (like a 9×13 inch casserole dish or a trifle bowl), spread a thin layer of the pudding mixture on the bottom.
-
Arrange a single layer of Nilla Wafers over the pudding.
-
Layer about half of the sliced bananas over the wafers.
-
Layer about half of the sliced strawberries over the bananas.
-
Spoon about half of the remaining pudding mixture over the fruit layers, spreading it gently to cover.
-
Repeat with another layer of Nilla Wafers, the rest of the bananas, and the rest of the strawberries.
-
Top with the remaining pudding mixture, spreading evenly.
-
Cover the dish tightly with plastic wrap and refrigerate for at least 4 hours, or preferably overnight, for the best results.
-
Before serving, spread the remaining whipped topping over the top of the pudding. You can garnish with a few extra Nilla Wafers, banana slices, or strawberry halves if you’re feeling fancy.
Nutrition (Per Serving)

