

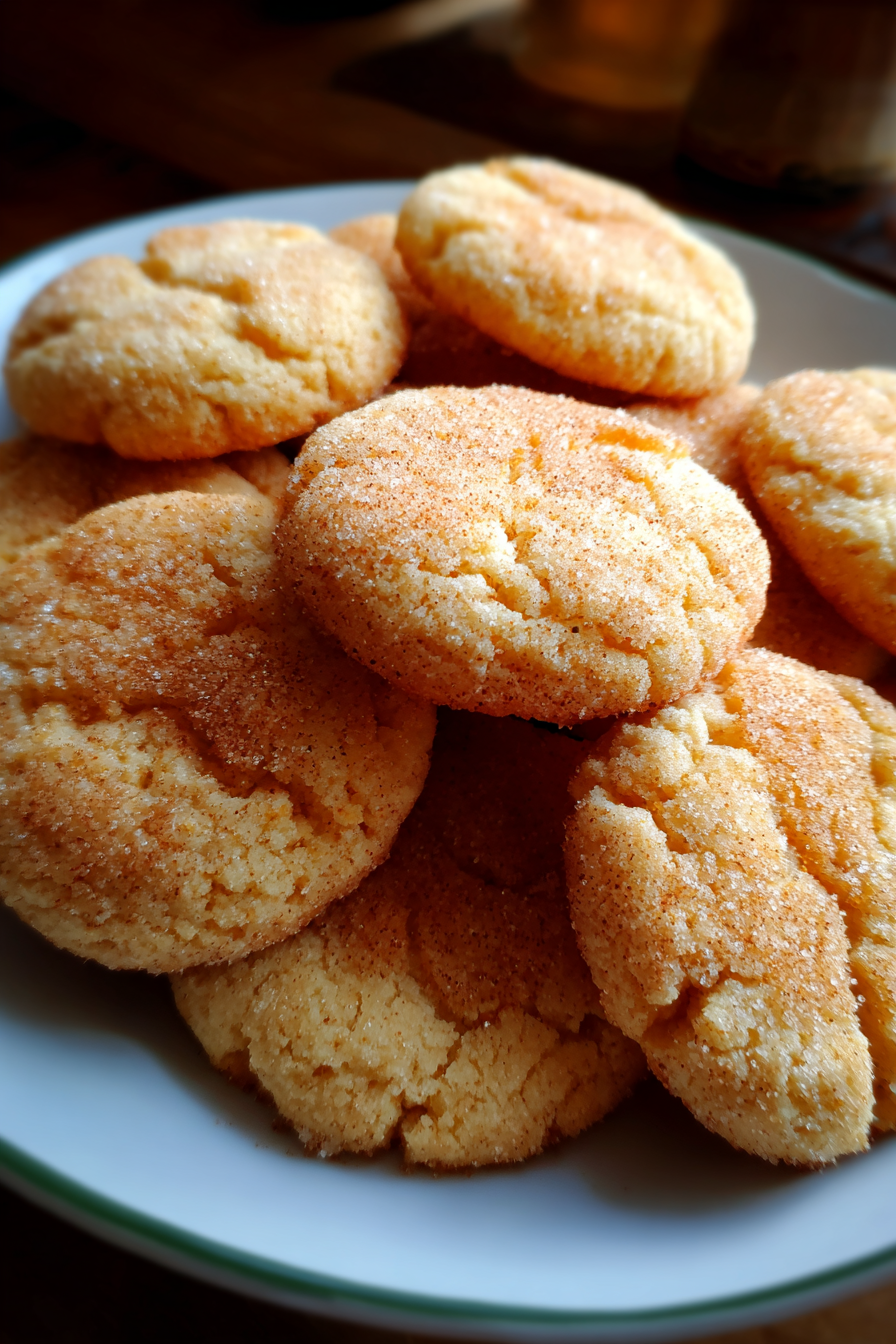
Easy Pumpkin Pie Sugar Cookies
Oh man, these pumpkin pie sugar cookies. They’re kind of a big deal in my house, especially once the leaves start changing. I remember the very first time I tried to make them a few years back. It was for a Friendsgiving potluck, and I wanted something super festive, you know? I was all ambitious, thinking “sugar cookies, how hard can it be?” Well, let me tell you, I grabbed the wrong can from the pantry – “pumpkin pie filling” instead of “pumpkin puree.” The dough was a sticky, sweet, cinnamon-overload mess. It wouldn’t roll, it wouldn’t cut, and when I finally managed to bake some sad, shapeless blobs, they tasted more like a dense, spiced muffin top than a delicate cookie. I ended up having to run to the grocery store for a last-minute store-bought dessert, completely defeated. But, stubborn as I am, I learned my lesson, tried again the next weekend with the *right* pumpkin, and finally nailed these easy pumpkin pie sugar cookies. Now, they’re a fall tradition, and everyone asks for the recipe!
Recipe Card
| Recipe Title | Easy Pumpkin Pie Sugar Cookies |
|---|---|
| Servings | About 24-30 cookies (2-2.5 dozen) |
| Prep Time | 25 minutes (plus at least 1 hour chill time) |
| Cooking Time | 8-10 minutes per batch |
| Calories | Approx. 195 per cookie (with glaze) |
You know, those times are always just estimates, right? My “prep time” usually includes a solid five minutes staring into the fridge wondering if the butter is soft enough yet. And that chill time? Don’t you dare skip it! I once thought I could shave off an hour from the total time by just popping the dough in the freezer for twenty minutes. Big mistake. The dough was still too warm in the middle, and my beautiful cookie cutters ended up making lumpy, spread-out puddles on the baking sheet. Learn from my impatience, friends: the chill time is your best friend for perfectly shaped cookies.
Ingredients
- 1 cup (2 sticks) unsalted butter, softened
- 1 cup granulated sugar
- 1/2 cup canned pumpkin puree (NOT pumpkin pie filling!)
- 1 large egg
- 1 teaspoon vanilla extract
- 2 1/2 cups all-purpose flour
- 1 teaspoon baking powder
- 1/2 teaspoon salt
- 1 teaspoon ground cinnamon
- 1/2 teaspoon ground nutmeg
- 1/4 teaspoon ground ginger
- 1/8 teaspoon ground cloves (optional, but gives it that extra something!)
- For the Glaze:
- 1 1/2 cups powdered sugar
- 2-3 tablespoons milk (any kind works, I usually use whole milk)
- 1/2 teaspoon vanilla extract
- Pinch of ground cinnamon (optional, for garnish)
Okay, let’s talk ingredients, because each one has a story for me. That butter? Softened means soft enough to easily dent with your finger, but not melted. I once nuked it for too long, and it was basically liquid, which made the dough greasy and sticky, and the cookies spread like crazy. Live and learn!
Granulated sugar is pretty straightforward, but I’ve been tempted to swap it for brown sugar for a chewier cookie. While it wasn’t bad, it just wasn’t the crisp-edged sugar cookie texture I was going for. Stick with white sugar for this one, trust me.
The pumpkin puree is, as my intro story shows, absolutely critical. If you grab pumpkin pie filling, you’re going to get a very different (and probably too sweet, too spiced) cookie that won’t hold its shape. Always double-check that label! I now keep my pumpkin puree cans separate from the pie filling ones just to avoid that mix-up.
The egg and vanilla are pretty standard, but don’t skimp on good vanilla. It really makes a difference. As for the flour, I’m a stickler for the “spoon and level” method. Scooping directly from the bag compacts the flour, and you’ll end up with too much, making your dough dry and crumbly. I learned that the hard way when my dough felt like play-doh that was left out too long.
Baking powder and salt are your leaveners and flavor enhancers. Don’t skip the salt; it really balances out the sweetness. And the spices? Oh, the spices. My secret is that little bit of cloves. It just deepens the pumpkin flavor without being overwhelming. I once forgot the ginger and cloves, and the cookies were good, but they just lacked that quintessential “pumpkin pie” warmth. Now I grind fresh nutmeg whenever I can – totally worth the effort.
Finally, the glaze. Powdered sugar is a must for a smooth glaze, don’t try to use granulated. And the milk for the glaze? Start with less, you can always add more. I’ve made glazes so thin they just disappear into the cookie, leaving barely a hint of sweetness. You want it thick enough to coat a spoon and look opaque, but still pourable. A little extra cinnamon on top of the glaze makes them look extra fancy, like something from a bakery!
Directions
- In a large bowl, cream together the softened butter and granulated sugar until light and fluffy. This usually takes about 2-3 minutes with an electric mixer.
- Beat in the pumpkin puree, egg, and vanilla extract until well combined. Scrape down the sides of the bowl to make sure everything gets mixed in.
- In a separate medium bowl, whisk together the all-purpose flour, baking powder, salt, ground cinnamon, ground nutmeg, ground ginger, and ground cloves.
- Gradually add the dry ingredients to the wet ingredients, mixing on low speed until just combined. Be careful not to overmix! The dough will be soft.
- Divide the dough in half, flatten each half into a disc, wrap tightly in plastic wrap, and refrigerate for at least 1 hour (or up to 2 days). This step is non-negotiable!
- Preheat your oven to 375°F (190°C). Line baking sheets with parchment paper or silicone mats.
- On a lightly floured surface, roll out one disc of chilled dough to about 1/4 inch thickness. Use your favorite cookie cutters to cut out shapes.
- Carefully transfer the cut-out cookies to the prepared baking sheets, leaving about an inch between them.
- Bake for 8-10 minutes, or until the edges are just lightly golden and the centers are set. They shouldn’t be browned.
- Let the cookies cool on the baking sheet for 5 minutes before transferring them to a wire rack to cool completely.
- While the cookies cool, prepare the glaze: In a small bowl, whisk together the powdered sugar, milk, and vanilla extract until smooth. Add more milk a tiny bit at a time if it’s too thick, or more powdered sugar if it’s too thin.
- Once the cookies are completely cool, drizzle or spread the glaze over them. If desired, sprinkle with a pinch of cinnamon. Let the glaze set before storing.
Let me tell you, that chilling step in number 5? I used to think it was just a suggestion. Like, “oh, if you have time, sure.” Nope, it’s the absolute secret sauce to getting cookies that hold their shape and aren’t greasy. One time, I was in a rush and tried to roll out the dough after only 15 minutes of chilling. It was like trying to roll out warm play-doh. It stuck to everything, ripped, and my pumpkin shapes looked more like abstract blobs. It was a frustrating mess, and I ended up having to re-knead it, wrap it, and chill it properly anyway. Just bite the bullet and wait the hour, your future self will thank you!
Also, that “don’t overmix” warning in number 4 is so true. Overmixing develops the gluten in the flour too much, leading to tough, chewy cookies instead of tender ones. I once thought mixing longer would make it “more combined,” but it just made my cookies rock-hard. Mix until just combined, a few streaks of flour are better than an overmixed, tough dough.
And for baking, step 9, watch them like a hawk! Oven temperatures can vary, and what’s 8 minutes in my oven might be 10 in yours. The key is just slightly golden edges, not brown. If they get too brown, they’ll be hard and crumbly. I’ve ruined so many batches by just walking away for “one more minute” and coming back to burnt edges. Lesson learned: set a timer, and keep an eye on ’em.
I really love these Easy Pumpkin Pie Sugar Cookies because they’re such a perfect comfort food without being overly complicated. They bring all the cozy, spicy feelings of fall, but in a fun, hand-held cookie form. They’re absolutely a family favorite, and the kids love helping with the cookie cutters and glazing (which usually ends up a little messy, but that’s part of the fun, right?). I wouldn’t really change anything about the recipe; it’s just perfect for what it is. It’s not really a healthy swap kind of cookie, it’s a “treat yo’ self” kind of cookie. They don’t last long enough for “leftovers” in my house, but if they did, they store really well.
Nutrition Info (per serving)
| Calories | Carbs | Fat | Protein |
|---|---|---|---|
| 195 kcal | 29g | 8g | 2g |
Okay, let’s be real, these aren’t health food. Seeing those numbers doesn’t really surprise me; it’s butter, sugar, and flour, after all! These are definitely a treat, a delightful indulgence, and totally worth it. I’ve tried to make them “lighter” or “healthier” before – maybe with applesauce instead of some butter, or whole wheat flour. Honestly? It just wasn’t the same. The texture suffered, and they lost that classic sugar cookie charm. For special diets, you *can* swap in a 1:1 gluten-free flour blend, but be prepared for a slightly different, often gummier, texture. It still tastes good, but it’s not quite the same chew. If you’re going for delicious, just enjoy these as they are!
Ingredient Swaps
| Ingredient | Substitution |
|---|---|
| Unsalted Butter | Salted butter (reduce added salt by 1/4 tsp) or shortening (will change texture) |
| Granulated Sugar | Light brown sugar (chewier, different flavor) |
| All-Purpose Flour | 1:1 Gluten-free flour blend |
| Milk (for glaze) | Water, lemon juice, or non-dairy milk |
| Individual Spices | 2 1/4 tsp pumpkin pie spice blend |
I’ve dabbled in swaps, mostly out of necessity or curiosity. Using salted butter instead of unsalted is totally fine, just make sure you reduce the added salt in the recipe by about a quarter teaspoon, or else your cookies might taste a little too salty. I tried shortening once when I was out of butter, and while the cookies were super soft, they just didn’t have that rich butter flavor I love. It changed the whole vibe.
Using brown sugar instead of granulated gave the cookies a really nice chew, almost like a snickerdoodle, but it wasn’t the classic sugar cookie texture. It’s not a bad swap if you want something different, but it’s not what this recipe intends.
For the gluten-free flour, I’ve had decent luck with a 1:1 blend, but the cookies tend to be a little more delicate and can sometimes be gummier. It’s definitely doable if you need it, but manage your expectations for the texture.
As for the glaze, using water or non-dairy milk works just fine if you don’t have regular milk, or have dietary restrictions. It might slightly change the richness, but the sweetness will still be there. And that pumpkin pie spice blend? Totally acceptable if you don’t want to measure out individual spices. I usually have all the separate spices on hand, but in a pinch, the blend is a quick and easy solution. Just make sure it’s fresh!
Tips
- Don’t overmix the dough! Mix until just combined, otherwise, your cookies will be tough.
- Chilling the dough is critical for perfectly shaped cookies that don’t spread too much. Don’t skip it!
- Flour your surface and cookie cutters lightly, but don’t add too much flour to your dough as you roll, or your cookies will be dry.
- Watch your baking time carefully. Cookies are done when edges are just set and lightly golden, not deeply browned.
- Achieve the right glaze consistency. It should be thick enough to coat a spoon, but still pourable.
These tips are basically my personal highlight reel of mistakes, haha! That first tip about not overmixing? I learned that after making a batch of cookies that you could practically frisbee across the kitchen. They were so dense and hard, it was like eating a spiced hockey puck. I thought I needed to beat the ingredients into submission, but no, gentle is the key!
And the chilling! Oh, the chilling. I’ve probably said it a dozen times already, but it’s so important. I once thought, “well, it’s cold outside, maybe that’ll do it,” and just left the dough on the counter for a bit. Nope. Room temp dough, even in a chilly kitchen, leads to flat, sad cookies that lose their shape. The fridge is where the magic happens for firm dough that rolls beautifully.
The flouring your surface tip is tricky. You need enough so the dough doesn’t stick, but too much, and it gets incorporated into the dough, making it tough and dry. I used to just dust everything haphazardly, and either had a sticky mess or a dry, cracked dough. Now, I use just a tiny sprinkle of flour, maybe a tablespoon, and spread it thinly. If the dough starts to stick, I lift it, add a *tiny* bit more flour underneath, and flip it. It’s a delicate balance!
FAQ
Q: Can I use fresh pumpkin puree instead of canned?
A: You totally can! But here’s the kicker: fresh pumpkin puree often has a lot more moisture than canned. If you’re going that route, make sure you really drain it well. I usually scoop my fresh puree into a cheesecloth-lined sieve and let it sit over a bowl for at least an hour, gently pressing out excess water. I once tried to use fresh puree right after cooking it, and my dough was so wet and sticky, it was completely unworkable. So, drain, drain, drain!
Q: My cookies spread too much and lost their shape! What went wrong?
A: Ah, the dreaded cookie spread! This usually comes down to a few culprits. First, your butter might have been too warm or even partially melted when you creamed it. Second, you might not have chilled your dough enough (or at all!). Cold dough holds its shape better in the hot oven. Third, sometimes too little flour can cause excessive spreading. Make sure you’re measuring your flour correctly by spooning it into the measuring cup and leveling it off, rather than scooping directly from the bag. I’ve done all of these, and each time resulted in cookie puddles instead of cute shapes.
Q: How should I store these cookies, and how long do they last?
A: Once the glaze is completely set (this can take an hour or two), store them in an airtight container at room temperature. Layer them between sheets of parchment paper if you have a lot, to prevent sticking and keep the glaze pretty. They’ll stay fresh and delicious for about 3-5 days. If you try to stack them before the glaze is dry, you’ll end up with a sticky, messy stack of cookies, which I’ve definitely learned the hard way. For longer storage, you can freeze them unglazed in an airtight container for up to a month, then glaze them after thawing.
That’s everything I know about making Easy Pumpkin Pie Sugar Cookies! Hope you give it a try. And if you mess it up, you’re in good company—I still do it sometimes.
Easy Pumpkin Pie Sugar Cookies
These delightful pumpkin pie sugar cookies are a festive fall tradition, offering all the cozy, spiced flavors of pumpkin pie in a tender, handheld cookie. Perfect for sharing at gatherings or enjoying with a warm beverage, they’re surprisingly easy to make with a few crucial tips for success.
Ingredients
- 1 cup (2 sticks) unsalted butter, softened
- 1 cup granulated sugar
- 1/2 cup canned pumpkin puree (NOT pumpkin pie filling!)
- 1 large egg
- 1 teaspoon vanilla extract
- 2 1/2 cups all-purpose flour
- 1 teaspoon baking powder
- 1/2 teaspoon salt
- 1 teaspoon ground cinnamon
- 1/2 teaspoon ground nutmeg
- 1/4 teaspoon ground ginger
- 1/8 teaspoon ground cloves (optional)
- For the Glaze:
- 1 1/2 cups powdered sugar
- 2-3 tablespoons milk (any kind works)
- 1/2 teaspoon vanilla extract
- Pinch of ground cinnamon (optional, for garnish)
Instructions
-
In a large bowl, cream together the softened butter and granulated sugar until light and fluffy (2-3 minutes with an electric mixer).
-
Beat in the pumpkin puree, egg, and vanilla extract until well combined. Scrape down the sides of the bowl to make sure everything gets mixed in.
-
In a separate medium bowl, whisk together the all-purpose flour, baking powder, salt, ground cinnamon, ground nutmeg, ground ginger, and ground cloves.
-
Gradually add the dry ingredients to the wet ingredients, mixing on low speed until just combined. Be careful not to overmix! The dough will be soft.
-
Divide the dough in half, flatten each half into a disc, wrap tightly in plastic wrap, and refrigerate for at least 1 hour (or up to 2 days). This step is non-negotiable!
-
Preheat your oven to 375°F (190°C). Line baking sheets with parchment paper or silicone mats.
-
On a lightly floured surface, roll out one disc of chilled dough to about 1/4 inch thickness. Use your favorite cookie cutters to cut out shapes.
-
Carefully transfer the cut-out cookies to the prepared baking sheets, leaving about an inch between them.
-
Bake for 8-10 minutes, or until the edges are just lightly golden and the centers are set. They shouldn’t be browned.
-
Let the cookies cool on the baking sheet for 5 minutes before transferring them to a wire rack to cool completely.
-
While the cookies cool, prepare the glaze: In a small bowl, whisk together the powdered sugar, milk, and vanilla extract until smooth. Add more milk a tiny bit at a time if it’s too thick, or more powdered sugar if it’s too thin.
-
Once the cookies are completely cool, drizzle or spread the glaze over them. If desired, sprinkle with a pinch of cinnamon. Let the glaze set before storing.
Nutrition (Per Serving)

