
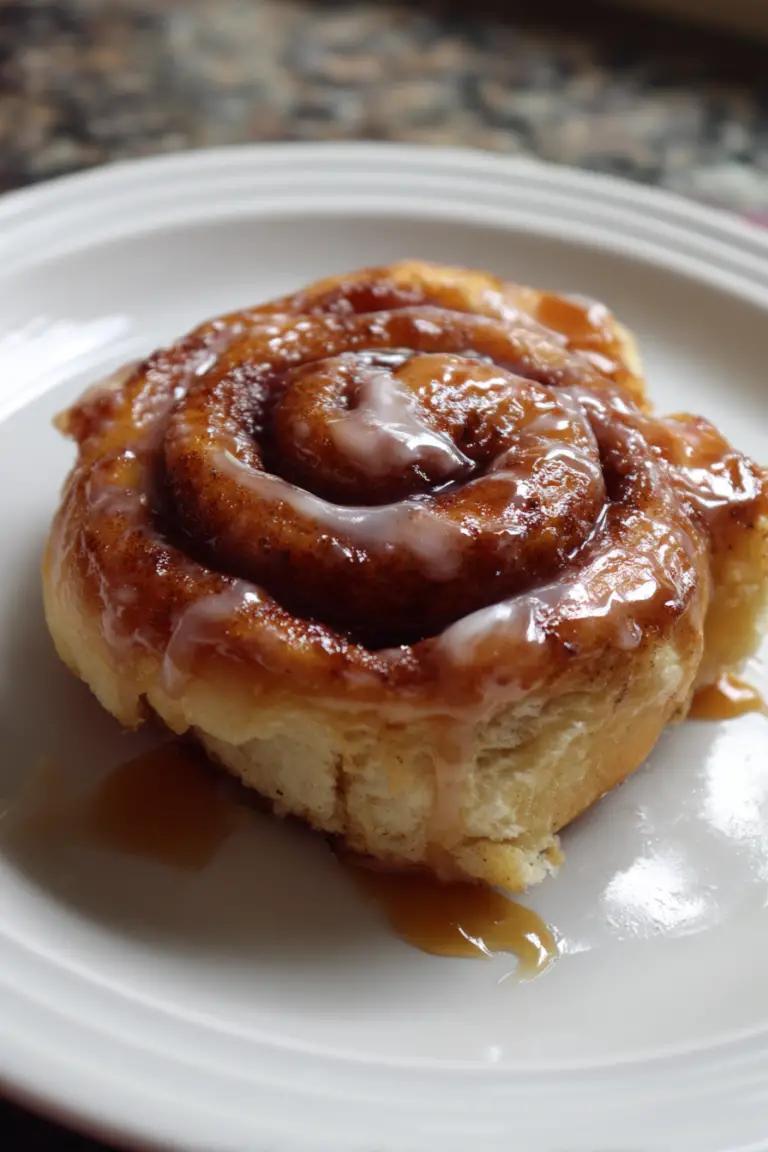
Easy Cinnamon Roll Apple Pie
Oh man, Easy Cinnamon Roll Apple Pie. This recipe is like, my secret weapon for showing up to a potluck looking like a kitchen goddess without actually doing a ton of work. My first time making it was for Thanksgiving a few years back. I was totally swamped, trying to wrangle a turkey, mashed potatoes, and about a million other things. Dessert was an afterthought, and I just kinda grabbed a can of cinnamon rolls and a bag of apples, figuring, “What’s the worst that could happen?” Well, the worst *almost* happened; I nearly burnt the crust because I forgot to check on it, but pulled it out just in time. Everyone raved about it, thinking I’d spent hours meticulously crafting a pie from scratch. It was a total game-changer, and it’s been a staple ever since, especially when I need a hug in food form.
Recipe Card
| Recipe Title | Easy Cinnamon Roll Apple Pie |
|---|---|
| Servings | 8 generous slices |
| Prep Time | 20 minutes |
| Cooking Time | 40-50 minutes |
| Calories | About 450 calories per serving (it’s dessert, folks!) |
Ingredients
- 2 (12.4 oz) cans refrigerated cinnamon rolls with icing
- 6-7 medium apples (about 6 cups sliced), peeled, cored, and sliced 1/4 inch thick
- 1/2 cup granulated sugar (or a bit less if your apples are super sweet)
- 1 teaspoon ground cinnamon
- 1/4 teaspoon ground nutmeg
- 1 tablespoon all-purpose flour
- 1 tablespoon fresh lemon juice
- 2 tablespoons unsalted butter, melted
So, about these ingredients. Every single one has a story, usually involving me messing something up.
First, those two cans of refrigerated cinnamon rolls. These are the MVP, the star of the show, the reason this is “easy.” Don’t skimp on these. I once tried to use some fancy, store-brand organic ones and they just didn’t puff up right or get that classic chewiness. Stick with the familiar brands, ya know?
Next, the apples. Granny Smith are classic for apple pie because they hold their shape and have that nice tartness that balances the sweet. But honestly, I’ve used Honeycrisp, Fuji, Gala, even a mix. I once used Red Delicious because that’s all I had, and while it was okay, they got way too mushy. It was more like apple sauce pie, which isn’t terrible, but not what I was going for.
The sugar, cinnamon, and nutmeg. These are your flavor base. The sugar amount really depends on your apples. If they’re super tart, go for the full half cup. If you’re using sweeter apples, maybe dial it back to a third of a cup. I forgot the cinnamon once, and it just tasted like… well, like apples with sugar. Good, but not *cinnamon roll apple pie* good.
That tablespoon of flour? That’s your thickener. It helps the apple filling set up nicely so it’s not a watery mess when you slice into it. I once skipped it, thinking, “Eh, who needs flour?” and ended up with a runny pie. Lesson learned. Always add the flour!
Lemon juice. This is crucial for two reasons: it brightens up the apple flavor and, more importantly, it stops your sliced apples from turning brown while you’re prepping everything else. The first time I made this, my apples were brown before they even hit the pie dish, and it just looked kinda sad. Now, I juice a lemon first thing.
Lastly, the melted butter. This helps bind the flour and spices to the apples, giving the filling a richer taste and smoother texture. I mean, can you ever go wrong with butter? I haven’t messed up with butter yet, but I’m sure there’s a first time for everything!
Directions
- Preheat your oven to 375°F (190°C). Lightly grease a 9-inch pie plate.
- Separate the cinnamon rolls from both cans. Set aside the icing packets.
- In a large bowl, combine the sliced apples, granulated sugar, cinnamon, nutmeg, flour, and lemon juice. Toss gently until the apples are evenly coated.
- Arrange 8 cinnamon rolls in the bottom of the prepared pie plate, pressing them slightly to form a solid bottom crust.
- Spoon the apple mixture evenly over the cinnamon roll crust.
- Take the remaining cinnamon rolls and gently stretch or flatten them slightly. Create a lattice pattern over the top of the apples, or simply arrange them artfully, leaving small gaps for steam to escape.
- Drizzle the melted butter over the top cinnamon roll lattice.
- Bake for 40-50 minutes, or until the apple filling is bubbly and the cinnamon rolls are golden brown and cooked through. If the crust starts to get too dark, you can loosely tent it with foil.
- Remove from oven and let cool for about 10 minutes. While still warm, open the icing packets and drizzle the icing generously over the entire pie.
- Serve warm and enjoy!
Okay, so let’s talk about the directions because this is where the fun (and the fails) really happen. Step 4, forming the bottom crust. I used to just lay the rolls down and hope for the best, but sometimes they wouldn’t fully meld together, and you’d get gaps. Now I press them down gently with my fingers or the back of a spoon to make sure they’re mostly connected. You want a good base for all those yummy apples.
Then there’s Step 6, creating the lattice. Oh man, my first few attempts at a lattice looked like a kindergartner’s art project after a sugar rush. It was messy, uneven, and kinda ugly. I used to get so stressed about it, trying to weave them perfectly. But guess what? It doesn’t have to be perfect! Just stretch ’em a bit and lay ’em across. It’s supposed to look rustic. Sometimes I just tear them into pieces and sprinkle them on top. It still tastes amazing, and no one cares if your lattice isn’t Instagram-ready. Don’t let perfection be the enemy of good apple pie!
And Step 8, baking time. This is where I almost burnt my pie that first Thanksgiving. My oven runs a little hot, so now I start checking at 35 minutes. If those edges are getting too dark but the middle still looks pale, I definitely tent it with foil. A burnt crust is a sad crust, and nobody wants that. You want golden brown, not charcoal black. And make sure the apples are truly tender – you don’t want crunchy apples in your pie.
Honestly, this pie is just the best for a quick, comforting dessert. It’s got all the warm, cozy feels of a homemade apple pie without the hassle of making your own crust from scratch. That’s why I love it. It’s a real crowd-pleaser and has become a family favorite for holidays and just regular Sunday dinners. Plus, if there are any leftovers (which is rare, let me tell you!), it reheats wonderfully in the microwave for a quick, satisfying breakfast with coffee. It’s truly a comfort food superstar.
Nutrition Info (per serving)
| Calories | Carbs | Fat | Protein |
|---|---|---|---|
| 450 | 65g | 18g | 4g |
Okay, let’s be real, this isn’t exactly a health food. The calories and carbs aren’t shocking for a dessert packed with sugar, butter, and cinnamon rolls. Have I tried to make it “healthier”? Absolutely. I once used less sugar in the apples and sugar-free cinnamon rolls. It was… fine. But it lost a lot of that indulgent, comforting feeling. For me, this pie is a treat, not an everyday meal. If you’re looking to lighten it up, maybe use fewer cinnamon rolls for the lattice or go lighter on the icing. But honestly, sometimes you just need to enjoy a good dessert for what it is.
Ingredient Swaps
| Ingredient | Substitution |
|---|---|
| Canned Cinnamon Rolls | Puff pastry (homemade or store-bought) for crust (will change flavor significantly) |
| Granny Smith Apples | Honeycrisp, Fuji, Gala (will be sweeter, may need less sugar) |
| Granulated Sugar | Brown sugar (will add a deeper, caramel-like flavor) |
| All-Purpose Flour | Cornstarch (use half the amount) |
| Unsalted Butter | Salted butter (adjust salt in recipe if needed), coconut oil (will impart a slight coconut flavor) |
I’ve definitely experimented with some of these swaps, and not all of them ended in glory. Swapping Granny Smiths for sweeter apples like Fuji or Gala is usually fine, but you really do need to cut back on the added sugar or it can be cloyingly sweet. One time, I didn’t adjust the sugar, and it was so sugary it almost hurt my teeth!
The puff pastry swap? Totally changes the game. It becomes a completely different, albeit still tasty, apple pie. It loses the specific “cinnamon roll” vibe, which is the whole point of *this* recipe, you know? It’s good, but it’s not *this* pie. I’d save the puff pastry for a different kind of apple tart. And I once tried to use coconut oil instead of butter. It was okay, but the coconut flavor came through a bit and didn’t really mesh with the cinnamon roll taste. Stick to butter if you can!
Tips
- **Don’t overmix the apples:** Just toss them gently until coated. Overmixing can release too much liquid too soon, making your pie watery.
- **Use a pie shield or foil:** If your crust edges are browning too fast, cover them loosely with foil or a pie shield for the last 15-20 minutes of baking.
- **Let it cool slightly before icing:** I know, I know, you want to dive in! But if the pie is too hot, the icing will just melt into a thin, sad puddle. Let it cool for 10-15 minutes so the icing can set up a bit.
- **Warm it up for leftovers:** If you have any leftovers, a quick 30-second zap in the microwave makes it taste almost fresh out of the oven.
- **Press that bottom crust down:** Make sure those bottom cinnamon rolls are pressed together well to avoid gaps where the apple filling could seep through and stick to the pan.
My biggest mistake with tips? Definitely the cooling before icing one. The very first time, I pulled it out of the oven, looked at those little icing packets, and thought, “Hot pie, melty icing, sounds good!” Nope. It just vanished into the pie, leaving no visible trace, just a slightly sticky top. It tasted good, but it didn’t *look* good. Now, I force myself to wait, even though it feels like an eternity when that delicious smell is filling your kitchen. Trust me, that little wait is worth it for the perfect icing swirl.
FAQ
**Q: Can I make this pie ahead of time?**
A: You sure can! It’s best served warm, but it’s still delicious at room temperature or even cold. If you make it ahead, let it cool completely, then cover it loosely with plastic wrap. When you’re ready to serve, you can reheat individual slices in the microwave or warm the whole pie in a 300°F oven for about 15-20 minutes until heated through. I once made it the night before for a brunch and just reheated it a bit in the morning, and it was perfect.
**Q: What if I don’t have lemon juice?**
A: Okay, so the lemon juice is mostly to prevent browning and add a little zing. If you absolutely don’t have it, your apples might brown a bit while they wait, but it won’t affect the taste *too* much after baking. You could try a tiny splash of apple cider vinegar in a pinch for a bit of tartness, but I wouldn’t recommend it as a regular swap. I’ve forgotten it before, and the pie still tasted good, just looked a little less vibrant before baking.
**Q: My cinnamon rolls are sticking to the bottom of the pan! What did I do wrong?**
A: Ah, been there! This usually means your pie plate wasn’t greased well enough. Even if it’s non-stick, a little spray or butter goes a long way. Also, make sure you really press those bottom cinnamon rolls together. If there are gaps, the sugary apple juices can seep through and caramelize, making them super sticky. I learned this the hard way trying to scrape pie off the bottom of a glass dish with a spoon!
**Q: Can I use different fruits besides apples?**
A: Absolutely! I’ve seen people do peach, mixed berry, or even cherry versions. Just make sure to adjust the sugar content based on how sweet your fruit is, and check if you need a little more flour for thickening, as some fruits release more liquid than apples. I tried a mixed berry one once, and it was delicious but a lot runnier; I wished I’d added an extra half-tablespoon of flour.
That’s everything I know about making Easy Cinnamon Roll Apple Pie! Hope you give it a try. And if you mess it up, you’re in good company—I still do it sometimes, and it always tastes good anyway!
Easy Cinnamon Roll Apple Pie
This delightful recipe combines the convenience of canned cinnamon rolls with classic apple pie flavors, creating a warm and comforting dessert that’s perfect for potlucks or any occasion. It’s a quick way to impress without the fuss of making a pie crust from scratch.

Ingredients
- 2 (12.4 oz) cans refrigerated cinnamon rolls with icing
- 6-7 medium apples (about 6 cups sliced), peeled, cored, and sliced 1/4 inch thick
- 1/2 cup granulated sugar
- 1 teaspoon ground cinnamon
- 1/4 teaspoon ground nutmeg
- 1 tablespoon all-purpose flour
- 1 tablespoon fresh lemon juice
- 2 tablespoons unsalted butter, melted
Instructions
-
Preheat your oven to 375°F (190°C). Lightly grease a 9-inch pie plate.
-
Separate the cinnamon rolls from both cans. Set aside the icing packets.
-
In a large bowl, combine the sliced apples, granulated sugar, cinnamon, nutmeg, flour, and lemon juice. Toss gently until the apples are evenly coated.
-
Arrange 8 cinnamon rolls in the bottom of the prepared pie plate, pressing them slightly to form a solid bottom crust.
-
Spoon the apple mixture evenly over the cinnamon roll crust.
-
Take the remaining cinnamon rolls and gently stretch or flatten them slightly. Create a lattice pattern over the top of the apples, or simply arrange them artfully, leaving small gaps for steam to escape.
-
Drizzle the melted butter over the top cinnamon roll lattice.
-
Bake for 40-50 minutes, or until the apple filling is bubbly and the cinnamon rolls are golden brown and cooked through. If the crust starts to get too dark, you can loosely tent it with foil.
-
Remove from oven and let cool for about 10 minutes. While still warm, open the icing packets and drizzle the icing generously over the entire pie.
-
Serve warm and enjoy!
Nutrition (Per Serving)

