
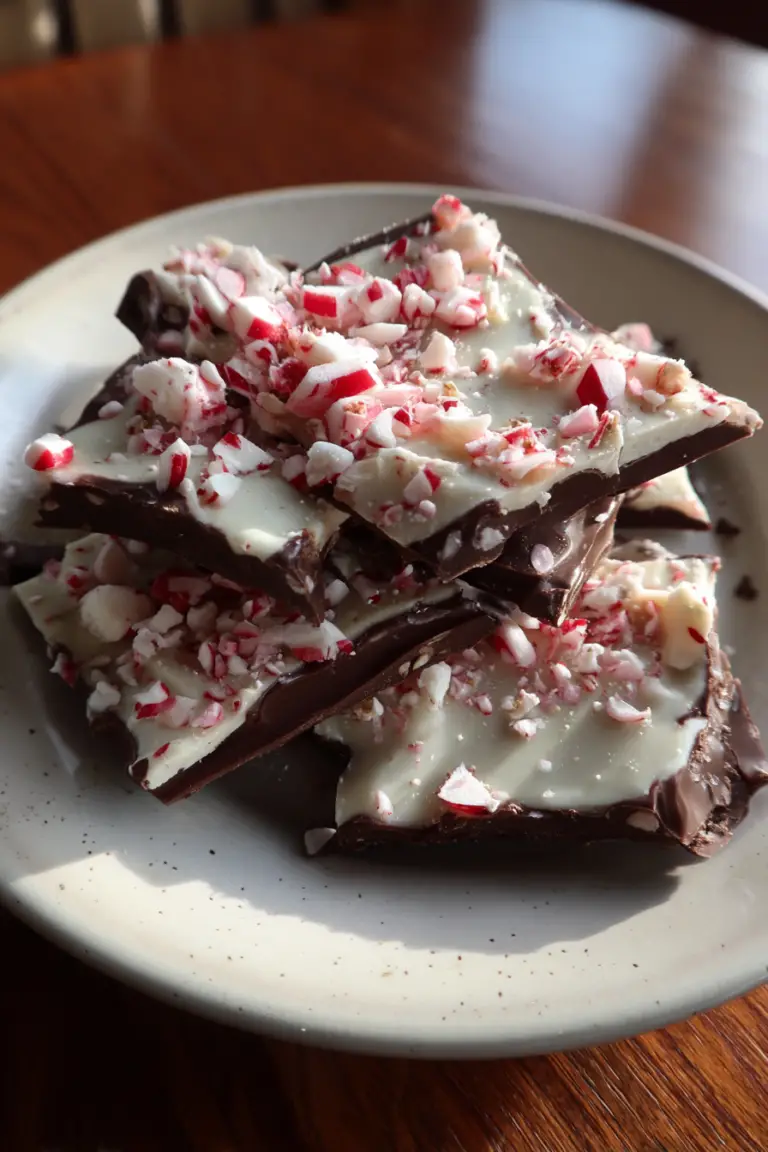
Easy Peppermint Bark Recipe
Oh man, Easy Peppermint Bark. This stuff is practically a holiday staple at my house, but I gotta tell you, my first go at it was a *hot mess*. I remember trying to impress my then-boyfriend’s family at their Christmas party like, ten years ago. I thought, “How hard can melted chocolate and candy canes be?” Famous last words, right? I ended up with chocolate that wouldn’t set, peppermint pieces that looked more like dust than festive chunks, and a kitchen that looked like a candy cane exploded. It was a disaster, but funny now. Luckily, over the years, I’ve really nailed this Easy Peppermint Bark Recipe, and now it’s one of those things folks ask me to bring year after year.
Recipe Card
| Recipe Title | Easy Peppermint Bark Recipe |
|---|---|
| Servings | About 24-30 pieces |
| Prep Time | 20 minutes |
| Cooking Time | 5-10 minutes (melting) |
| Calories | Approx. 180 per piece (highly variable!) |
Ingredients
- 16 oz good quality white chocolate (wafers, bars, or chips)
- 16 oz good quality dark or semi-sweet chocolate (wafers, bars, or chips)
- 1 tsp peppermint extract (optional, but I love it!)
- 10-12 regular-sized candy canes (about 4-5 oz total), crushed
Good quality chocolate, y’all, is non-negotiable here. I learned this the hard way using cheap “baking” chocolate chips once. They seized up and tasted waxy, not melty and smooth like good chocolate should. Spend a little extra, it makes all the difference in the world.
For the dark chocolate, you can use anything from semi-sweet to a nice 70% cacao. I usually go with semi-sweet because it balances the sweetness of the white chocolate nicely. I once tried making this with milk chocolate only, and it was just too sweet, like a sugar bomb in my mouth.
The white chocolate is where you can really mess up if you’re not careful. It’s notorious for seizing. I’ve ruined entire bowls of it by overheating or getting a single drop of water in there. Now I treat it like gold.
That little teaspoon of peppermint extract? That’s my secret weapon. It really amps up the minty flavor without having to rely solely on the candy canes. I forgot it once and it tasted… fine, but not *zingy* enough. It just gives it that extra punch.
And finally, the candy canes. You want the hard ones, not the chewy soft mints. I made that mistake once, thinking “peppermint is peppermint,” and they just dissolved into a sticky mess on the bark. Stick with the classic, crunchy candy canes!
Directions
- Line a large baking sheet (about 10×15 inches or larger) with parchment paper. This is so important; don’t skip it!
- Unwrap your candy canes. Place them in a Ziploc bag and crush them into small pieces. You can use a rolling pin or the bottom of a heavy pan. Don’t go too fine; you want some good crunch!
- In a microwave-safe bowl, melt the dark chocolate. Microwave in 30-second intervals, stirring well after each, until smooth. This usually takes 2-3 minutes.
- Stir in the peppermint extract into the melted dark chocolate, if using.
- Pour the melted dark chocolate onto the prepared baking sheet and spread it evenly with an offset spatula or the back of a spoon. Make it a thin, even layer.
- Pop the baking sheet into the fridge for about 10-15 minutes, or until the chocolate is firm to the touch.
- While the dark chocolate is chilling, melt the white chocolate in a separate microwave-safe bowl. Again, 30-second intervals, stirring after each. White chocolate can seize easily, so be extra careful not to overheat it. It might take a little longer, around 3-4 minutes.
- Once the dark chocolate is firm, pour the melted white chocolate over it and spread it evenly. Work quickly here!
- Immediately sprinkle the crushed candy canes over the wet white chocolate, gently pressing some in so they stick.
- Place the baking sheet back into the fridge for at least 30-60 minutes, or until both layers are completely firm.
- Once fully firm, remove from the fridge. Lift the parchment paper off the baking sheet and place it on a cutting board.
- Break or cut the bark into irregular pieces. I usually just break it, it looks more rustic and fun!
- Store in an airtight container at room temperature or in the fridge.
Okay, let’s talk about the crushing candy canes part. I once tried to crush them in a flimsy plastic bag, and it just burst open, sending peppermint shrapnel all over my kitchen. It was like a very sweet, very sticky crime scene. Use a *good* quality Ziploc bag, maybe even double bag it, and don’t bash it like you’re trying to win a prize. A gentle but firm rolling pin or a heavy pan works wonders. Also, don’t crush them to powder! You want actual little pieces for that satisfying crunch.
Spreading the chocolate thin and even? Easier said than done. I used to make my layers too thick, and then when I tried to break the bark, it would just crack awkwardly or be impossible to eat without feeling like you’re eating a solid brick of candy. Thin layers mean a better snap and more manageable pieces. The chilling time between layers is also key. If the first layer isn’t firm, the white chocolate will just bleed into it, and you won’t get those distinct, pretty layers. I rushed it once and ended up with a swirly, muddy-looking bark that tasted fine but looked like abstract art gone wrong.
This Easy Peppermint Bark Recipe really is a lifesaver around the holidays. It feels fancy, but it’s super simple. I love it because it’s so forgiving in its “imperfections.” Unlike, say, a cake that has to rise just right, if your bark pieces are wonky, it just adds to its homemade charm! It’s a total family favorite, and everyone looks forward to it. It’s especially great for gifting, too. I often make a huge batch and then bag up little portions for my neighbors and friends. It’s definitely a comfort food for me, bringing back all those cozy holiday memories.
My big mistake was trying to make it “healthy” once. I swapped out the regular chocolate for sugar-free versions, and oh my goodness, it was inedible. The texture was gritty, and the flavor was just off. So, my advice? This is a treat, embrace it! Don’t try to mess with a good thing by trying to make healthy swaps that just don’t work. Sometimes a little indulgence is exactly what we need.
Nutrition Info (per serving)
| Calories | Carbs | Fat | Protein |
|---|---|---|---|
| 180 | 18g | 11g | 2g |
Okay, let’s be real, no one is making peppermint bark for the nutritional value, right? The calories here are a guesstimate and can totally swing depending on your chocolate choice and how big you break your pieces. It doesn’t surprise me that it’s high in carbs and fat, it’s chocolate and sugar after all! I haven’t really tried to make this lighter because, honestly, it’s an occasional treat. For folks with special diets, just be mindful of the ingredients. If you’re gluten-free, this is usually fine, but always double-check your chocolate brands. For dairy-free, there are some great vegan white and dark chocolates out there now that work really well. I’ve made it for a friend with a dairy allergy using those, and it turned out pretty good!
Ingredient Swaps
| Ingredient | Substitution |
|---|---|
| Dark/Semi-Sweet Chocolate | Milk Chocolate (for a sweeter bark), or higher percentage dark chocolate (for a more intense, less sweet flavor) |
| White Chocolate | Candy Melts (easier to melt, but different flavor profile) |
| Candy Canes | Crushed starlight mints, festive sprinkles, mini chocolate chips, or other crushed hard candies |
| Peppermint Extract | Vanilla extract (for a different flavor), or omit entirely |
Alright, let’s talk swaps. Milk chocolate instead of dark can work if you have a serious sweet tooth, but it gets pretty intense with the white chocolate. I usually stick to semi-sweet or dark to cut the sweetness a bit. Candy melts for white chocolate? They do melt like a dream and are super easy to work with because they don’t seize like real white chocolate can. But the taste is different, less rich, more sugary. It’s a trade-off.
As for the candy cane topping, I’ve tried sprinkles (fun for kids, but not the same crunch), and mini chocolate chips (delicious, but then it’s just chocolate bark, not *peppermint* bark). Crushed starlight mints work great, giving that classic peppermint flavor. I tried using some fancy flavored hard candies once, and it was a flavor clash disaster – stick to peppermint, trust me. I also tried vanilla extract instead of peppermint extract. It was good, like a classic vanilla chocolate bark, but it just wasn’t the Christmas-y peppermint vibe I was going for. So, swaps can be fun, but some are definitely better than others for this specific recipe.
Tips
- Use good quality chocolate – it really makes a huge difference in taste and texture.
- Melt chocolate slowly and carefully, especially white chocolate, to prevent seizing.
- Make sure each chocolate layer is fully set before adding the next.
- Don’t crush your candy canes into fine powder; you want some texture.
- Store in an airtight container to keep it fresh and crunchy.
My number one tip is using good quality chocolate. I learned this the hard way when I tried to cheap out on some store-brand white chocolate chips. They melted all gloppy, never smoothed out right, and then when it cooled, it tasted waxy and just… sad. My bark was ruined, and I had to throw the whole batch out. What a waste of time and ingredients! I wish someone had just told me, “Hey, splurge a little on the chocolate, you won’t regret it.” It really is the star of the show. And melting slowly? That’s another one. I’ve nuked white chocolate too fast so many times, and it just turns into a crumbly, seized-up mess that’s impossible to salvage. Now I take my time, stirring every 30 seconds, even if it feels like forever. It’s worth the extra minute or two to avoid a total chocolate catastrophe.
FAQ
Q: My chocolate seized up! What did I do wrong?
A: Oh man, I feel you. This has happened to me more times than I care to admit. Usually, it’s one of two things: you overheated it, especially the white chocolate, or a tiny drop of water got into your bowl. White chocolate is super sensitive. Try melting it over a double boiler next time for gentler heat, or microwave in super short bursts, stirring constantly. If it’s already seized, sometimes you can try to salvage it by stirring in a tiny bit of vegetable oil (like 1/2 tsp), but honestly, it rarely comes back to its former glory. Best to start over.
Q: How long does peppermint bark last?
A: If you can keep people from eating it all in one sitting, it usually lasts a couple of weeks stored in an airtight container at room temperature. If you put it in the fridge, it’ll last even longer, maybe up to a month. But honestly, in my house, it’s lucky to survive a weekend! The main thing is to keep it away from moisture and direct sunlight.
Q: Why is my peppermint bark soft and not snapping?
A: This usually means your chocolate wasn’t tempered properly, or you didn’t let it chill long enough. For a homemade bark, we’re not usually tempering, so the biggest culprit is not letting it get fully firm in the fridge. Also, make sure you’re using real chocolate, not candy melts, if you want that hard snap. Candy melts tend to be a bit softer. I’ve rushed the chilling process before, trying to get it ready for a party, and it was just a bendy, sad mess. Patience is key for that perfect snap!
That’s everything I know about making Easy Peppermint Bark Recipe! Hope you give it a try, and if you mess it up, you’re in good company—I still do it all the time.

