

Easy Homemade Eggnog Recipe
Oh man, eggnog. For years, it was just that carton stuff from the store that showed up around Thanksgiving, thick and kinda… artificial. My real journey with making an Easy Homemade Eggnog Recipe started one chaotic Christmas Eve about ten years ago. My grandma, bless her heart, had mentioned how her mother used to make it from scratch, and I, in my infinite wisdom, decided that *this* was the year I’d surprise everyone with “authentic” eggnog. I remember looking at a recipe online, thinking, “Eggs, milk, sugar? How hard can it be?” Famous last words, right? I got to the tempering step and completely messed it up. Instead of a smooth, creamy custard base, I ended up with what looked suspiciously like sweet scrambled eggs in a pot of milk. My husband, trying to be supportive, said it had “texture.” We ended up just giggling, pouring it down the drain, and opening a carton of the store-bought stuff. But that failure sparked something. I was determined to conquer it, and over the years, I’ve really nailed this Easy Homemade Eggnog Recipe, turning it into a cherished tradition.
Recipe Card
| Recipe Title | Easy Homemade Eggnog Recipe |
|---|---|
| Servings | 8-10 people |
| Prep Time | 15 minutes |
| Cooking Time | 15-20 minutes |
| Calories | About 350-400 (depends on whole milk/cream choice and booze) |
You know, for something that feels so fancy and traditional, making eggnog isn’t nearly as hard as that first disaster made it seem. It’s become a total family favorite, especially around the holidays. After that first scrambled-egg incident, I almost gave up, but I’m so glad I didn’t. It really is worth the little bit of effort, and now it’s one of those comfort food things I just *have* to make every year.
What I love about this particular Easy Homemade Eggnog Recipe is that it’s flexible. You can make a big batch for a party, or just a smaller one for a quiet evening. It really elevates a simple get-together. Honestly, it tastes so much better than anything you can buy, it’s just a different league of creamy, rich goodness.
I wouldn’t change a thing about how I make it now, mostly because I’ve learned from all my past mistakes. It’s not really a meal prep kind of thing, but you can definitely make it ahead for a party, and it only gets better.
Ingredients
- 6 large eggs, separated (yolks and whites)
- 3/4 cup granulated sugar, divided
- 2 cups whole milk
- 1 cup heavy cream
- 1 teaspoon vanilla extract
- 1/2 teaspoon freshly grated nutmeg, plus more for garnish
- Pinch of salt
- Optional: 1 cup brandy, rum, or bourbon (or a mix!)
Okay, let’s talk ingredients, because each one plays a starring role and can make or break your Easy Homemade Eggnog Recipe. Getting these right is key.
Those 6 large eggs are the heart of your eggnog, literally. They give it that signature richness and body. One year, I was short on eggs and tried using only four. The eggnog was thin and watery, not that luscious, velvety drink we all crave. It was a sad, pale imitation. Don’t skimp on the eggs, folks! And separating them is important – the yolks for the custard, the whites for that fluffy, frothy top (or added into the base for richness).
The 3/4 cup granulated sugar, divided, is crucial for both sweetness and texture. I once thought, “Oh, I’ll just use less sugar, it’s healthier!” Bad idea. It tasted bland and unfinished, like sweet milk soup. Another time, I accidentally added *all* the sugar to the yolks at once and didn’t whisk it in quick enough before adding the milk, and some of it got kinda grainy. It needs to be fully dissolved, so dividing it helps.
2 cups whole milk and 1 cup heavy cream are what give this Easy Homemade Eggnog Recipe its luxurious creaminess. Please, for the love of all that is good, do not try to use skim milk. I did that once. For my New Year’s resolution, I decided to make a “light” eggnog. It tasted like regret. It was watery, thin, and just not satisfying. The fat in the whole milk and cream is essential for that rich mouthfeel.
1 teaspoon vanilla extract adds that warm, comforting note. Don’t use imitation vanilla here unless you absolutely have to. I made that mistake once with a cheap bottle I had lying around, and the chemical-y taste really came through. It wasn’t horrible, but it definitely didn’t have that deep, round flavor good vanilla provides. It’s worth splurging on the good stuff for something like eggnog.
1/2 teaspoon freshly grated nutmeg is non-negotiable for me now. When I first started, I just used the pre-ground stuff from the spice cabinet. It was fine, but a little flat. Then my friend showed me how to grate fresh nutmeg, and it was a revelation! The aroma alone is half the experience. The pre-ground stuff often loses its potency, so if you want that true holiday spice, invest in a whole nutmeg and a microplane. You won’t regret it.
A tiny pinch of salt might seem weird in a sweet drink, but trust me, it’s a flavor enhancer. It balances the sweetness and makes all the other flavors pop. If you forget it, the eggnog just tastes a little less vibrant. I learned this from my grandma, who always added a tiny bit of salt to her cookies and sweet breads. It’s her secret weapon, and now mine too.
And finally, the optional 1 cup brandy, rum, or bourbon. This is where the fun begins for adults! I’ve tried all three. Brandy makes it smooth and elegant. Rum, especially dark rum, gives it a warmer, spicier Caribbean vibe. Bourbon adds a smoky, oaky depth. One year, I was feeling ambitious and added a full cup of *each* to a smaller batch. Let’s just say that was a very potent batch, and everyone was feeling quite festive after one small glass. So, stick to one cup total unless you’re making a double recipe, and even then, go easy. You can always add more to individual glasses!
Directions
- In a large heatproof bowl, whisk together the egg yolks and 1/2 cup of the granulated sugar until pale yellow and slightly thickened.
- In a medium saucepan, combine the whole milk, heavy cream, and pinch of salt. Heat over medium heat until small bubbles form around the edges and it’s steaming, but not boiling.
- Slowly, and I mean *slowly*, ladle about half of the hot milk mixture into the egg yolk mixture, whisking constantly to temper the eggs.
- Pour the tempered egg mixture back into the saucepan with the remaining hot milk.
- Continue to cook over medium-low heat, stirring constantly with a wooden spoon or spatula, until the mixture thickens enough to coat the back of the spoon (reaching 160°F on an instant-read thermometer).
- Remove from heat immediately. Stir in the vanilla extract and freshly grated nutmeg. If using alcohol, stir it in now.
- Pour the eggnog through a fine-mesh sieve into a clean bowl or pitcher to catch any bits of cooked egg or spices.
- Cover and chill in the refrigerator for at least 4 hours, or preferably overnight, to allow the flavors to meld and for it to thicken further.
- Just before serving, in a separate clean bowl, beat the egg whites with the remaining 1/4 cup granulated sugar until stiff peaks form.
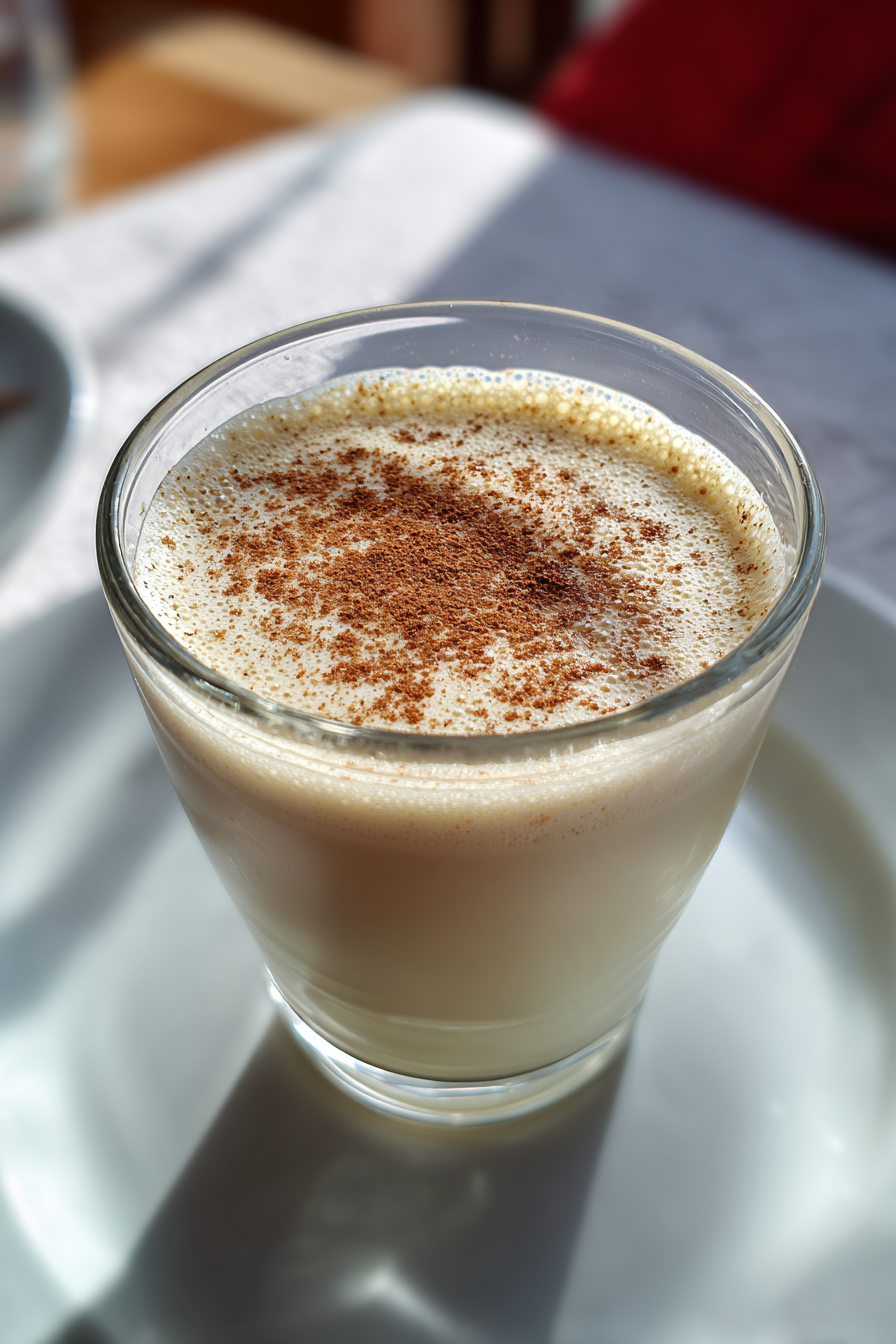
- Gently fold the beaten egg whites into the chilled eggnog for a lighter, frothy texture, or serve the eggnog plain and garnish with a dollop of whipped cream or egg white foam, and a sprinkle of fresh nutmeg.
Let’s dive into some of these steps, because a few of them are where I tripped up spectacularly in the past. Especially that tempering business!
That third step, “Slowly, and I mean *slowly*, ladle about half of the hot milk mixture into the egg yolk mixture, whisking constantly to temper the eggs,” is where my eggnog dreams used to go to die. My first time, I just dumped a big splash of hot milk right into the yolks, and immediately, I had sweet scrambled eggs. It looked like cottage cheese in my bowl! The key is truly to go slow, like a thin stream, while whisking like your life depends on it. This gradually raises the temperature of the egg yolks without cooking them too fast. It’s a delicate dance, but once you get the hang of it, it’s not scary at all. Just be patient and keep that whisk moving!
Then there’s step five: “Continue to cook over medium-low heat, stirring constantly… until the mixture thickens enough to coat the back of the spoon (reaching 160°F on an instant-read thermometer).” I can’t stress this enough: *do not walk away* from the stove during this step. I thought I could quickly check my phone or grab a cookie from the pantry, and bam! The bottom of my eggnog got thick and lumpy, almost curdled. It went from perfectly smooth to a gloopy mess in seconds. Keep stirring, especially scraping the bottom, and use that thermometer. Hitting 160°F is important for food safety with eggs, but going over that, even a little, can turn your silky smooth drink into a pudding. Trust the thermometer, not your gut feeling, especially when you’re just starting out with this Easy Homemade Eggnog Recipe.
After that fifth step, “Remove from heat immediately.” This is critical! The residual heat in the pan can continue cooking the eggs, even off the burner. I once left it in the hot pan a little too long, thinking it would be fine, and it just got *too* thick. It cooled down to a consistency more like a very loose custard or a thick gravy, rather than a drinkable eggnog. It was still tasty, but definitely not pourable from a pitcher. So, once it hits 160°F, get it off that heat source pronto!
And finally, step eight, “Cover and chill in the refrigerator for at least 4 hours, or preferably overnight.” My biggest enemy here is impatience. The first few times I made it successfully, I was so excited I’d pour a glass after only an hour or two in the fridge. It was still warm-ish and the flavors hadn’t really settled. It tasted good, but it wasn’t *great*. That long chill time is magic. It allows the flavors to meld, deepens the vanilla and nutmeg, and thickens the eggnog to that perfect velvety consistency. Don’t rush it; good things come to those who wait!
Nutrition Info (per serving)
| Calories | Carbs | Fat | Protein |
|---|---|---|---|
| 380 | 30g | 25g | 10g |
Yeah, looking at those numbers, it definitely confirms that this Easy Homemade Eggnog Recipe is a decadent treat, not something for your daily diet! Honestly, I’m not super surprised by the calorie or fat count; with all that whole milk, heavy cream, and sugar, it’s basically dessert in a glass. I’ve definitely tried to make it “lighter” by using 2% milk and less sugar, but it just wasn’t the same, as I mentioned before. The richness is part of its charm. For folks with special diets, it’s tough. You *can* make it dairy-free (see swaps below), but it changes the entire profile. As for low-carb, that sugar is a big player, so you’d have to experiment with alternative sweeteners, which I haven’t really done successfully without altering the texture. My advice? Enjoy a small glass and savor every sip. It’s an indulgence, not a staple!
Ingredient Swaps
| Ingredient | Substitution |
|---|---|
| Whole Milk / Heavy Cream | Dairy-free milk (almond, oat, soy) and dairy-free cream |
| Granulated Sugar | Maple syrup, agave, or erythritol (for sugar-free) |
| Eggs | Store-bought pasteurized egg yolks (for extra safety, but reduces “scratch” feel) |
| Alcohol | Omit entirely for a non-alcoholic version, or use rum extract for flavor |
Okay, so I’ve played around with a few of these ingredient swaps over the years, mostly out of curiosity or when I’m trying to accommodate a friend.
Dairy-free milk and cream? I’ve tried this with almond milk and a touch of coconut cream for richness. It was… okay. It definitely makes for an acceptable non-dairy holiday drink, but it lacks that thick, luxurious mouthfeel of traditional eggnog. The flavor is a bit different too, with the nuttiness of almond or the slight coconut taste coming through. It’s a different beast entirely, so manage your expectations if you go this route for your Easy Homemade Eggnog Recipe. It’s a compromise, but a decent one if dairy is off-limits.
Granulated sugar for other sweeteners is tricky. I’ve used maple syrup instead of granulated sugar, and it was actually pretty good! It gives the eggnog a lovely, warm, slightly caramel note, but it does change the fundamental “eggnog” flavor a bit. It’s a nice twist if you like maple. I haven’t tried erythritol or other sugar substitutes for a truly sugar-free version of this Easy Homemade Eggnog Recipe, mostly because I’m worried about the texture and that distinct aftertaste some of those sweeteners have. Sugar isn’t just for sweetness, it contributes to the body too, so swapping it completely might make your eggnog thinner.
Using store-bought pasteurized egg yolks is something I’ve done when I’m feeling extra cautious, especially if serving to very young or very old guests. It doesn’t really change the flavor or texture much, which is great. It just means you don’t have to separate the eggs yourself (which, let’s be honest, can sometimes be a messy affair for me) and you get that peace of mind regarding raw eggs. It makes the “easy” in Easy Homemade Eggnog Recipe even easier.
And omitting alcohol? Absolutely! I make a batch without alcohol every year for my kids and for friends who don’t drink. It’s still incredibly delicious and satisfying. You don’t *need* the booze for it to be amazing. Sometimes I’ll add a tiny bit of rum extract to the non-alcoholic version just for that hint of flavor without the actual alcohol, and that works really well. It’s still a fantastic comforting drink for everyone, truly a family favorite that way.
Tips
- **Temper those eggs properly!** This is the single most important step to avoid scrambled eggnog.
- **Use an instant-read thermometer.** Don’t guess on the cooking temperature. 160°F is your target.
- **Freshly grate your nutmeg.** The aroma and flavor are unparalleled compared to pre-ground.
- **Chill, chill, chill.** Patience makes perfect here; the flavors deepen and it thickens beautifully.
- **Don’t skimp on the fat.** Whole milk and heavy cream are essential for that classic richness.
Alright, let’s talk about these tips, because they’re based on *years* of trial and error (mostly error, if I’m being honest).
That first tip, “Temper those eggs properly!” I cannot emphasize this enough. I remember my first eggnog attempt – the scrambled egg disaster. I was so excited, had all my ingredients ready, and then BAM. Hot milk, cold yolks, instant lumps. It was so disheartening. I wish someone had really drilled into me *how slow* you need to go and *how consistently* you need to whisk. It’s like teaching a baby to swim; you don’t just throw them in the deep end. You introduce them to the water gradually. If I had known just how critical that slow stream and constant whisking was, I could’ve saved myself a lot of heartache (and wasted eggs). It’s not hard, just requires focus.
And then there’s the “Use an instant-read thermometer” tip. Oh, the number of times I thought I could eyeball it. “It *looks* thick enough,” I’d tell myself. Only to find it either too thin and watery after chilling, making me worried about undercooked eggs, or worse, too thick and gloopy from overcooking. I once overcooked it so badly it was like a thick pudding, not a drink. I was so mad at myself! An instant-read thermometer takes all the guesswork out. It’s a cheap kitchen tool that prevents so many potential cooking fails. Just get one, seriously. It’s a game-changer for anything custard-based, not just this Easy Homemade Eggnog Recipe.
Finally, “Chill, chill, chill.” My impatience used to get the better of me. I’d make a batch in the afternoon, try to drink it that evening, and it was okay, but not the rich, thick, deeply flavored concoction I craved. The flavors were still kinda separate, and it was thinner than I wanted. I remember pouring it into glasses, and it just looked… sad. The next day, after a full night in the fridge, it was a completely different drink. The vanilla and nutmeg had married beautifully with the dairy and eggs, and it had thickened up to that perfect, velvety consistency. It’s like a good friendship; it gets better with time and a little patience. Trust the process and let it chill.
FAQ
**Q: Can I make this Easy Homemade Eggnog Recipe ahead of time? How long does it last?**
A: Absolutely, and I highly recommend it! Making it a day or two in advance actually makes it taste better, as the flavors have more time to meld and deepen. I usually make my batch on Christmas Eve morning for Christmas Day. It’ll last safely in an airtight container in the refrigerator for about 3-5 days. If you’ve added alcohol, it might even last a bit longer because the alcohol acts as a preservative, but I always aim to finish it within a week, just to be safe.
**Q: What if my eggnog curdles or gets lumpy? Can I fix it?**
A: Oh man, this is the heartbreak! If you get lumps from the eggs cooking too fast (my famous scrambled eggnog incident), it’s tough to completely undo. You can try pouring it through a fine-mesh sieve several times, or even try blending it quickly with an immersion blender to smooth out small lumps. However, if it’s truly curdled into distinct cooked egg pieces, it’s pretty much a lost cause for drinking. You might be able to salvage it for something else, like using it as a base for a bread pudding (don’t knock it ’til you try it!), but as an eggnog, it’s probably best to start over. Don’t be too hard on yourself; it happens to the best of us, especially when learning this Easy Homemade Eggnog Recipe.
**Q: What’s the best type of alcohol to use, and how much?**
A: This is purely a matter of personal preference, but I’ve got my favorites! For a classic, slightly sophisticated feel, brandy is wonderful. If you want something a bit warmer and spicier, dark rum is fantastic. For a deeper, oakier kick, bourbon is your friend. I often do a mix, maybe half brandy and half rum, or a splash of all three if I’m feeling fancy. As for amount, I stick to about 1 cup total for this recipe. You can always add more to individual glasses if someone wants an extra kick. One year I put too much in the main batch, and everyone was getting a bit too cheerful a little too quickly! So, start with 1 cup and adjust as you learn your preference.
**Q: Is it safe to eat raw eggs in homemade eggnog?**
A: Okay, this is a super important question! Traditional eggnog recipes often did use raw eggs. However, this Easy Homemade Eggnog Recipe *cooks* the egg yolks to 160°F, which is the temperature recommended by food safety guidelines to kill any potential salmonella bacteria. So, yes, if you follow the directions and cook it to 160°F, it’s considered safe. If you’re still concerned or serving to vulnerable populations (like pregnant women, young children, or the elderly), you can use pasteurized eggs or pasteurized egg yolks, which are pre-treated to eliminate bacteria. That’s a great option for extra peace of mind!
That’s everything I know about making Easy Homemade Eggnog Recipe! Hope you give it a try. And if you mess it up, you’re in good company—I still do it sometimes.
Easy Homemade Eggnog Recipe
Discover the cherished tradition of homemade eggnog with this easy-to-follow recipe, perfected over years for a smooth, creamy, and undeniably festive drink. Elevate your holiday gatherings with this rich, comforting beverage that tastes far superior to store-bought versions.
Ingredients
- 6 large eggs, separated (yolks and whites)
- 3/4 cup granulated sugar, divided
- 2 cups whole milk
- 1 cup heavy cream
- 1 teaspoon vanilla extract
- 1/2 teaspoon freshly grated nutmeg, plus more for garnish
- Pinch of salt
- Optional: 1 cup brandy, rum, or bourbon (or a mix!)
Instructions
-
In a large heatproof bowl, whisk together the egg yolks and 1/2 cup of the granulated sugar until pale yellow and slightly thickened.
-
In a medium saucepan, combine the whole milk, heavy cream, and pinch of salt. Heat over medium heat until small bubbles form around the edges and it’s steaming, but not boiling.
-
Slowly ladle about half of the hot milk mixture into the egg yolk mixture, whisking constantly to temper the eggs.
-
Pour the tempered egg mixture back into the saucepan with the remaining hot milk.
-
Continue to cook over medium-low heat, stirring constantly with a wooden spoon or spatula, until the mixture thickens enough to coat the back of the spoon (reaching 160°F on an instant-read thermometer).
-
Remove from heat immediately. Stir in the vanilla extract and freshly grated nutmeg. If using alcohol, stir it in now.
-
Pour the eggnog through a fine-mesh sieve into a clean bowl or pitcher to catch any bits of cooked egg or spices.
-
Cover and chill in the refrigerator for at least 4 hours, or preferably overnight, to allow the flavors to meld and for it to thicken further.
-
Just before serving, in a separate clean bowl, beat the egg whites with the remaining 1/4 cup granulated sugar until stiff peaks form.
-
Gently fold the beaten egg whites into the chilled eggnog for a lighter, frothy texture, or serve the eggnog plain and garnish with a dollop of whipped cream or egg white foam, and a sprinkle of fresh nutmeg.
Nutrition (Per Serving)

