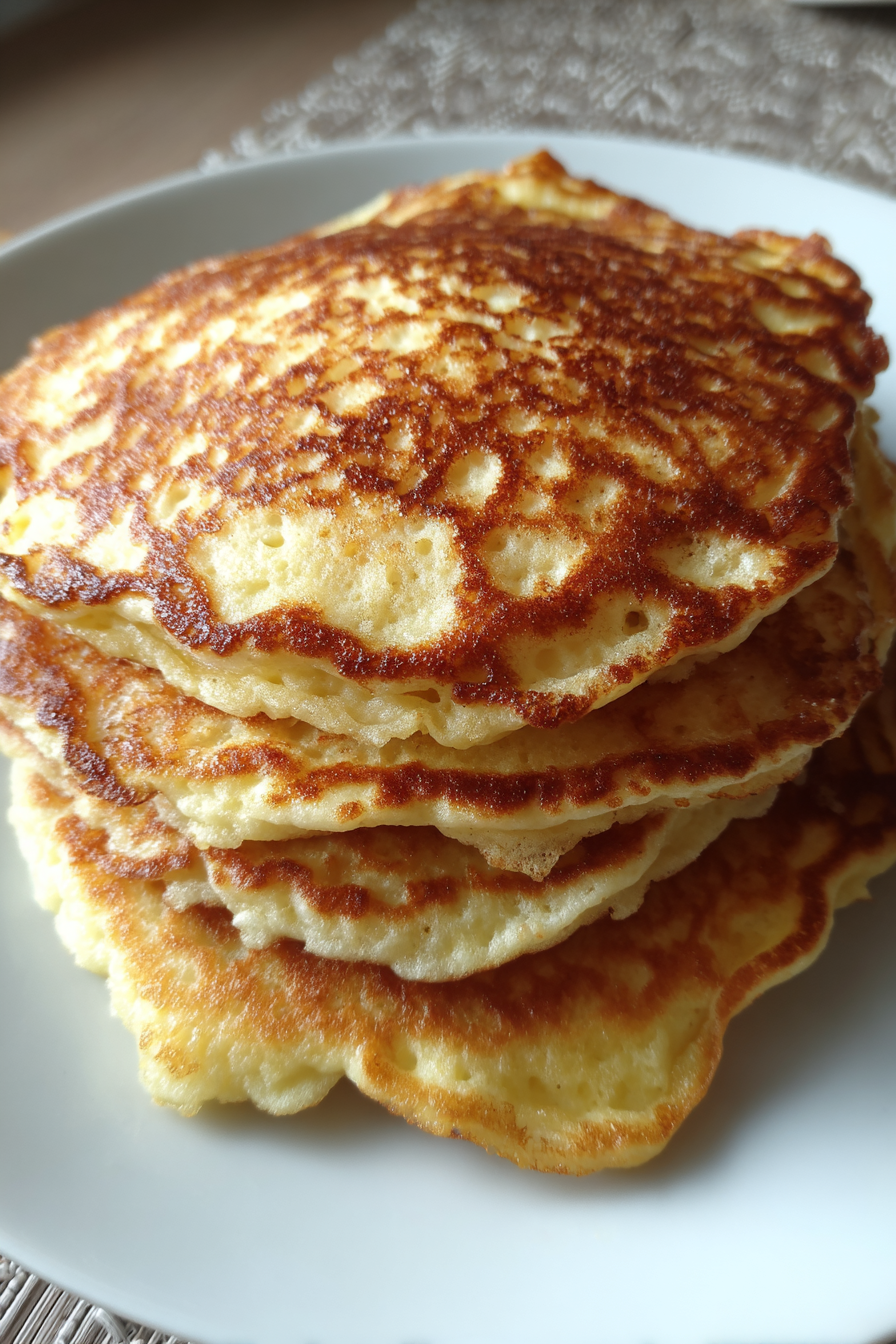
Easy Fluffy Pancakes Recipe
Oh man, pancakes. They just bring me back, you know? My first real go at making the “Easy Fluffy Pancakes Recipe” was for a college roommate’s birthday. I wanted to do something sweet for her, a surprise breakfast in bed kinda deal. Well, let me tell you, I was so excited I barely slept, and then I woke up, groggy as anything, and completely forgot the baking powder. The poor girl woke up to what looked like thin, pale Frisbees, practically solid and definitely not fluffy. We had a good laugh, but I swore then and there I’d master the art of the fluffy pancake. It took a few more tries, a lot of flat discs, and maybe one batter explosion when I overmixed, but eventually, I got it. And now, this recipe is a total Sunday morning staple, a true comfort food for my family.
Recipe Card
| Recipe Title | Easy Fluffy Pancakes Recipe |
|---|---|
| Servings | 4-6 (about 12 medium pancakes) |
| Prep Time | 10 minutes |
| Cooking Time | 15-20 minutes |
| Calories | About 250-300 per serving (2 pancakes) |
Ingredients
- 1 ½ cups all-purpose flour (or a mix, see notes!)
- 2 tablespoons granulated sugar
- 1 tablespoon baking powder
- ½ teaspoon baking soda
- ¼ teaspoon salt
- 1 large egg, lightly beaten
- 1 cup whole milk (or buttermilk for extra fluff!)
- 2 tablespoons unsalted butter, melted and cooled (plus more for the griddle)
- 1 teaspoon vanilla extract
Alright, so these ingredients might seem pretty standard, but each one plays a big part in making these pancakes truly easy and fluffy. I learned this the hard way, trust me. Like that time I decided to go “healthy” and swapped all the all-purpose flour for whole wheat without adjusting anything else. We ended up with dense, heavy pancakes that felt more like a brick in your stomach than a light, airy breakfast. They tasted okay, but the texture was totally off. So now, I stick to mostly all-purpose, maybe a little whole wheat mixed in if I’m feeling adventurous.
The sugar isn’t just for sweetness, it helps with browning, too. I once accidentally grabbed powdered sugar instead of granulated – rookie mistake! It mixed fine, but the pancakes didn’t get that nice golden crust. And don’t even get me started on the time I was half asleep and added a *tablespoon* of salt instead of a quarter teaspoon. My family still brings that one up every now and then; let’s just say those pancakes were… memorable.
Baking powder and baking soda are the real heroes here, working together to give you that lift. I made the mistake of using expired baking powder once, thinking, “It’s fine, it’s just powder!” Nope. My pancakes were flatter than a map of Kansas. Always check those dates, folks! And the milk, oh the milk. Whole milk gives the best richness, but buttermilk? That’s my secret weapon for *extra* fluff. Just make sure you’re using baking soda with buttermilk, as the acidity activates it even more for a super lift.
The butter adds flavor and tenderness, and vanilla extract just elevates everything. I once ran out of vanilla and just skipped it. The pancakes were fine, but they lacked that comforting, familiar warmth. It’s a subtle touch, but it makes a big difference in the overall experience. Plus, melting and cooling the butter is key – if it’s too hot, it can start to cook your egg!
Directions
- In a large bowl, whisk together the dry ingredients: flour, sugar, baking powder, baking soda, and salt. Make sure there are no lumps and everything is well combined.
- In a separate medium bowl, whisk together the wet ingredients: egg, milk, melted butter, and vanilla extract.
- Pour the wet ingredients into the dry ingredients. Mix with a spoon or spatula until *just* combined. A few lumps are totally fine, actually preferred! Don’t overmix.
- Let the batter rest for 5-10 minutes. This gives the gluten a chance to relax and the baking powder/soda time to start doing their magic.
- Heat a lightly greased griddle or large non-stick skillet over medium-low heat.
- Pour about ¼ cup of batter for each pancake onto the hot griddle.
- Cook for 2-3 minutes per side, or until bubbles appear on the surface and the edges look set. Flip carefully with a spatula and cook until golden brown.
- Serve immediately with your favorite toppings!
Okay, let’s talk about these steps, because each one holds a potential landmine I’ve definitely stepped on. That first step, mixing the dry ingredients, seems simple, right? Well, I once got lazy and didn’t whisk them thoroughly. My first pancake had a giant pocket of pure baking powder that tasted like chemicals, and another had a sugary clump. You gotta make sure that leavening is distributed evenly!
Now, step three: combining wet and dry. This is where most pancake disasters happen. I cannot stress this enough: DO NOT OVERMIX. Seriously, resist the urge. I thought a smooth batter was the goal once, so I beat the living daylights out of it. The result? Rubbery, tough pancakes. My husband still jokes about the time I made “tire cakes.” Lumps are your friends here; they mean you haven’t developed the gluten too much. A few quick stirs until *just* combined, and then walk away from that bowl!
Skipping the rest step (number four) is another common mistake I used to make when I was in a rush. I’d pour the batter straight onto the griddle, eager for breakfast. But those 5-10 minutes are magic. They let the flour hydrate fully, and the leavening agents start producing gas, making those air pockets that lead to super fluffy pancakes. If you skip it, your pancakes will be denser and less airy.
And finally, the heat of the griddle. I’ve burned so many pancakes trying to rush them on high heat, only for the outside to be black and the inside still raw. Or, conversely, used too low heat and ended up with dry, crispy-edged pancakes that took forever to cook. Medium-low is your sweet spot for a nice, even cook and beautiful golden-brown color. A good trick is to put a tiny drop of water on the pan – if it sizzles and evaporates quickly, it’s ready!
Honestly, this “Easy Fluffy Pancakes Recipe” is more than just a breakfast item for me; it’s a weekend ritual. It’s the ultimate comfort food after a long week, and it’s become such a family favorite. We’ve had so many funny moments around the griddle, from my kids trying to make “dinosaur” shaped pancakes (which usually ended up looking like blobs) to my own mishaps with flipping them too aggressively and splattering batter everywhere.
What I love most is how forgiving it generally is, despite my occasional screw-ups. Even a slightly less-than-perfect batch still tastes pretty good with a pile of fresh fruit and maple syrup. We don’t often have leftovers, but when we do, they’re great for a quick microwave reheat on a busy weekday morning. Sometimes I make a big batch on Sunday so we can have them for breakfast throughout the week. It’s not exactly a healthy swap, but it beats a sugary cereal! If I were to change anything next time, I’d probably experiment with adding some lemon zest to the batter for a brighter flavor.
Nutrition Info (per serving)
| Calories | Carbs | Fat | Protein |
|---|---|---|---|
| 280 | 40g | 10g | 7g |
*These are approximate values and can vary based on ingredients and portion sizes.*
Looking at the nutrition info, it doesn’t exactly scream “diet food,” does it? And yeah, that probably doesn’t surprise me much for pancakes! It’s definitely a treat, but you can absolutely make some adjustments to lighten it up. I’ve swapped whole milk for skim milk or even unsweetened almond milk to cut down on fat and calories, and it works pretty well, though you might lose a *tiny* bit of richness. Reducing the sugar to just 1 tablespoon doesn’t hurt the flavor too much either, especially if you’re drowning them in maple syrup anyway. For my friends with special diets, using a good quality gluten-free all-purpose flour blend usually works great, but sometimes you need a splash more milk. And if you’re looking to boost the protein, a scoop of unflavored protein powder can be mixed into the dry ingredients, though it might make the batter a little thicker, so add milk slowly until you reach the right consistency.
Ingredient Swaps
| Ingredient | Substitution |
|---|---|
| All-purpose flour | Whole wheat flour (partial), Gluten-free all-purpose blend |
| Granulated sugar | Maple syrup (reduce milk slightly), Honey |
| Whole milk | Buttermilk, Skim milk, Plant-based milk (almond, oat) |
| Unsalted butter | Vegetable oil, Melted coconut oil |
So, these ingredient swaps? Some are winners, some are… well, they change things up a bit. Using buttermilk instead of whole milk is probably my favorite swap. It reacts beautifully with the baking soda and gives you an even tangier, fluffier pancake. If you don’t have buttermilk, you can always make your own by adding a tablespoon of lemon juice or white vinegar to regular milk and letting it sit for 5 minutes. Plant-based milks like almond or oat milk work fine too, but the pancakes might be a smidge less rich.
Swapping all-purpose flour for a gluten-free blend usually works pretty well, especially if it’s a blend designed for baking. Just remember that gluten-free flours absorb liquids differently, so you might need to adjust the amount of milk. I once tried to use just almond flour, and it was a complete disaster – the pancakes fell apart and were super grainy. Not all flours are created equal! Using whole wheat flour in place of *some* of the all-purpose flour (say, ½ cup whole wheat and 1 cup all-purpose) adds a nice nutty flavor and fiber without making them too dense.
For sugar, swapping for maple syrup or honey is totally doable, but you’ll want to reduce your milk by a tablespoon or two to account for the extra liquid. The flavor will be a little different, but still delicious. And for butter, vegetable oil or melted coconut oil are perfectly good substitutes. They don’t add the same nuanced flavor as butter, but they still provide the necessary fat for tenderness. Just be careful with coconut oil; if your other ingredients are cold, it might solidify into little clumps.
Tips
- **Don’t Overmix the Batter:** Seriously, a few lumps are your friends! Overmixing develops gluten, which makes pancakes tough and chewy instead of light and fluffy.
- **Let the Batter Rest:** Give it 5-10 minutes. This allows the flour to fully hydrate and the leavening agents to kick in, creating those essential air bubbles.
- **Check Your Leavening Agents:** Make sure your baking powder and baking soda aren’t expired. Old leavening means flat pancakes.
- **Proper Griddle Temperature:** Medium-low heat is key. Too hot, and they burn on the outside before cooking through. Too cool, and they dry out and take forever.
- **Don’t Press Down on Pancakes:** Once you flip them, resist the urge to press them down with your spatula. You’ll squish out all those lovely air bubbles you worked so hard to create!
These tips are basically a highlight reel of all my past pancake fails, bundled up into helpful advice! The “don’t overmix” one is probably the most crucial lesson I learned. I wish someone had screamed that at me when I was first starting out. I remember one morning, trying to impress a date with my pancake skills, and I stirred that batter until it was silk-smooth, thinking I was doing something good. What I actually created was a batch of rubbery, dense hockey pucks. My date was polite about it, but I could tell. It was humiliating! From then on, I embraced the lumps.
Another big one is checking your baking powder. I used to keep my canister in the back of the pantry for ages, figuring it lasted forever. Nope! The day I used old baking powder was the day my pancakes looked like sad, deflated discs. There was no fluff, no rise, just disappointment. Now, I make it a point to buy fresh baking powder every few months, especially if I’m not baking a lot. It makes a world of difference. And the griddle temperature? That one took a while to nail. I’d either burn the edges or they’d sit there, pale and uninspiring. A little bit of trial and error, getting to know your stovetop and pan, goes a long way. Use that tiny drop of water trick I mentioned earlier to test the heat!
FAQ
**Q: My pancakes are flat! What did I do wrong?**
A: Oh man, I’ve been there so many times! Most likely culprits are overmixing the batter (which makes them tough and unable to rise), using old or expired baking powder/soda, or not letting the batter rest. Make sure your leavening agents are fresh, mix the batter *just* until combined (lumps are good!), and let it sit for 5-10 minutes before cooking.
**Q: Can I make the pancake batter ahead of time?**
A: You can, but with a tiny warning! If you mix the batter the night before and refrigerate it, the baking soda and powder will lose some of their oomph overnight. They start reacting as soon as they hit the liquid. You’ll still get decent pancakes, but they might not be *quite* as fluffy. A trick I use is to mix the dry ingredients and wet ingredients separately, refrigerate them, and then combine them right before cooking in the morning. That usually works great!
**Q: How do I get perfectly round pancakes?**
A: I swear, sometimes mine look like abstract art! The trick is not to spread the batter out with your spoon once it’s on the griddle. Just pour your ¼ cup (or whatever size you like) from a measuring cup or ladle, let it spread naturally, and resist the urge to play with it. Using a slightly thicker batter can also help them hold their shape better. A little non-stick spray on your measuring cup can help the batter slide out cleanly, too.
**Q: What are your favorite toppings for these pancakes?**
A: Oh, the possibilities! Classic maple syrup and butter are always a winner. But I also love fresh berries (blueberries, raspberries, sliced strawberries), sliced bananas, a dollop of whipped cream, or even a sprinkle of chocolate chips (added directly to the batter or on top of each pancake right after pouring). Sometimes, if I’m feeling fancy, I’ll do a quick berry compote. So good!
That’s everything I know about making Easy Fluffy Pancakes Recipe! Hope you give it a try. And if you mess it up, you’re in good company—I still do it sometimes.
Easy Fluffy Pancakes Recipe
Master the art of perfectly fluffy pancakes with this simple yet robust recipe, designed to deliver light, airy stacks every time. A true Sunday morning staple, it promises golden-brown deliciousness that’s surprisingly easy to achieve.
Ingredients
- 1 ½ cups all-purpose flour
- 2 tablespoons granulated sugar
- 1 tablespoon baking powder
- ½ teaspoon baking soda
- ¼ teaspoon salt
- 1 large egg, lightly beaten
- 1 cup whole milk
- 2 tablespoons unsalted butter, melted and cooled
- 1 teaspoon vanilla extract
Instructions
-
In a large bowl, whisk together the dry ingredients: flour, sugar, baking powder, baking soda, and salt. Make sure there are no lumps and everything is well combined.
-
In a separate medium bowl, whisk together the wet ingredients: egg, milk, melted butter, and vanilla extract.
-
Pour the wet ingredients into the dry ingredients. Mix with a spoon or spatula until just combined. A few lumps are totally fine, actually preferred! Do not overmix.
-
Let the batter rest for 5-10 minutes. This gives the gluten a chance to relax and the baking powder/soda time to start doing their magic.
-
Heat a lightly greased griddle or large non-stick skillet over medium-low heat.
-
Pour about ¼ cup of batter for each pancake onto the hot griddle.
-
Cook for 2-3 minutes per side, or until bubbles appear on the surface and the edges look set. Flip carefully with a spatula and cook until golden brown.
-
Serve immediately with your favorite toppings!
Nutrition (Per Serving)