
Easy Lemon Bars Recipe
Oh man, Easy Lemon Bars Recipe. Where do I even begin with this one? I think my first real attempt was back when my oldest, Leo, was just a toddler. We had new neighbors move in next door, super sweet couple, and I wanted to bring over something homemade as a welcome gesture. I’d seen a recipe for lemon bars floating around online and thought, “How hard could it be?” Famous last words, right? I remember pulling them out of the oven, they smelled amazing, but I was so impatient. I sliced into them probably ten minutes after they came out. Disaster! The filling was still so wobbly and warm it just completely oozed everywhere, and the crust crumbled into a million pieces. It looked like a sunny, sweet scramble. I ended up just scooping it all into a container and calling it “deconstructed lemon crumble” with a straight face when I gave it to them. They were polite, bless their hearts, but I swore that day I’d master the Easy Lemon Bars Recipe so I’d never face that particular shame again. And here we are, years later, and I’ve got it down pat, even the parts that still trip me up sometimes.
Recipe Card
| Recipe Title | Easy Lemon Bars Recipe |
|---|---|
| Servings | 16 squares |
| Prep Time | 20 minutes |
| Cooking Time | 35-40 minutes |
| Calories | 280 per serving |
Ingredients
- 1 ½ cups all-purpose flour
- ½ cup granulated sugar
- ¾ cup unsalted butter, cold and cubed
Okay, let’s talk crust ingredients. Flour, sugar, butter – pretty standard stuff, right? But lemme tell you, the quality of your butter *really* matters here. I once ran out of unsalted butter and, in a moment of sheer desperation, tried using salted. The crust came out way too salty and just… off. It really messed with the delicate balance you need for the lemon filling. Stick to unsalted, folks, trust me on this one. And make sure it’s cold! That’s key for a flaky, tender crust, not a dense, greasy one.
- 4 large eggs
- 1 ½ cups granulated sugar
- ¼ cup all-purpose flour
- ¾ cup fresh lemon juice (from about 4-5 lemons)
- Zest of 2 large lemons
- Pinch of salt
- Powdered sugar, for dusting
Now for the star of the show, the filling! The fresh lemon juice is non-negotiable. I’ve been there, tried to cheap out and use the bottled stuff from the store. My first “deconstructed lemon crumble” was actually made with bottled lemon juice, and it just tasted… flat. Sour, sure, but missing that vibrant, bright zing that only fresh lemons give. It really does make all the difference, so roll those lemons on the counter before you cut ’em to get all that beautiful juice out. And don’t skimp on the zest either; it really intensifies that lemony flavor without making it too tart. The extra sugar might seem like a lot, but it balances the tartness perfectly. And the eggs? They’re what gives your filling that lovely custard-like texture, so make sure they’re fresh. I’ve forgotten the pinch of salt before, too, and it really does help brighten all the flavors, so don’t skip it.
Directions
- Preheat oven to 350°F (175°C). Line a 9×13 inch baking pan with parchment paper, leaving an overhang on the sides.
- In a large bowl, combine 1 ½ cups flour and ½ cup granulated sugar. Cut in the cold, cubed butter using a pastry blender, your fingers, or a food processor until the mixture resembles coarse crumbs.
- Press the crumb mixture evenly into the bottom of the prepared pan. Bake for 18-20 minutes, or until lightly golden brown around the edges.
- While the crust bakes, prepare the filling: In a medium bowl, whisk together the eggs, 1 ½ cups granulated sugar, and ¼ cup flour until smooth.
- Stir in the fresh lemon juice, lemon zest, and pinch of salt.
- Once the crust is baked, pour the lemon filling evenly over the hot crust.
- Return the pan to the oven and bake for another 20-25 minutes, or until the filling is set and edges are lightly golden. The center might still jiggle slightly, that’s okay!
- Remove from oven and let cool completely on a wire rack. This is super important!
- Once cooled, refrigerate for at least 2 hours (or even better, overnight) before slicing.
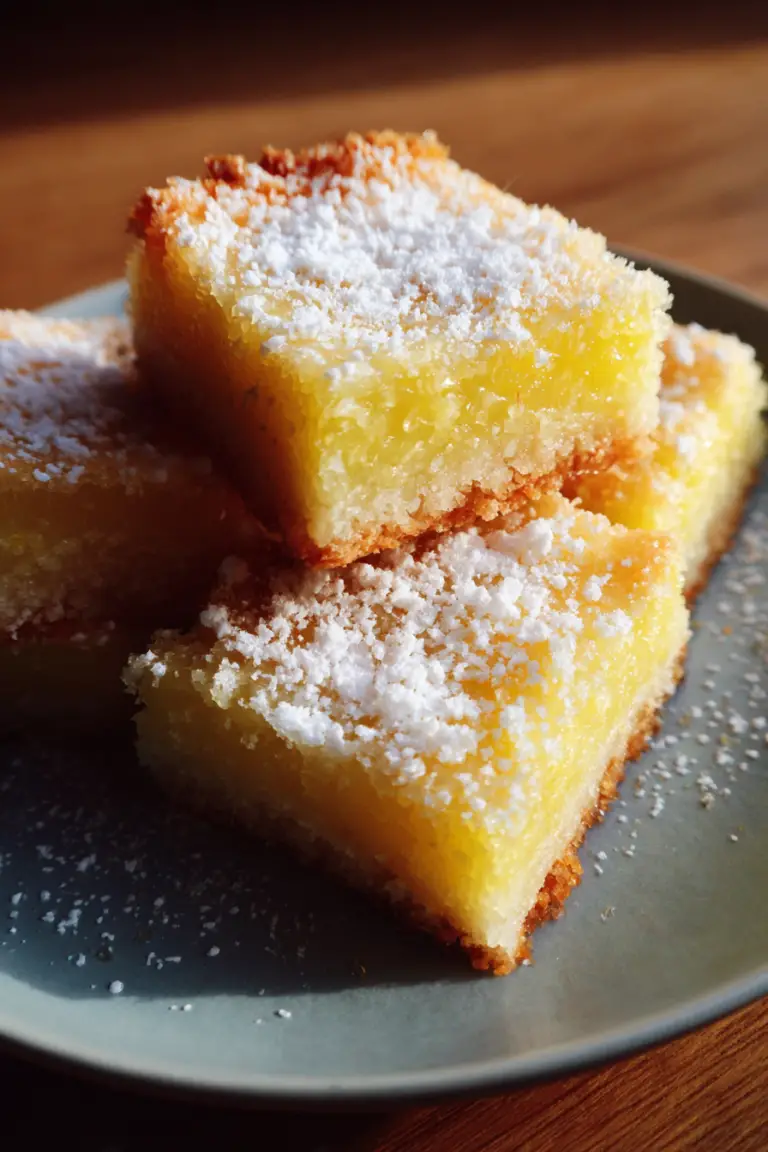
- Lift the bars out of the pan using the parchment paper overhang. Dust generously with powdered sugar before cutting into squares.
Okay, let’s talk about those directions, because there are a few places where I’ve personally messed things up royally. Step 3, baking the crust, is crucial. My first couple of times, I either underbaked it and ended up with a soggy bottom that stuck to the pan, or I overbaked it and it was hard as a rock, nearly impossible to cut and chew. You’re looking for a *light* golden brown, not deep brown. It still needs to be tender. Then, Step 6, pouring the filling over a hot crust. This sounds counterintuitive sometimes, but it actually helps to set the bottom of the filling quickly, creating a nice clean line between the crust and the lemon layer. I once let my crust cool down completely because I got distracted with Leo wanting a snack, and when I poured the filling, it kind of just sat on top and didn’t meld as well, leading to the layers separating a bit when I cut into them. It wasn’t the end of the world, but it wasn’t as pretty. And Step 8 and 9, cooling and chilling? This is where my “deconstructed lemon crumble” came from! DO NOT RUSH IT. Seriously, that lemon filling needs time to fully set up and become firm. If you cut into it too soon, it’ll be a beautiful, runny mess. Patience is a virtue, especially with these bars.
I swear, this Easy Lemon Bars Recipe has become my go-to for so many occasions. It’s a real family favorite, especially in the summer. My husband, Dave, isn’t even a huge dessert person, but he’ll devour these. The perfect balance of sweet and tart just gets him every time. I’ve made them for countless potlucks since that first embarrassing attempt, and they always disappear fast. They’re not exactly an “easy dinner” type of thing, more of a “comfort food” dessert, but they’re so good. The best part? Leftovers actually keep really well in the fridge, so you can make them ahead of time for parties. I once doubled the recipe for a big family reunion, and trying to fit two 9×13 pans in my tiny fridge was a comedic struggle, but totally worth it.
My biggest mistake, aside from the impatience, has definitely been trying to substitute ingredients too much. Like using lemon extract instead of fresh juice—just don’t. It tastes artificial and doesn’t give you that bright, natural pucker. I also tried using a gluten-free flour blend for the crust once, thinking I could make a healthy swap for a friend, and it completely changed the texture to something crumbly and dry. It’s not a “one-pot” kind of dish, which I love for weeknights, but the two distinct layers are what make it special, and they’re worth the extra bowl.
What would I change next time? Honestly, not much with the core recipe itself. It’s pretty perfect as is. Maybe I’d experiment with different citrus zests in the crust for a subtle twist, like a bit of orange or lime to complement the lemon. Or perhaps I’d try a slightly thicker crust sometimes, just because I really love a good shortbread. But if you’re looking for a classic, crowd-pleasing dessert that isn’t too complicated, this Easy Lemon Bars Recipe is the one. It’s a truly reliable friend in the kitchen.
Nutrition Info (per serving)
| Calories | Carbs | Fat | Protein |
|---|---|---|---|
| 280 | 38g | 14g | 4g |
Okay, so looking at these numbers, yeah, it doesn’t exactly scream “healthy swap” or “diet food,” does it? 280 calories per serving is quite a bit for a dessert square, but let’s be real, these are lemon *bars*, not a salad. The fat comes mostly from the butter in the crust, and the carbs from all that delicious sugar and flour. I’ve definitely tried to make them lighter before – reduced sugar, swapped butter for applesauce (don’t even ask). It just wasn’t the same. It lost its characteristic richness and texture. My advice? Enjoy these as a treat! If you’re really concerned about special diets, you could look into specific gluten-free recipes that are designed for lemon bars, rather than just swapping flour. For sugar, you could *slightly* reduce the sugar in the filling, maybe by ¼ cup, if you like things extra tart, but any more than that and it starts to impact the texture too much. Honestly, sometimes it’s better to just have a smaller piece of the real deal than a larger piece of something that just doesn’t hit the spot.
Ingredient Swaps
| Ingredient | Substitution |
|---|---|
| Unsalted Butter | Salted Butter (adjust salt in crust/filling), Margarine (not recommended) |
| All-Purpose Flour | Gluten-Free Flour Blend (texture will change) |
| Fresh Lemon Juice | Bottled Lemon Juice (flavor will be less vibrant) |
| Granulated Sugar | Monk Fruit/Erythritol blend (texture/sweetness may vary, can be gritty) |
| Lemon Zest | None (flavor will be less intense) |
So, about these swaps. I’ve been there, tried almost all of them in a pinch, or out of curiosity. Using salted butter is probably the “least bad” swap, but you really need to cut the pinch of salt from the filling and crust, and even then, you might get a slightly off flavor. It’s fine in a pinch, but it’s not ideal. Margarine, though? Hard pass. I used it once because I was desperate and it made the crust taste greasy and artificial, and the texture was just… weird. Not flaky at all. Gluten-free flour blends are tricky. They work, but expect a different crust. It tends to be more crumbly and less tender, not in a bad way necessarily, but just different. Bottled lemon juice, as I mentioned, is my biggest “no.” You lose so much of that bright, fresh lemon flavor. It just tastes like generic sour. And sugar substitutes? Oh boy. I tried a monk fruit/erythritol blend once for my mom, who’s diabetic. The sweetness was there, but the texture was off. It can sometimes give a slightly gritty mouthfeel, and it doesn’t contribute to the custard’s thickness the same way granulated sugar does. The filling came out a little softer than usual. My best advice for swaps is to only do them if you absolutely have to, and understand that the final product might not be exactly what you expect. Some recipes are just sacred, you know?
Tips
- Always use fresh lemon juice and zest. No shortcuts here!
- Don’t overbake the crust – a light golden is perfect.
- Cool and refrigerate the bars completely before slicing. Patience is your best friend.
- Line your pan with parchment paper with an overhang for easy removal.
Alright, let’s talk tips, because these are all lessons I learned the hard way. That first tip, about fresh lemon juice and zest? That was a disaster for me early on. I was trying to save time and money, so I bought that big yellow plastic lemon of juice. My lemon bars tasted so bland and artificial. It was a true “aha!” moment realizing that the whole soul of a lemon bar is that vibrant, fresh lemon. I wish someone had just told me straight up, “Don’t even bother if you’re not using fresh!” And the cooling and refrigerating part? That’s probably my biggest, most repeated mistake. Every single time I think, “Oh, just a little bit longer in the fridge should be fine,” and then I go to slice them, and the filling is still too soft and it just mushes. It’s like cutting through soft jelly. The bars look messy, and it’s just not satisfying. I’ve learned that if the recipe says “at least 2 hours,” aim for 4, or even overnight. It makes all the difference for those clean, beautiful squares you see in pictures. Trust me, I’ve got the evidence of many botched batches in my memory bank.
FAQ
Q: My lemon bars are runny, what did I do wrong?
A: Oh man, I feel you on this one! The most common culprit here is usually not baking them long enough, or not chilling them properly. The filling might seem set when it comes out of the oven, but it continues to firm up as it cools. If it’s still jiggly like Jell-O when it’s completely cool, it probably needed a few more minutes in the oven. But even if it was baked enough, cutting into it before it’s thoroughly chilled (at least 2 hours, but honestly, overnight is best) will result in a runny mess. It needs that fridge time to become a true custard. Learn from my “deconstructed crumble” mistake!
Q: Can I make these ahead of time?
A: Absolutely! These are fantastic for making ahead. In fact, I often make them the day before I need them. They keep really well in an airtight container in the refrigerator for 3-4 days. The flavors actually meld and deepen a little bit overnight, too, so sometimes they’re even better the next day. Just make sure to dust with powdered sugar right before serving, because it can melt into the bars if you do it too early.
Q: My crust is soggy. How do I fix that?
A: A soggy crust is the worst, isn’t it? I’ve had that happen when I didn’t bake the crust enough initially. You want it to be a light golden brown and feel firm. Another reason could be if you live in a really humid climate, or if you covered the bars before they were completely cool, trapping moisture. Make sure your crust is properly baked, and let the bars cool *completely* uncovered on a wire rack before you even think about putting them in the fridge or covering them up.
That’s everything I know about making Easy Lemon Bars Recipe! Hope you give it a try. And if you mess it up, you’re in good company—I still do it sometimes. But they’re always delicious, even when they’re a little messy!
Easy Lemon Bars Recipe
Master the art of creating classic lemon bars with this perfected recipe, featuring a buttery shortbread crust and a bright, tangy lemon custard filling. This crowd-pleasing dessert is surprisingly simple to make, delivering irresistible sweet and tart squares every time.

Ingredients
- 1 ½ cups all-purpose flour (for crust)
- ½ cup granulated sugar (for crust)
- ¾ cup unsalted butter, cold and cubed (for crust)
- 4 large eggs (for filling)
- 1 ½ cups granulated sugar (for filling)
- ¼ cup all-purpose flour (for filling)
- ¾ cup fresh lemon juice (from about 4-5 lemons)
- Zest of 2 large lemons
- Pinch of salt
- Powdered sugar, for dusting
Instructions
-
Preheat oven to 350°F (175°C). Line a 9×13 inch baking pan with parchment paper, leaving an overhang on the sides.
-
In a large bowl, combine 1 ½ cups flour and ½ cup granulated sugar. Cut in the cold, cubed butter using a pastry blender, your fingers, or a food processor until the mixture resembles coarse crumbs.
-
Press the crumb mixture evenly into the bottom of the prepared pan. Bake for 18-20 minutes, or until lightly golden brown around the edges.
-
While the crust bakes, prepare the filling: In a medium bowl, whisk together the eggs, 1 ½ cups granulated sugar, and ¼ cup flour until smooth.
-
Stir in the fresh lemon juice, lemon zest, and pinch of salt.
-
Once the crust is baked, pour the lemon filling evenly over the hot crust.
-
Return the pan to the oven and bake for another 20-25 minutes, or until the filling is set and edges are lightly golden. The center might still jiggle slightly, that’s okay!
-
Remove from oven and let cool completely on a wire rack. This is super important!
-
Once cooled, refrigerate for at least 2 hours (or even better, overnight) before slicing.
-
Lift the bars out of the pan using the parchment paper overhang. Dust generously with powdered sugar before cutting into squares.
Nutrition (Per Serving)

