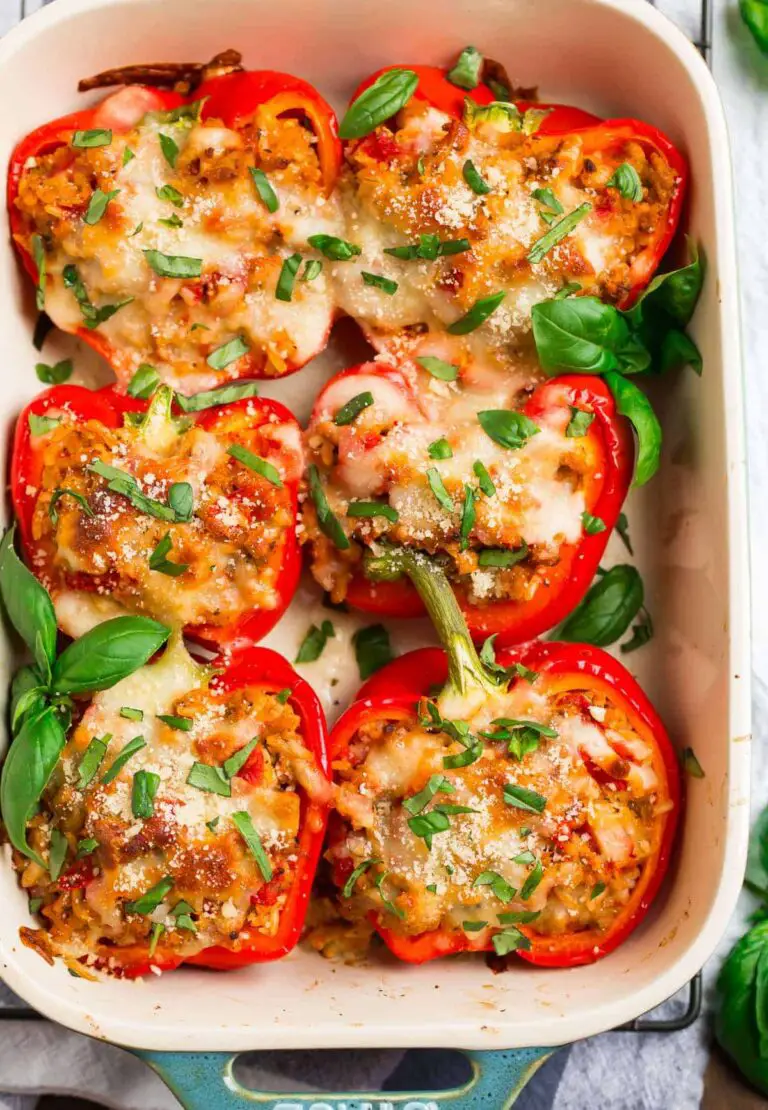
Easy Stuffed Peppers Recipe
Oh man, stuffed peppers. This recipe, the “Easy Stuffed Peppers Recipe,” is probably one of the first “real” meals I ever tried to make that wasn’t just pasta with jarred sauce. I was in college, trying to impress my then-boyfriend (now husband, so I guess it worked!), and I had this vague idea that stuffed peppers were fancy. I remember diligently scooping out the seeds, feeling like a real chef, only to then completely forget to cook the rice *before* mixing it into the ground beef. Yeah, you can imagine. We ended up with chewy, half-cooked rice and kind of raw-tasting beef inside soft peppers. It was edible, barely, and we both laughed so hard. But that day, I vowed to master them, and now it’s a total family favorite, a classic comfort food that I make all the time without even thinking twice. It just makes you feel good, you know?
Recipe Card
| Recipe Title | Easy Stuffed Peppers Recipe |
|---|---|
| Servings | 4 |
| Prep Time | 20 minutes |
| Cooking Time | 45-50 minutes |
| Calories | About 450-500 per serving |
Ingredients
- 4 medium bell peppers (any color, but I love red or orange)
- 1 tbsp olive oil
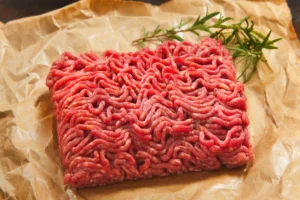
- 1 lb ground beef (80/20 or 90/10 works best)
- 1 medium onion, chopped
- 2 cloves garlic, minced
- 1 (14.5 oz) can diced tomatoes, undrained
- 1 (8 oz) can tomato sauce, divided
- 1 cup cooked rice (white or brown)
- 1 cup shredded cheddar cheese, divided
- 1 tsp dried oregano
- 1/2 tsp dried basil
- Salt and black pepper to taste
Okay, let’s break down these ingredients, ’cause even simple things can go sideways if you’re not careful. First up, the bell peppers. I always go for red, yellow, or orange ones now. They’re sweeter and get super tender.
I tried green ones once because they were on sale, and my husband was like, “Why do these taste like grass?” He wasn’t wrong. They just have a more bitter, almost savory flavor that doesn’t quite blend as well with the sweet tomato sauce, in my opinion.
Olive oil is pretty straightforward, just for sautéing. Nothing too crazy here. I mean, I guess you could use butter, but olive oil feels a little lighter and fits the flavor profile.
The ground beef is super important. I usually pick 80/20. That little bit of fat really adds to the flavor and keeps the filling moist. Don’t go too lean unless you add some extra moisture, like more tomato sauce or a splash of broth.
One time, I tried 99% lean ground turkey breast to be “healthy,” and the filling was so dry and crumbly, it felt like eating seasoned sawdust. I had to dump in half a can of extra tomato sauce just to salvage it. Stick to a little fat, it’s worth it.
Onion and garlic – the flavor foundation! Don’t skip these. Fresh is always best. I’ve been lazy and used garlic powder before, and it just doesn’t have that punch.
One time, I was in a rush and didn’t chop the onion fine enough. My husband found big chunks, and he’s not a fan of raw-ish onion flavor. So take the extra minute, chop ’em small. It makes a difference.
Diced tomatoes – I use canned, undrained, for a little texture and extra liquid. It helps keep the filling from drying out while baking.
I accidentally grabbed crushed tomatoes once, thinking it was close enough. It just made the filling a bit too saucy, almost like chili. Not bad, but not what I was going for. Diced gives you those nice little bursts of tomato.
Tomato sauce – this is key for flavor and moisture, both in the filling and on top. I usually buy the small cans so I can easily divide it. Don’t forget that extra bit for the top, it makes a nice glaze.
There was this one time I forgot to save some for the top and just spooned extra diced tomatoes on there. It tasted okay, but it didn’t look nearly as pretty or have that nice, unified tomato flavor over the cheese.
Cooked rice! This is where my infamous first fail happened. Seriously, cook it first! Any kind works – white, brown, even quinoa if you’re feeling fancy. I usually just use leftover white rice if I have it.
If you don’t cook it beforehand, it won’t cook properly inside the pepper, and you’ll end up with hard, grainy bits. Trust me, I’ve lived that nightmare. Always pre-cook your grain!
Shredded cheddar cheese. I mean, who doesn’t love cheese? It adds creaminess and a little tang. Freshly shredded is always better than pre-shredded, it melts smoother. But no judgment if you use the pre-shredded stuff, I do too sometimes.
Once I ran out of cheddar and tried Monterey Jack. It was fine, melted super well, but didn’t have that classic cheddar taste I was used to. It’s all about what you like, but cheddar is my go-to for this recipe.
Oregano and basil – classic Italian seasoning. These really pull all the flavors together. Don’t underestimate the power of dried herbs. They really bloom with the heat.
I once used Italian seasoning mix instead of separate oregano and basil, which worked fine. But when I completely forgot the herbs, the dish tasted so bland. It just screamed, “Something is missing!”
Salt and pepper to taste. Always taste your filling before stuffing! Seasoning is super personal, so start with a little and add more. A bland filling makes for a bland pepper, and nobody wants that.
I learned the hard way that you really need to season the meat mixture well. The peppers themselves don’t add much salt, so if your filling is under-seasoned, the whole dish falls flat. Don’t be afraid to taste and adjust.
Directions
- Preheat your oven to 375°F (190°C). Lightly grease a 9×13 inch baking dish.
- Wash the bell peppers. Slice each pepper in half lengthwise, from stem to tip. Scoop out all the seeds and membranes.
- Heat olive oil in a large skillet over medium-high heat. Add ground beef and cook, breaking it up with a spoon, until browned. Drain any excess fat.
- Add chopped onion to the skillet with the beef and cook until softened, about 5 minutes. Stir in minced garlic and cook for another minute until fragrant.
- Stir in diced tomatoes (undrained), half of the tomato sauce (4 oz), cooked rice, oregano, basil, salt, and pepper. Mix well.
- Remove the skillet from the heat. Stir in half of the shredded cheddar cheese (1/2 cup) until just combined.
- Arrange the bell pepper halves in the prepared baking dish. Spoon the beef and rice mixture evenly into each pepper half, mounding it slightly.
- Pour the remaining tomato sauce (4 oz) over the tops of the stuffed peppers.
- Cover the baking dish loosely with aluminum foil. Bake for 30 minutes.
- Remove the foil, sprinkle the remaining shredded cheddar cheese (1/2 cup) over the tops of the peppers.
- Return to the oven, uncovered, and bake for another 15-20 minutes, or until the peppers are tender and the cheese is bubbly and lightly browned.
- Let rest for a few minutes before serving.
Okay, let’s talk about the directions, because even with an “easy” recipe, there are places where you can totally stumble. Step 2, slicing and deseeding the peppers, sounds simple, right? One time, I was rushing and sliced them across the middle, like a bowl. It meant they couldn’t stand up straight in the baking dish and kept flopping over, spilling their precious filling. Big mess. Always slice them lengthwise, stem to tip, so they sit flat and stable.
Another common mistake I’ve made is overstuffing. I get so excited about the filling, I just pile it high. But when they cook, the filling expands a bit, and if there’s too much, it’ll just bubble right over the sides and into your baking dish. You lose precious filling, and your dish gets gunky. Fill ’em up, but leave a tiny bit of breathing room at the top.
And then there’s the cooking time. It says 45-50 minutes, but ovens vary, and so do peppers. I’ve pulled them out after 45 minutes thinking they were done, only to find the peppers were still a bit too firm for my liking. Now, I always poke them with a fork. If it slides in easily, they’re perfect. If there’s resistance, I give them another 5-10 minutes. Nobody wants crunchy peppers in their stuffed pepper!
Seriously, this Easy Stuffed Peppers Recipe is such a lifesaver for our family. I mean, beyond that disastrous first attempt with the raw rice, it’s become a symbol of comfort food in our house. It’s one of those dinners that just feels like a big, warm hug, perfect after a long day or when you just need something hearty and satisfying.
What I really love about it is how forgiving it is. Even if I mess up a tiny bit, like using a different kind of cheese or accidentally adding too much onion, it still turns out delicious. It’s almost impossible to truly ruin it once you get the hang of cooking the rice beforehand!
It’s also fantastic for meal prep. I often make a double batch on Sunday, and we have lunches or easy dinners for a few days. They reheat beautifully in the microwave, or you can even pop them back in the oven. It’s way healthier than grabbing takeout, and it feels like a proper home-cooked meal even on a busy weeknight.
If I had to change one thing for next time? I’ve been thinking about trying it with some smoked paprika in the filling, just for a little extra depth. Or maybe a tiny pinch of red pepper flakes for a subtle kick. But honestly, as is, it’s pretty perfect. It’s a healthy swap for heavier dishes, but still feels like total indulgence. A real family favorite!
Nutrition Info (per serving)
| Calories | Carbs | Fat | Protein |
|---|---|---|---|
| 480 | 35g | 28g | 25g |
Does the nutrition surprise you? Honestly, the calories might seem a little high for some, but remember, it’s a full meal in one! I’ve definitely made it lighter by swapping the ground beef for lean ground turkey or even lentils for a vegetarian version. If you’re watching your carbs, you could reduce the rice and add more veggies like mushrooms or spinach to the filling. For special diets, going with ground turkey and brown rice definitely bumps up the healthy factor without sacrificing too much taste. It’s super adaptable, which is another reason I love it!
Ingredient Swaps
| Ingredient | Substitution |
|---|---|
| Ground Beef | Ground turkey, ground chicken, or cooked lentils |
| White Rice | Brown rice, quinoa, or cauliflower rice (for low carb) |
| Cheddar Cheese | Mozzarella, Colby Jack, or a dairy-free shredded cheese |
| Bell Peppers | Zucchini or hollowed-out tomatoes (requires shorter baking time) |
| Tomato Sauce/Diced Tomatoes | Marinara sauce, crushed tomatoes, or even a can of Rotel for a kick |
Okay, these swaps? Some are winners, some are… well, learning experiences. Ground turkey is a pretty solid swap for beef, just remember my earlier warning about dryness – add a little extra moisture or fat to keep it from being chalky. Cooked lentils make for a great vegetarian option, and they hold up really well. I’ve even done half beef, half lentils before, and it was surprisingly good!
For the rice, brown rice or quinoa totally work, adding more fiber. But cauliflower rice? That one’s tricky. It gets really soft and releases a lot of water, which can make your filling watery. You really need to squeeze out all the moisture from the cauliflower rice before adding it, and maybe cook it a bit longer uncovered to let some of that liquid evaporate.
Cheese swaps are pretty safe. Mozzarella makes it super stringy and melty, which is fun. Dairy-free cheese… well, some melt better than others, so pick a brand you trust. And using zucchini or big tomatoes instead of peppers? Zucchini gets super tender, but can also be watery. Tomatoes are fine, but they burst easier, so handle with care and maybe bake them in a smaller dish to hold their shape.
As for tomato sauce swaps, marinara is usually a safe bet, adding a little extra herb flavor. Crushed tomatoes work, but again, your filling will be a bit wetter. Rotel? Oh yeah, if you like a little spicy kick, that’s a fantastic swap! Just be ready for that extra heat.
Tips
- Don’t overstuff your peppers! Leave a little room at the top for the filling to expand.
- Taste and adjust your filling before you stuff the peppers. It’s your last chance to add more seasoning!
- If your peppers are wobbly, trim a tiny bit off the bottom (the rounded part) to help them sit flat in the baking dish.
- For crispier peppers, you can par-bake the empty halves for 10-15 minutes before stuffing.
- Let them rest for 5-10 minutes after baking. The flavors meld, and they’re easier to serve without falling apart.
Alright, these tips are hard-won, let me tell you. The “don’t overstuff” one? I learned that after a particularly ambitious attempt where half my filling bubbled over and welded itself to the baking dish. It was a nightmare to clean, and half the deliciousness ended up as crusty bits. Now I always err on the side of slightly under-filled, just to be safe.
And tasting the filling? Oh man, that’s a rookie mistake I still make sometimes when I’m tired. I just assume it’s seasoned enough, only to take a bite of the finished pepper and realize it’s a bit bland. It’s so much harder to fix after it’s baked! Now I always grab a tiny spoonful of the cooked meat mixture, let it cool a second, and give it a try. Wish I knew that earlier, it would’ve saved some “well, it’s *okay*” dinners.
The tip about trimming the bottom of wobbly peppers is a game changer. I used to just let them lean against each other, hoping for the best, and sometimes they’d still tip over a bit, especially if they were unevenly cut. A tiny flat spot on the bottom makes all the difference for stability, no more wobbly pepper towers in the oven!
FAQ
Q: Can I prepare these ahead of time?
A: Absolutely! This is one of my favorite things about stuffed peppers. You can assemble them completely, right up to the point of baking, cover the dish tightly with plastic wrap, and pop them in the fridge for up to 24 hours. Just add an extra 10-15 minutes to your baking time if they’re going in cold from the fridge. I’ve done this for dinner parties, and it saves so much stress.
Q: How do I prevent the peppers from being too watery?
A: Ah, the watery pepper problem! I’ve definitely had this. First, make sure you drain all the fat from your ground beef after browning. That’s a big culprit. Second, if your diced tomatoes seem extra juicy, you can drain some of the liquid before adding them to the filling. Also, using a bit less tomato sauce in the filling itself helps. And make sure your rice is cooked but not mushy, as mushy rice can absorb less liquid. If you use a very watery vegetable like mushrooms, sauté them separately first to cook off their moisture before adding them to the filling.
Q: Can I freeze leftover stuffed peppers?
A: Yes, you totally can! I do it all the time. Let them cool completely after baking. Then, you can wrap individual peppers tightly in plastic wrap, then foil, and place them in a freezer-safe bag or container. They’ll last for about 2-3 months. To reheat, you can bake them from frozen (covered) at 350°F for about an hour, or until heated through, then uncover for the last 15 minutes to crisp up the cheese. They’re such a great freezer meal for busy nights!
That’s everything I know about making Easy Stuffed Peppers Recipe! Hope you give it a try. And if you mess it up, you’re in good company—I still do it sometimes, but they’re always delicious!