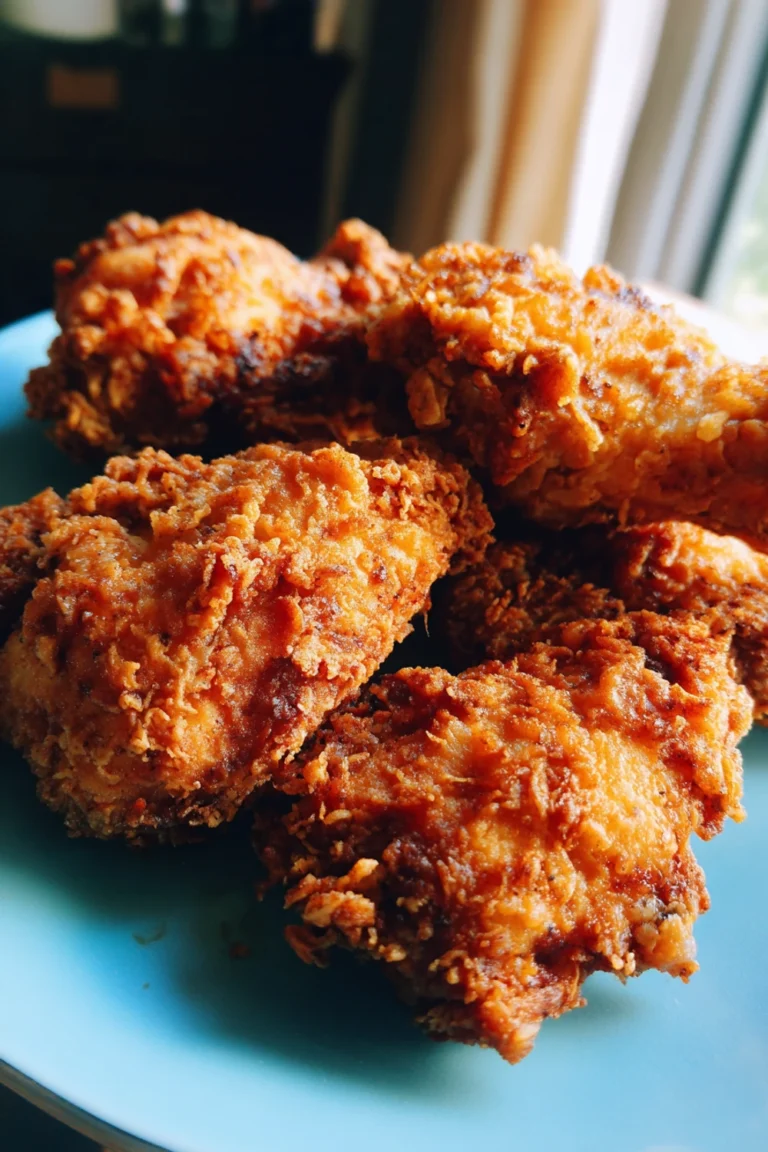
Buttermilk Fried Chicken Recipe
I’ll never forget the first time I tried to make buttermilk fried chicken. I was so excited, I invited my whole family over. I thought, how hard could it be? Well, I ended up with chicken that was black on the outside and totally raw inside. My brother still won’t let me live it down. But that failure made me obsessed with getting it right, and now it’s my go-to comfort food for every big gathering.
Recipe Card
| Recipe Title | Buttermilk Fried Chicken Recipe |
|---|---|
| Servings | 4-6 people |
| Prep Time | 4 hours (mostly marinating) |
| Cooking Time | 20-25 minutes |
| Calories | Approx. 520 per piece |
Ingredients
- 3 lbs chicken pieces (thighs and drumsticks work best)
- 4 cups buttermilk
- 2 tablespoons hot sauce (like Frank’s)
- 3 cups all-purpose flour
- 2 tablespoons cornstarch
- 1 tablespoon garlic powder
- 1 tablespoon paprika
- 2 teaspoons salt
- 1 teaspoon black pepper
- 1/2 teaspoon cayenne pepper (optional)
- Vegetable oil, for frying (about 1 quart)
The buttermilk is non-negotiable, trust me. I once tried to use regular milk with a squeeze of lemon because I was out, and it was a total flop. The chicken didn’t get tender at all. And don’t skip the hot sauce! It doesn’t make it spicy, just gives it a way better flavor. I learned that the hard way with a bland batch.
Directions
- In a big bowl, whisk together the buttermilk and hot sauce.
- Add the chicken pieces, making sure they’re all submerged. Cover and refrigerate for at least 4 hours, or overnight is even better.
- In another large bowl, mix the flour, cornstarch, garlic powder, paprika, salt, black pepper, and cayenne.
- Take a piece of chicken from the buttermilk, let the excess drip off, and dredge it thoroughly in the flour mixture. Press it on good!
- Place the coated chicken on a wire rack and let it sit for 15-20 minutes. This helps the coating stick.
- Meanwhile, pour oil into a large, heavy pot (like a Dutch oven) until it’s about 2 inches deep. Heat it to 350°F.
- Carefully place 3-4 pieces of chicken in the hot oil. Don’t crowd the pot!
- Fry for about 12-15 minutes, turning occasionally, until it’s golden brown and crispy. The internal temp should be 165°F.
- Remove the chicken and let it drain on a clean wire rack, not on paper towels.
- Let it rest for a few minutes before serving. It’s worth the wait!
The biggest mistake I made for years was crowding the pot. I was impatient and wanted to fry it all at once. The oil temp plummeted, the chicken steamed instead of fried, and I got a greasy, sad mess. Now I fry in small batches, no matter how long it takes. It makes all the difference between good and great fried chicken.
Another thing I learned the hard way was skipping the rest after dredging. I’d coat it and throw it right in the oil. Half the breading would slide right off and sink to the bottom of the pot. Letting it sit on the rack for a bit lets the coating set up, so you get that perfect, craggy crust that stays on.
And for heaven’s sake, use a thermometer for the oil! I used to just guess if it was “hot enough” by throwing a little flour in. Sometimes it was too cold, sometimes it was smoking hot and burned immediately. A simple candy thermometer changed my fried chicken life. It’s the easiest way to avoid my first epic fail.
Nutrition Info (per serving)
| Calories | Carbs | Fat | Protein |
|---|---|---|---|
| 520 | 25g | 28g | 38g |
Look, it’s fried chicken, it’s not health food. But I don’t make it every day, it’s a treat! I’ve tried baking it to make it lighter, but it’s just not the same. The texture is all wrong. If I’m being good, I’ll just have one piece with a huge side salad. Life’s about balance, right?
Ingredient Swaps
| Ingredient | Substitution |
|---|---|
| Buttermilk | Plain yogurt thinned with a little milk |
| All-purpose flour | Gluten-free 1-to-1 flour blend |
| Vegetable oil | Peanut oil or canola oil |
I’ve tried a lot of these. The yogurt swap works pretty well, actually! It gives a similar tang and tenderizes the chicken. Gluten-free flour works fine for the coating, no one will notice. But do not, I repeat, do NOT try to use olive oil for frying. It has a low smoke point and will make your whole house smell funky and give the chicken a weird taste. Learned that one the expensive way.
Tips
- Use a Dutch oven or a heavy-bottomed pot. It holds heat so much better than a flimsy pan.
- Double-dip for extra crunch! After the first dredge in flour, dip it back in the buttermilk and then in the flour again.
- Let the oil come back to temp between batches. If you add chicken to oil that’s too cool, it gets greasy.
- Keep the fried chicken warm in a 200°F oven on a wire rack while you finish the other batches.
The double-dip tip was a game-changer for me. I saw it online and thought it was just for show. But it creates those little nooks and crannies that get super crispy. The first time I did it, I was worried it would be too thick, but it was the best batch I’d ever made. My husband said it tasted like it came from a proper restaurant.
FAQ
Can I marinate the chicken for longer than overnight?
Yeah, but be careful. I once left it in the buttermilk for two full days because my plans changed. The chicken got almost too tender and a little mushy on the outside. 24 hours is the absolute max, I’d say.
Why is my seasoning burning in the oil?
Oh man, I’ve done this. If your heat is too high, the paprika and garlic powder in the flour can burn before the chicken is cooked. That’s why keeping that oil at a steady 350°F is so important. If you see little black specks floating in the oil, that’s burnt seasoning. Time to skim it out or start with fresh oil.
How do I reheat leftovers without them getting soggy?
Do not microwave it! You’ll end up with rubbery, sad chicken. The best way is to heat it in a 375°F oven on a wire rack for about 10-15 minutes. It won’t be *quite* as good as fresh, but it’ll still be crispy and delicious. It makes for an easy dinner the next night.
That’s everything I know about making Buttermilk Fried Chicken Recipe! Hope you give it a try, and if you mess it up, you’re in good company—I do it all the time.
Buttermilk Fried Chicken Recipe
Crispy, golden-brown buttermilk fried chicken with a perfectly seasoned crust and tender, juicy interior. A foolproof recipe learned from years of trial and error.

Ingredients
- 3 lbs chicken pieces (thighs and drumsticks)
- 4 cups buttermilk
- 2 tablespoons hot sauce (like Frank’s)
- 3 cups all-purpose flour
- 2 tablespoons cornstarch
- 1 tablespoon garlic powder
- 1 tablespoon paprika
- 2 teaspoons salt
- 1 teaspoon black pepper
- 1\/2 teaspoon cayenne pepper (optional)
- 1 quart vegetable oil (for frying)
Instructions
- In a large bowl, whisk together buttermilk and hot sauce until well combined.
- Add chicken pieces to the buttermilk mixture, ensuring all pieces are fully submerged. Cover and refrigerate for at least 4 hours or overnight.
- In another large bowl, combine flour, cornstarch, garlic powder, paprika, salt, black pepper, and cayenne pepper. Mix thoroughly.
- Remove chicken from buttermilk, allowing excess to drip off. Dredge each piece thoroughly in the flour mixture, pressing firmly to ensure good adhesion.
- Place coated chicken on a wire rack and let rest for 15-20 minutes to help the coating set.
- Pour oil into a large Dutch oven or heavy-bottomed pot until it reaches 2 inches deep. Heat oil to 350°F using a thermometer.
- Carefully place 3-4 pieces of chicken in the hot oil, avoiding overcrowding the pot.
- Fry for 12-15 minutes, turning occasionally, until golden brown and crispy. Internal temperature should reach 165°F.
- Remove chicken from oil and drain on a clean wire rack (not paper towels).
- Let chicken rest for 5 minutes before serving to allow juices to redistribute.