Easy Chicken Katsu Recipe for Crispy Perfection
I’ll never forget the first time I tried to make this Easy Chicken Katsu Recipe for Crispy Perfection. I was so confident, I invited my friend over for dinner. I ended up with chicken that was somehow both burnt on the outside and raw in the middle. We had to order pizza and I felt so defeated. But I kept trying because my cousin had raved about how good it was, and now it’s my go-to comfort food for a crazy easy dinner that always impresses.
Recipe Card
| Recipe Title | Easy Chicken Katsu Recipe for Crispy Perfection |
|---|---|
| Servings | 4 |
| Prep Time | 15 minutes |
| Cooking Time | 15 minutes |
| Calories | approx. 520 |
Ingredients
- 2 large boneless, skinless chicken breasts
- 1 tsp kosher salt
- 1/2 tsp black pepper
- 1 cup all-purpose flour
- 2 large eggs
- 2 tbsp water
- 2 cups panko breadcrumbs
- 1 cup neutral oil (like canola or vegetable)
- 1/2 head of cabbage, shredded (for serving)
- Tonkatsu sauce, for serving
The panko is non-negotiable for that crispy perfection. I once used regular breadcrumbs because it’s all I had, and it was a sad, soggy mess. And don’t skip the tonkatsu sauce! It’s the perfect tangy-sweet partner. I tried to make my own once and it was a complete disaster, so I just buy the bottle now.
Directions
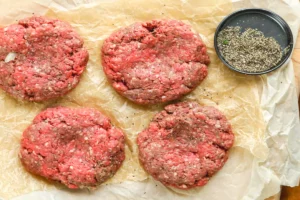
- First, slice your chicken breasts in half horizontally to make four thinner cutlets.
- Place them between two pieces of plastic wrap and gently pound them with a rolling pin or pan until they’re about 1/2 inch thick.
- Season both sides of each cutlet generously with the salt and pepper.
- Now, set up your breading station: one shallow dish with the flour, another with the eggs beaten with water, and a third with the panko.
- Dredge each chicken cutlet in the flour, shaking off any excess.
- Next, dip it into the egg wash, making sure it’s fully coated.
- Finally, press it firmly into the panko, coating both sides completely. Really press those crumbs on there!
- Heat the oil in a large skillet over medium-high heat. To test if it’s ready, drop a panko crumb in—if it sizzles immediately, you’re good to go.
- Carefully place two cutlets in the hot oil. Don’t crowd the pan!
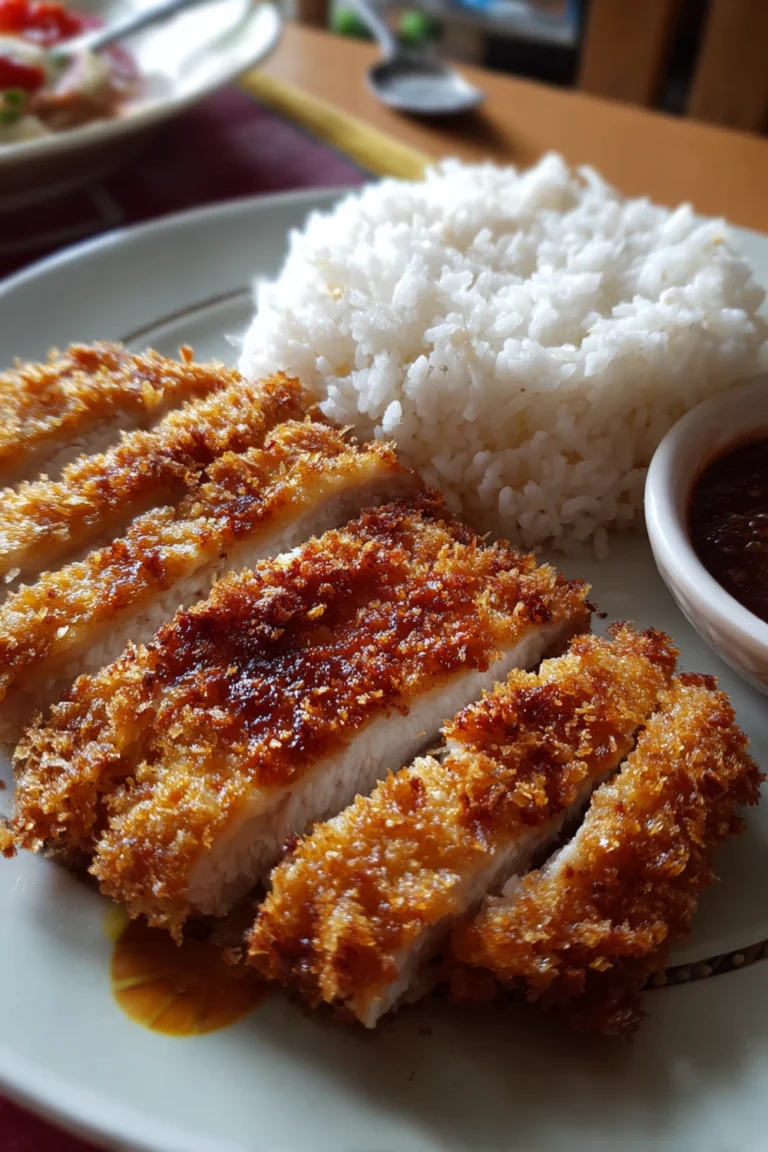
- Fry for about 4-5 minutes per side, until they’re a deep golden brown and cooked through.
- Transfer to a wire rack set over a baking sheet to drain. This keeps the bottom from getting soggy.
- Repeat with the remaining two cutlets.
- Let them rest for a couple minutes, then slice and serve over shredded cabbage with a generous drizzle of tonkatsu sauce.
The biggest lesson I learned the hard way is about the oil temperature. If it’s not hot enough, the chicken will just soak up all the oil and get greasy. If it’s too hot, the panko burns before the chicken is cooked. I ruined a whole batch that way. Using a thermometer helps, but the panko sizzle test is my lazy, reliable method.
This Easy Chicken Katsu Recipe for Crispy Perfection has saved me on so many busy weeknights. It feels fancy but it’s seriously such an easy dinner to throw together. My family goes nuts for it, and my kids actually eat the cabbage because it’s underneath all that saucy, crispy goodness. It’s our ultimate comfort food.
And the leftovers are no joke. I used to think fried chicken would get soggy, but this holds up surprisingly well. I’ll chop up a leftover cutlet the next day and put it on a salad or even in a sandwich. It’s just as good cold, which is a miracle if you ask me. I love a recipe that does double duty.
If I were to change one thing next time, I might try using an air fryer just to see what happens. I’m a little scared to mess with a good thing, but I’m curious if I can get that same crunch with a little less oil. I’ll report back if it doesn’t end in total failure!
Nutrition Info (per serving)
| Calories | Carbs | Fat | Protein |
|---|---|---|---|
| 520 | 35g | 25g | 35g |
Okay, so it’s not a salad. I know. But it’s a treat! To make it a bit lighter, I always serve it with a huge pile of shredded cabbage, which makes the plate feel bigger and adds some veggies. You could also try baking it on a well-oiled rack, but honestly, frying it gives it that authentic texture that’s worth the splurge for me.
Ingredient Swaps
| Ingredient | Substitution |
|---|---|
| Chicken Breast | Chicken thighs or even thin pork chops (then it’s tonkatsu!) |
| All-Purpose Flour | Gluten-free 1-to-1 flour blend |
| Panko Breadcrumbs | Gluten-free panko or crushed cornflakes |
| Neutral Oil | Avocado oil works great too |
I’ve tried the gluten-free swaps for a friend and they worked surprisingly well! The cornflakes give a different, but still delicious, kind of crunch. But I tried using pork rinds instead of panko once for a keto version and… let’s just say it was a very dark, very salty period in my cooking life that we don’t need to revisit.
Tips
- Really press the panko into the chicken. Don’t be gentle—make sure it’s on there good.
- Let the oil come back up to temperature between batches. Patience is key for crispy perfection.
- Use a wire rack, not paper towels, to drain. This was a total game-changer for me to avoid a soggy bottom.
- Don’t skip pounding the chicken. Even thickness means even cooking, no raw spots.
That wire rack tip I learned after a truly tragic dinner where my beautiful katsu went soft the second it hit the paper towels. I was so mad at myself. Now I just put a baking sheet under the rack to catch drips and it solves everything. Why did it take me so long to figure that out?
FAQ
Can I bake this instead of frying?
You can, but it won’t be the same, I’m not gonna lie. I’ve tried it. Brush both sides with a good amount of oil and bake at 400°F on a wire rack until crispy. It’s good, but it’s missing that specific fried crunch that makes this Easy Chicken Katsu Recipe so special.
My breading is falling off! What did I do wrong?
Oh man, I’ve been there. This usually happens if you didn’t shake off the excess flour after the first step. That flour layer helps the egg stick, which helps the panko stick. If you glob on too much flour, the whole thing just slides right off. A light, even coat is the secret.
How do I know when the chicken is done?
The best way is to use a meat thermometer—it should read 165°F in the thickest part. If you’re like me and can never find the thermometer, just make a small cut into the thickest part of one cutlet. No pink? You’re golden. Literally.
That’s everything I know about making this Easy Chicken Katsu Recipe for Crispy Perfection! Hope you give it a try. And if you mess it up, you’re in good company—I still do it sometimes. Text me if you have questions!
Easy Chicken Katsu Recipe for Crispy Perfection
Crispy, golden-brown chicken cutlets served with shredded cabbage and tangy tonkatsu sauce for an authentic Japanese comfort food experience that’s surprisingly easy to make.

Ingredients
- 2 large boneless, skinless chicken breasts
- 1 tsp kosher salt
- 1\/2 tsp black pepper
- 1 cup all-purpose flour
- 2 large eggs
- 2 tbsp water
- 2 cups panko breadcrumbs
- 1 cup neutral oil (canola or vegetable)
- 1\/2 head cabbage, shredded
- Tonkatsu sauce, for serving
Instructions
- Slice chicken breasts in half horizontally to create four thinner cutlets
- Place cutlets between plastic wrap and pound to 1\/2 inch thickness
- Season both sides with salt and pepper
- Set up breading station: flour in one dish, eggs beaten with water in second, panko in third
- Dredge each cutlet in flour, shaking off excess
- Dip in egg wash, ensuring full coating
- Press firmly into panko, coating both sides completely
- Heat oil in large skillet over medium-high heat (test with panko crumb – should sizzle immediately)
- Carefully place two cutlets in hot oil (don’t crowd pan)
- Fry for 4-5 minutes per side until deep golden brown and cooked through
- Transfer to wire rack over baking sheet to drain
- Repeat with remaining cutlets
- Let rest 2 minutes, then slice and serve over shredded cabbage with tonkatsu sauce