

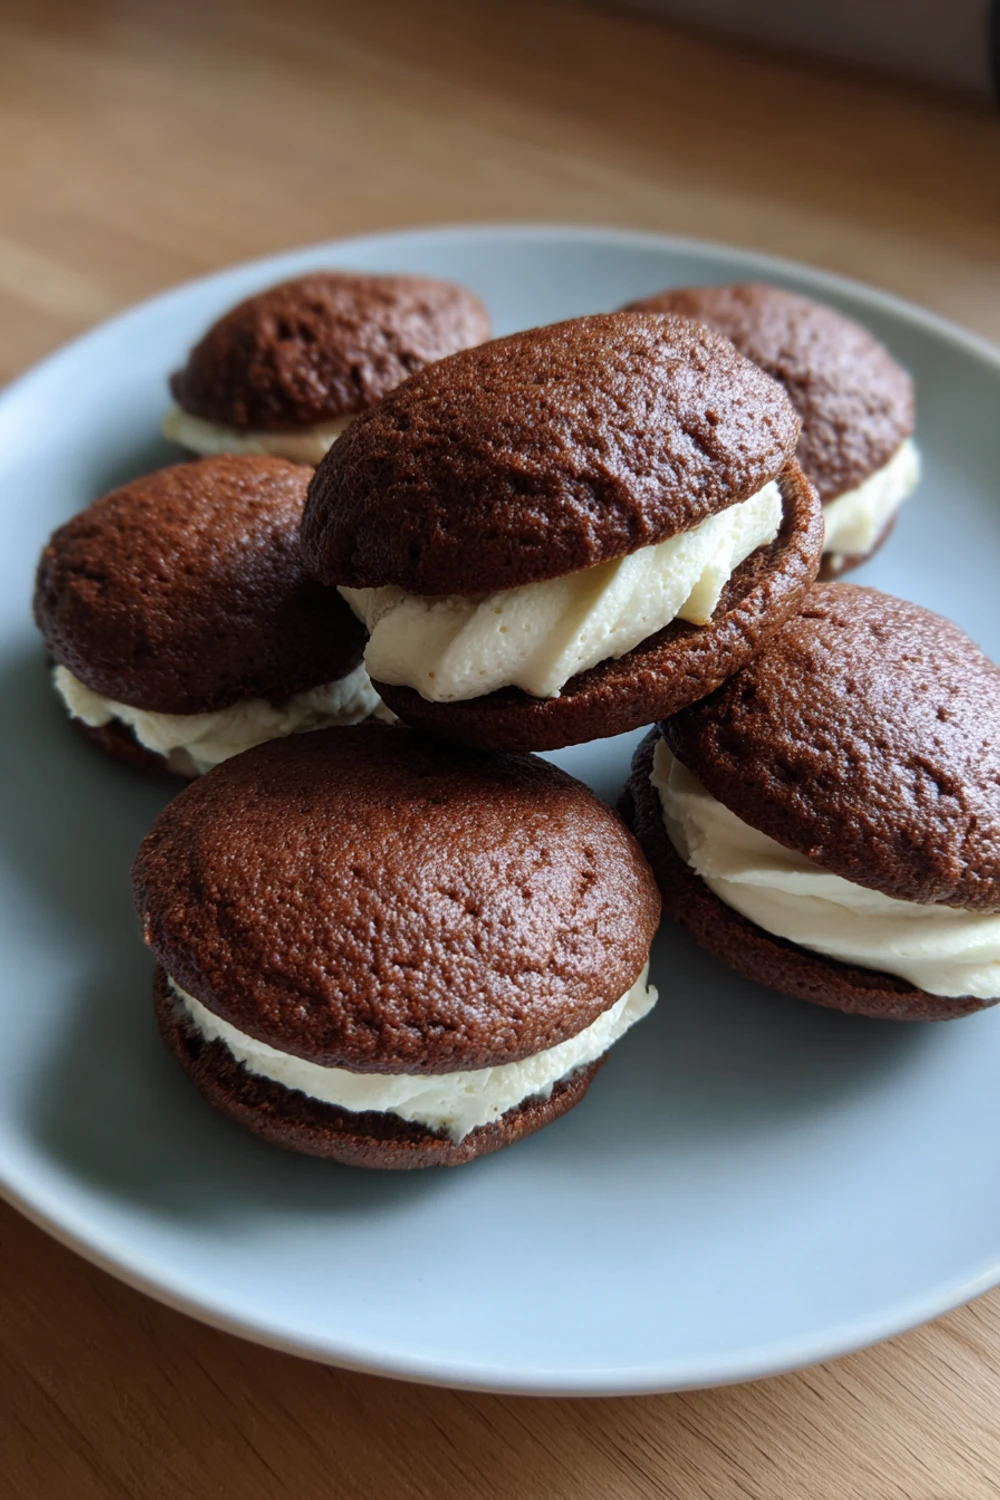
Easy Whoopie Pies Recipe
The first time I tried making whoopie pies, I was convinced they were a complete disaster. I was trying to impress my family at a reunion and ended up with flat, crispy puddles instead of soft, cakey rounds. My cousin took one look and asked if they were fancy cookies, not pies. I learned that day that baking is a science, but also that even ugly whoopie pies still taste amazing. That’s why I love this easy whoopie pies recipe so much—it’s forgiving and always brings a smile, even when they’re not perfect.
Recipe Card
| Recipe Title | Easy Whoopie Pies Recipe |
|---|---|
| Servings | 12 pies |
| Prep Time | 20 minutes |
| Cooking Time | 10 minutes |
| Calories | 320 per pie |
Ingredients
- 2 cups all-purpose flour
- 1/2 cup cocoa powder
- 1 tsp baking soda
- 1/2 tsp salt
- 1/2 cup unsalted butter, softened
- 1 cup granulated sugar
- 1 large egg
- 1 tsp vanilla extract
- 1 cup milk
- 1/2 cup shortening
- 1 1/2 cups powdered sugar
- 1 tsp vanilla extract (for filling)
- 2 tbsp milk (for filling)
I once used salted butter by mistake and the cakes turned out way too salty. It totally threw off the sweet balance. Now I always double-check my butter. And that shortening in the filling? I tried all-butter once and it was a melty mess. Shortening might not be fancy, but it holds up so much better.
Directions
- Preheat your oven to 350°F and line baking sheets with parchment paper.
- Whisk together the flour, cocoa powder, baking soda, and salt in a medium bowl.
- In a large bowl, cream the softened butter and sugar until it’s light and fluffy.
- Beat in the egg and vanilla until everything is just combined.
- Alternate adding the dry ingredients and the milk to the butter mixture, starting and ending with the dry stuff.
- Drop tablespoon-sized mounds of batter onto the prepared sheets, spacing them about 2 inches apart.
- Bake for 10-12 minutes, until the tops spring back when you touch them lightly.
- Let the cakes cool completely on a wire rack before you even think about filling them.
- For the filling, beat the shortening until it’s smooth, then gradually mix in the powdered sugar.
- Add the vanilla and milk, and beat until it’s fluffy and spreadable.
- Spread a generous amount of filling on the flat side of one cake and top it with another.
- Gently press them together and try not to eat them all at once.
The biggest mistake I make is not spacing the batter enough. They spread like crazy and I end up with one giant whoopie pie sheet. It tastes fine but looks ridiculous. And for the love of all that is good, let them cool! I’ve ruined so many by filling them warm. The filling just melts everywhere and it’s a sad, goopy situation.
I love making these for my kids because they’re a fun project. We always end up with more frosting on our faces than in the pies, but that’s part of the charm. They’re the ultimate comfort food for a rainy day. And the leftovers (if there are any) are actually better the next day. The filling softens the cakes a little and it’s just perfect.
Next time, I might try adding a pinch of espresso powder to the batter. I hear it deepens the chocolate flavor without making it taste like coffee. I’m always looking for little ways to tweak my favorite recipes. But honestly, this easy whoopie pies recipe is a family favorite just the way it is.
Nutrition Info (per serving)
| Calories | Carbs | Fat | Protein |
|---|---|---|---|
| 320 | 45g | 15g | 4g |
Yeah, these are definitely a treat and not a health food. I’ve tried making them with applesauce instead of some butter, and they were okay but definitely more cake-like and less sturdy. For a special occasion though, I say just go for the real deal. Life’s too short for bad whoopie pies.
Ingredient Swaps
| Ingredient | Substitution |
|---|---|
| All-purpose flour | Gluten-free 1-to-1 blend |
| Milk | Buttermilk or almond milk |
| Shortening | More butter (but it’ll be softer) |
| Granulated sugar | Brown sugar for a deeper flavor |
I used a gluten-free blend for my friend once and it worked surprisingly well. The texture was a tiny bit more crumbly, but she loved them. Swapping buttermilk for regular milk is my go-to move now—it gives the cakes a little tang that cuts the sweetness. But the butter-for-shortening swap is risky. It tastes great but doesn’t hold its shape, so eat them fast!
Tips
- Use a cookie scoop for perfectly even cakes every time.
- Don’t overmix the batter! Stir until just combined for soft cakes.
- Chill the filling for 15 minutes if your kitchen is warm.
- Let the cakes cool completely before assembling.
I cannot stress the overmixing thing enough. I got overzealous with my hand mixer one time and the cakes came out tough and flat. It was such a bummer. Now I mix by hand once the dry ingredients go in. It feels a little old-fashioned, but it works. A cookie scoop was a game-changer for me too—no more weird, misshapen pies.
FAQ
Can I make these ahead of time?
Absolutely! The cakes can be baked a day ahead and stored in an airtight container. I actually think they’re better when the filling has a chance to meld with the cake overnight. Just assemble them the day you want to serve them so they don’t get too soft.
Why did my whoopie pies come out flat?
Oh man, I’ve been there. This usually means your baking soda is old. It loses its power over time. Test it by dropping a little in some vinegar—if it doesn’t bubble vigorously, it’s time for a new box. Also, make sure your butter is softened, not melted.
Can I freeze them?
Yes! They freeze beautifully. Wrap each pie individually in plastic wrap and pop them in a freezer bag. They’ll keep for a couple months. Just thaw them at room temperature for an hour or so. It’s like having a little secret dessert stash for emergencies.
That’s everything I know about making Easy Whoopie Pies Recipe! Hope you give it a try, and if you mess it up, you’re in good company—I do it all the time.
Easy Whoopie Pies Recipe
A forgiving and delicious recipe for soft, cakey chocolate whoopie pies with a fluffy vanilla cream filling, perfect for a fun baking project.
Ingredients
- 2 cups all-purpose flour
- 1/2 cup cocoa powder
- 1 tsp baking soda
- 1/2 tsp salt
- 1/2 cup unsalted butter, softened
- 1 cup granulated sugar
- 1 large egg
- 1 tsp vanilla extract
- 1 cup milk
- 1/2 cup shortening
- 1 1/2 cups powdered sugar
- 1 tsp vanilla extract (for filling)
- 2 tbsp milk (for filling)
Instructions
-
Preheat oven to 350°F (175°C) and line baking sheets with parchment paper.
-
In a medium bowl, whisk together the flour, cocoa powder, baking soda, and salt.
-
In a large bowl, cream the softened butter and granulated sugar until light and fluffy.
-
Beat in the egg and 1 tsp vanilla extract until just combined.
-
Alternate adding the dry ingredients and the 1 cup of milk to the butter mixture, beginning and ending with the dry ingredients. Mix until just combined.
-
Drop tablespoon-sized mounds of batter onto the prepared baking sheets, spacing them about 2 inches apart.
-
Bake for 10-12 minutes, or until the tops spring back when touched lightly.
-
Transfer the cakes to a wire rack and let them cool completely.
-
For the filling, beat the shortening until smooth.
-
Gradually mix in the powdered sugar.
-
Add the 1 tsp vanilla extract for filling and 2 tbsp of milk, then beat until the filling is fluffy and spreadable.
-
Spread a generous amount of filling onto the flat side of one cooled cake and top it with another cake, flat side down.
-
Gently press them together to form a pie.
Nutrition (Per Serving)

