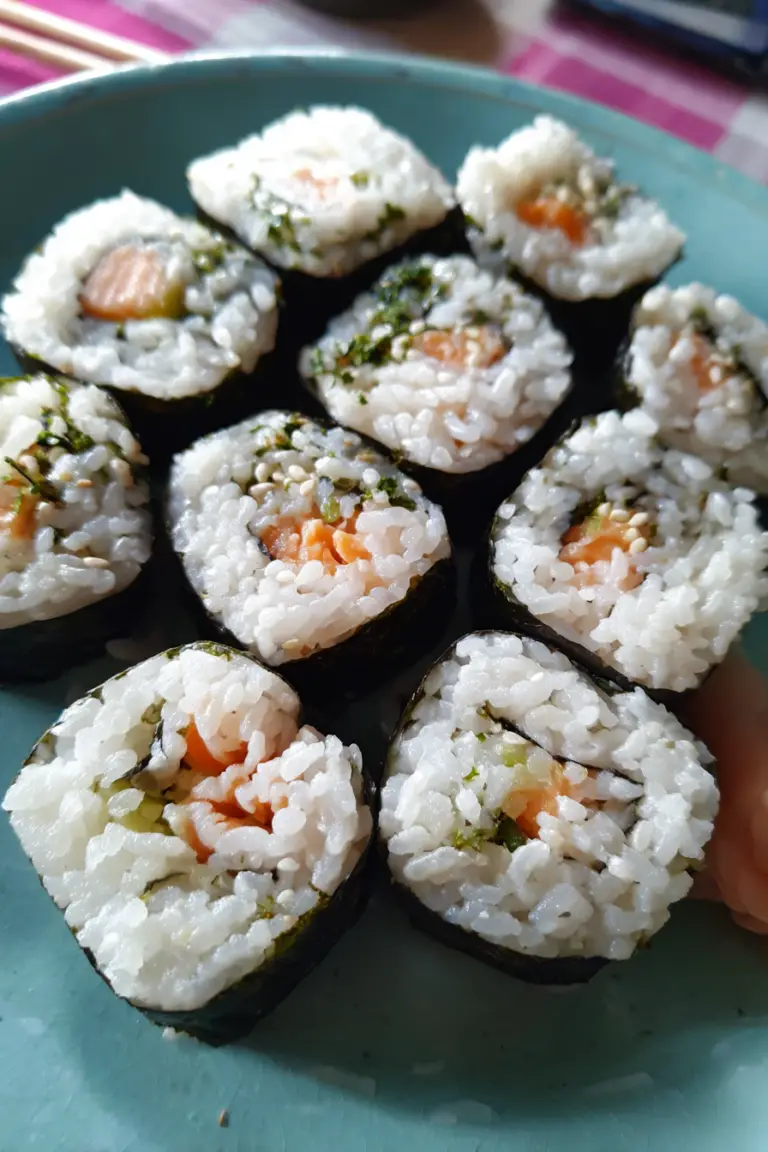
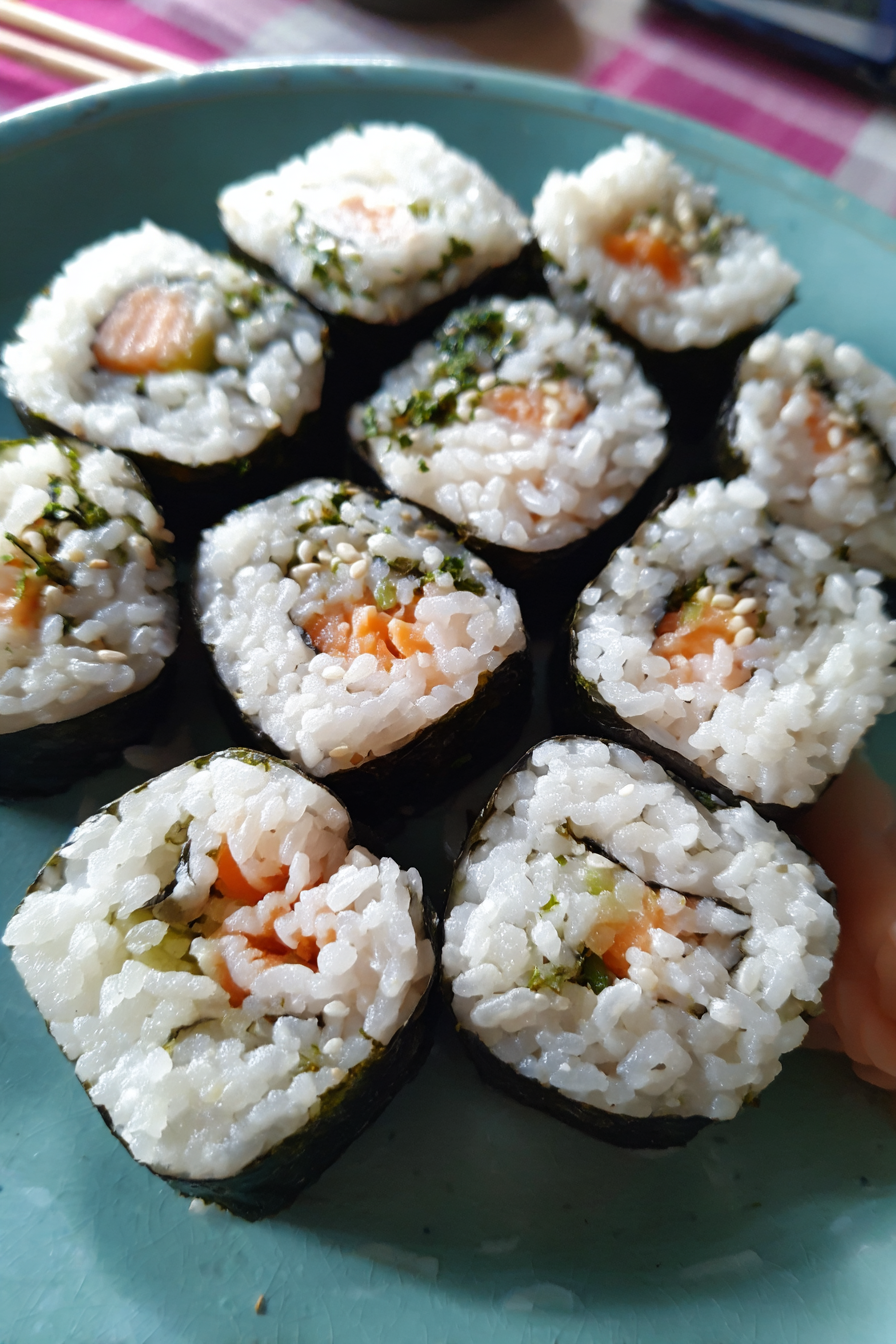
Easy Homemade Sushi Rolls Recipe
Oh my gosh, you guys, I gotta tell you about the first time I ever tried to make sushi at home. It was for my husband’s birthday, maybe five or six years ago now. He loves sushi, and I thought, “How hard can it be, right? It’s just rice and stuff rolled up.” Famous last words! I didn’t have a bamboo mat, so I tried using a dish towel wrapped in plastic wrap. The rice was so sticky, but not the good sticky – more like a gluelike mess that stuck to *everything* but the nori. The whole thing just exploded into a soggy pile of rice and avocado when I tried to cut it. It looked like a swamp creature had attacked a rice paddy. We totally laughed our heads off, ordered takeout, and vowed to try again, but properly this time. Now, making Easy Homemade Sushi Rolls is seriously one of our favorite things to do together, and I’ve finally gotten pretty good at it!
Recipe Card
| Recipe Title | Easy Homemade Sushi Rolls Recipe |
|---|---|
| Servings | 4 rolls (approx. 24-32 pieces) |
| Prep Time | 30 minutes |
| Cooking Time | 20 minutes (for rice) |
| Calories | About 350-450 per roll, depending on fillings |
Ingredients
- 2 cups sushi rice
- 2.5 cups water (for cooking rice)
- 1/4 cup rice vinegar (unseasoned is fine, but seasoned is easier)
- 2 tablespoons sugar
- 1 teaspoon salt
- 8 sheets nori (seaweed wraps)
- Fillings:
- 1 cucumber, thinly sliced into matchsticks
- 1 large avocado, thinly sliced
- 1 cup imitation crab meat, shredded, or cooked shrimp, thinly sliced
- Optional: Smoked salmon, cream cheese, carrots, bell peppers
- Soy sauce, wasabi, pickled ginger for serving
Sushi rice is the MVP here, seriously. Don’t cheap out and try to use regular long-grain or even arborio rice like I once did thinking “rice is rice, right?”. Nope. It just doesn’t have the right starch content to get that sticky, yet firm, texture that holds a roll together. My first sushi disaster was 80% because I used the wrong kind of rice, and it was just a mushy, crumbly mess. Learn from my mistake – get the sushi rice!
The rice vinegar, sugar, and salt mix is what gives sushi rice its distinct flavor. I’ve definitely forgotten the sugar before, and it just tastes… flat. Don’t skip it. If you can find “seasoned” rice vinegar, that’s even easier ’cause it already has the sugar and salt in it, but I usually just mix it myself ’cause I usually have all the ingredients on hand anyway.
Nori is just dried seaweed, but make sure you get the kind specifically for sushi rolls, not those little roasted seaweed snack sheets. One time, my grocery store was out, and I thought, “Oh, these little snack packs are seaweed, close enough!” It was not close enough. They were too thin, too crispy, and shattered the second I tried to roll them. Disaster 2.0. So, sushi nori, full size, a little flexible.
For fillings, honestly, use what you like! Cucumber adds a nice crunch, avocado makes it creamy, and imitation crab is a classic for a reason. I’ve tried everything from leftover roasted chicken to canned tuna (don’t recommend the tuna straight up, it was weird) – but keeping it simple with fresh veggies and a protein usually works best. Don’t overcrowd it, which is my biggest downfall.
Directions
- Rinse the sushi rice thoroughly under cold water until the water runs clear. This gets rid of extra starch and helps it cook right.
- Combine the rinsed rice and 2.5 cups of water in a medium pot with a tight-fitting lid. Bring to a boil, then immediately reduce heat to low, cover, and simmer for 15 minutes.
- Remove from heat (don’t peek!), and let it sit covered for another 10 minutes. This steam time is crucial.
- While the rice is steaming, whisk together the rice vinegar, sugar, and salt in a small bowl until dissolved. This is your sushi vinegar.
- Transfer the cooked rice to a large, non-metallic bowl. Slowly drizzle the sushi vinegar over the rice, folding it in gently with a rice paddle or wooden spoon. Try not to mash it. Fan the rice (with a magazine, a small fan, whatever you got!) for about 10 minutes to cool it down quickly and make it glossy.
- Set up your rolling station: Lay out a bamboo sushi mat (if you have one) or a piece of plastic wrap on your counter. Have a small bowl of water nearby to keep your hands moist.
- Place one sheet of nori, shiny side down, on your mat or plastic wrap. Dip your fingers in the water, take a handful of rice (about 3/4 to 1 cup), and spread it evenly over about 2/3 of the nori, leaving the top 1/3 clear. Don’t press too hard, just a gentle, even layer.
- Arrange your fillings in a line across the center of the rice. Don’t overdo it! Less is more for a good roll.
- Using the mat or plastic wrap, carefully lift the edge closest to you and roll it tightly over the fillings, tucking them in. Keep rolling, applying gentle, even pressure, until you reach the clear edge of the nori.
- Moisten the clear edge with a little water to seal the roll. Give it a final gentle squeeze to firm it up.
- With a very sharp, slightly wet knife, slice the roll into 6-8 pieces. Clean the knife between each cut for cleaner slices.
- Repeat with remaining nori and fillings. Serve immediately with soy sauce, wasabi, and pickled ginger.
Okay, let’s talk about some of these steps, ’cause I’ve messed up pretty much all of them at some point. That rice rinsing step? Totally important. The first few times, I was lazy and just rinsed it once or twice. Big mistake. The rice came out gummy, not fluffy and sticky. You really gotta keep rinsing until the water isn’t cloudy anymore. It takes a few minutes, but it’s worth it for good texture.
And the part where you let the rice sit covered for 10 minutes after cooking? Seriously, *do not peek*. I know it’s tempting! But if you lift that lid, all the steam that’s finishing up the cooking process escapes, and your rice won’t be cooked evenly. I’ve done it, and then you get hard bits in some spots and mushy bits in others. Just walk away for those 10 minutes.
Spreading the rice on the nori and then rolling it… this is where things can get dicey. My first attempts were either too much rice (making the roll huge and impossible to eat) or not enough, so it just fell apart. And spreading it? Oh man, I used to press so hard, thinking I was getting it nice and flat. But all I was doing was squishing the rice and making it gluey. You really want a light touch, like you’re just coaxing the rice into place. And the rolling itself? It took me a while to get the “tight but not squished” pressure right. My early rolls were either too loose and fell apart, or so tight they exploded. Just practice, you’ll get the feel for it.
And the cutting! My goodness, the cutting. I thought any knife would do. Wrong. A dull knife just tears the nori and squishes your beautiful roll into a sad, deformed log. You absolutely need a very sharp knife. And wetting it between each cut? That’s a game-changer. It keeps the rice from sticking to the blade and gives you those clean, picture-perfect slices. I used to skip that, and my sushi looked like it had been through a shredder. Now, I have a dedicated, super-sharp knife just for sushi night.
This Easy Homemade Sushi Rolls Recipe has become a really special one in our house, especially since we moved away from family. It’s a fun project, almost like a little assembly line we set up, and it’s something everyone can get involved in. My kids (when they’re older, they’re little right now!) can pick their own fillings, which I think will be a blast. It makes for a lighter, healthy dinner that’s surprisingly filling, and honestly, the leftovers are pretty great for lunch the next day, though it’s best eaten fresh. I used to think it was this super complicated, fancy thing, but once you get the rice right, the rest is just practice. It’s like a little taste of our favorite restaurant but right at home, and for way less money. We usually make a big batch, maybe 6-8 rolls, and it’s enough for a family dinner with some to spare. I’m always trying new fillings too – sometimes I do a little smoked salmon and cream cheese, almost like a bagel, and that’s surprisingly good in a roll!
Nutrition Info (per serving)
| Calories | Carbs | Fat | Protein |
|---|---|---|---|
| 380 | 65g | 8g | 12g |
*These are rough estimates and will vary greatly depending on your specific fillings.*
The nutrition info always surprises me a little, especially how high the carbs can be with all that rice! But it’s good carbs, you know? It’s filling, and when you load it up with fresh veggies and lean protein, it’s definitely a healthier option than a lot of takeout. If I’m trying to make it lighter, sometimes I’ll do what they call a “sushi bowl” – just the rice, toppings, and some nori strips on top, no rolling. Or I’ll do a “naked roll” or “sashimi roll” with much less rice and more fish/veggies, or even wrap it in thinly sliced cucumber instead of nori sometimes, which is pretty refreshing. For folks with special diets, gluten-free soy sauce is easy to find, and you can absolutely make these vegan by sticking to just veggies like cucumber, avocado, carrots, and maybe some marinated tofu.
Ingredient Swaps
| Ingredient | Substitution |
|---|---|
| Sushi Rice | Brown sushi rice (takes longer to cook) |
| Imitation Crab | Cooked shrimp, smoked salmon, canned tuna (drained and mixed with mayo), grilled chicken strips, marinated tofu |
| Cucumber | Carrots (julienned), bell peppers (thinly sliced), sprouts, blanched asparagus |
| Nori | Soy paper, thinly sliced cucumber or daikon radish (for a carb-free wrap) |
| Sugar (for rice vinegar mix) | Maple syrup (use a tiny bit less) |
Okay, so not all ingredient swaps are created equal, let me tell you. Brown sushi rice? Totally works, but it takes longer to cook and has a slightly different, nuttier texture. It’s good, just be prepared for the extra time. For protein, cooked shrimp and smoked salmon are fantastic – they keep their texture well and taste great. Canned tuna, though… that’s a tough one. I tried mixing it with a bit of mayo once, like for a tuna salad, and it was okay, but just plain tuna was a hard pass for me. It was too soft and kinda muted the other flavors. Marinated tofu is a solid vegan option, especially if you get it nice and firm.
For veggies, carrots and bell peppers are awesome substitutes for cucumber. They add color and crunch. Sprouts are good too! Now, for the nori swaps… soy paper is pretty cool. It’s colorful and has a super mild taste, great if you’re not a huge fan of seaweed flavor. But using thinly sliced cucumber or daikon radish as a wrap? That’s an advanced move, my friend. I tried it once, and it was so hard to keep it from tearing, and it made everything really watery. The rolls were more like loose lettuce wraps. If you’re going for carb-free, it’s an option, but don’t expect it to be as easy or hold up as well as nori. And maple syrup for sugar? Yeah, that worked pretty well, but I definitely tasted a slight maple note in the rice, which wasn’t unwelcome, just unexpected.
Tips
- **Get a bamboo rolling mat.** Seriously, it’s like five bucks and makes a world of difference for getting tight, even rolls. Don’t try to wing it with plastic wrap and a dish towel like I did.
- **Keep your hands wet.** Sushi rice is super sticky. A small bowl of water nearby for wetting your hands before handling the rice prevents it from sticking to you like glue.
- **Don’t overfill your rolls.** This is probably my biggest and most repeated mistake. It’s so tempting to load ’em up, but then they burst when you roll or cut them. Less is truly more here.
- **Use a super sharp, wet knife.** For slicing, this is non-negotiable for clean cuts. Wet the blade with a damp paper towel between each slice.
- **Let the rice cool properly.** Don’t try to roll with hot rice; it’ll make your nori soggy and hard to work with. Fanning it helps cool it down quicker and gives it a nice sheen.
Okay, so about those tips… the bamboo rolling mat one? That’s me speaking from personal experience, obviously. My first attempt without one was a complete and utter disaster. I was wrestling with slippery plastic wrap and a tea towel, trying to coax the rice into a cylindrical shape, and it just kept slipping and squishing. The mat gives you leverage and control that you just can’t get otherwise. I got one for like $3 online, and it was the best investment ever for my sushi journey. I wish I’d known how crucial it was from the start, it would’ve saved me a lot of frustration and rice-on-the-ceiling moments. Now, I have two because sometimes my husband and I roll at the same time!
FAQ
**Q: My sushi rice isn’t sticky enough, what did I do wrong?**
A: Oh man, this happens! Usually, it’s one of a few things. Did you rinse it enough? If you don’t wash off enough of the excess starch, it can get gummy, but if you wash *too* much, it won’t be sticky. It’s a balance. More likely, you might have cooked it with too much water, or not let it steam long enough off the heat. That 10 minutes covered *after* cooking is crucial for it to absorb all the moisture and get perfectly sticky. Also, make sure you’re using actual sushi rice, not some regular long-grain stuff. I learned that the hard way, trust me.
**Q: My rolls keep falling apart when I try to cut them. Help!**
A: This is almost always a knife problem, or a “not-tight-enough-roll” problem. First, is your knife super sharp? Like, razor-sharp? If it’s dull, it’ll just tear the nori and squish the rice. Also, wet the blade before *every* cut – it prevents sticking. And second, when you roll, are you really pressing it together firmly but gently as you go? You want it to be dense, but not squished. My first few rolls were always too loose, and they’d just crumble. Practice makes perfect for that tight roll!
**Q: How long can I keep homemade sushi rolls? Can I make them ahead?**
A: Homemade sushi is really best eaten fresh, like within an hour or two of making it. The rice starts to harden and dry out, and the nori can get a bit chewy after a while. If you absolutely have to make them ahead, maybe an hour or two before, cover them really tightly with plastic wrap and keep them at room temperature (not the fridge!). Once they go into the fridge, the rice changes texture pretty dramatically. Leftovers are okay for lunch the next day, but they won’t be quite as good as fresh. I’ve had leftovers sitting in the fridge for more than a day, and it’s just… sad sushi. Eat ’em quick!
**Q: Can I use different fish like raw tuna or salmon?**
A: This is a big one. Yes, you totally *can*, but you *have* to make sure it’s “sushi-grade” or “sashimi-grade” fish from a reputable fishmonger. This isn’t just a fancy label; it means the fish has been handled and frozen specifically to be safe for raw consumption. Don’t just pick up any salmon fillet from the regular seafood counter and slice it up raw. You could get really sick. If you’re not sure, stick to cooked options like smoked salmon, cooked shrimp, or imitation crab. I’ve definitely had friends get adventurous with non-sushi-grade fish and regret it. Safety first, always!
That’s everything I know about making Easy Homemade Sushi Rolls Recipe! Hope you give it a try, and if you mess it up, you’re in good company—I still do it sometimes.
Easy Homemade Sushi Rolls Recipe
Learn to create delicious and surprisingly easy homemade sushi rolls, perfect for a fun and interactive family dinner or a special meal at home. This comprehensive guide walks you through perfecting sushi rice and offers versatile filling ideas for a restaurant-quality experience.
Ingredients
- 2 cups sushi rice
- 2.5 cups water (for cooking rice)
- 1/4 cup rice vinegar (unseasoned or seasoned)
- 2 tablespoons sugar
- 1 teaspoon salt
- 8 sheets nori (seaweed wraps)
- 1 cucumber, thinly sliced into matchsticks
- 1 large avocado, thinly sliced
- 1 cup imitation crab meat, shredded, or cooked shrimp, thinly sliced
- Optional: Smoked salmon, cream cheese, carrots, bell peppers (for fillings)
- Soy sauce, wasabi, pickled ginger (for serving)
Instructions
- Rinse the sushi rice thoroughly under cold water until the water runs clear. This removes excess starch for optimal texture.
- Combine the rinsed rice and 2.5 cups of water in a medium pot with a tight-fitting lid. Bring to a boil, then immediately reduce heat to low, cover, and simmer for 15 minutes.
- Remove the pot from heat (do not lift the lid!) and let it sit covered for another 10 minutes to allow the rice to steam and absorb all moisture.
- While the rice is steaming, whisk together the rice vinegar, sugar, and salt in a small bowl until completely dissolved. This creates your sushi vinegar seasoning.
- Transfer the cooked rice to a large, non-metallic bowl. Slowly drizzle the sushi vinegar over the rice, folding it in gently with a rice paddle or wooden spoon. Avoid mashing the rice. Fan the rice (using a fan or magazine) for about 10 minutes to cool it down quickly and achieve a glossy texture.
- Set up your rolling station: Lay out a bamboo sushi mat (recommended) or a piece of plastic wrap on your counter. Keep a small bowl of water nearby to moisten your hands.
- Place one sheet of nori, shiny side down, on your mat or plastic wrap. Dip your fingers in the water, take a handful of rice (about 3/4 to 1 cup), and spread it evenly over about 2/3 of the nori, leaving the top 1/3 clear at the far end. Use a gentle, even layer.
- Arrange your chosen fillings in a line across the center of the rice. Do not overfill, as this makes rolling difficult.
- Using the mat or plastic wrap, carefully lift the edge closest to you and roll it tightly over the fillings, tucking them in firmly. Continue rolling, applying gentle, even pressure, until you reach the clear edge of the nori.
- Moisten the clear edge of the nori with a little water to help seal the roll. Give the roll a final gentle squeeze to firm it up and create an even cylinder.
- With a very sharp, slightly wet knife, slice the roll into 6-8 pieces. Clean the knife with a damp cloth or by re-wetting it between each cut for cleaner, precise slices.
- Repeat with the remaining nori sheets and fillings. Serve immediately with soy sauce, wasabi, and pickled ginger.