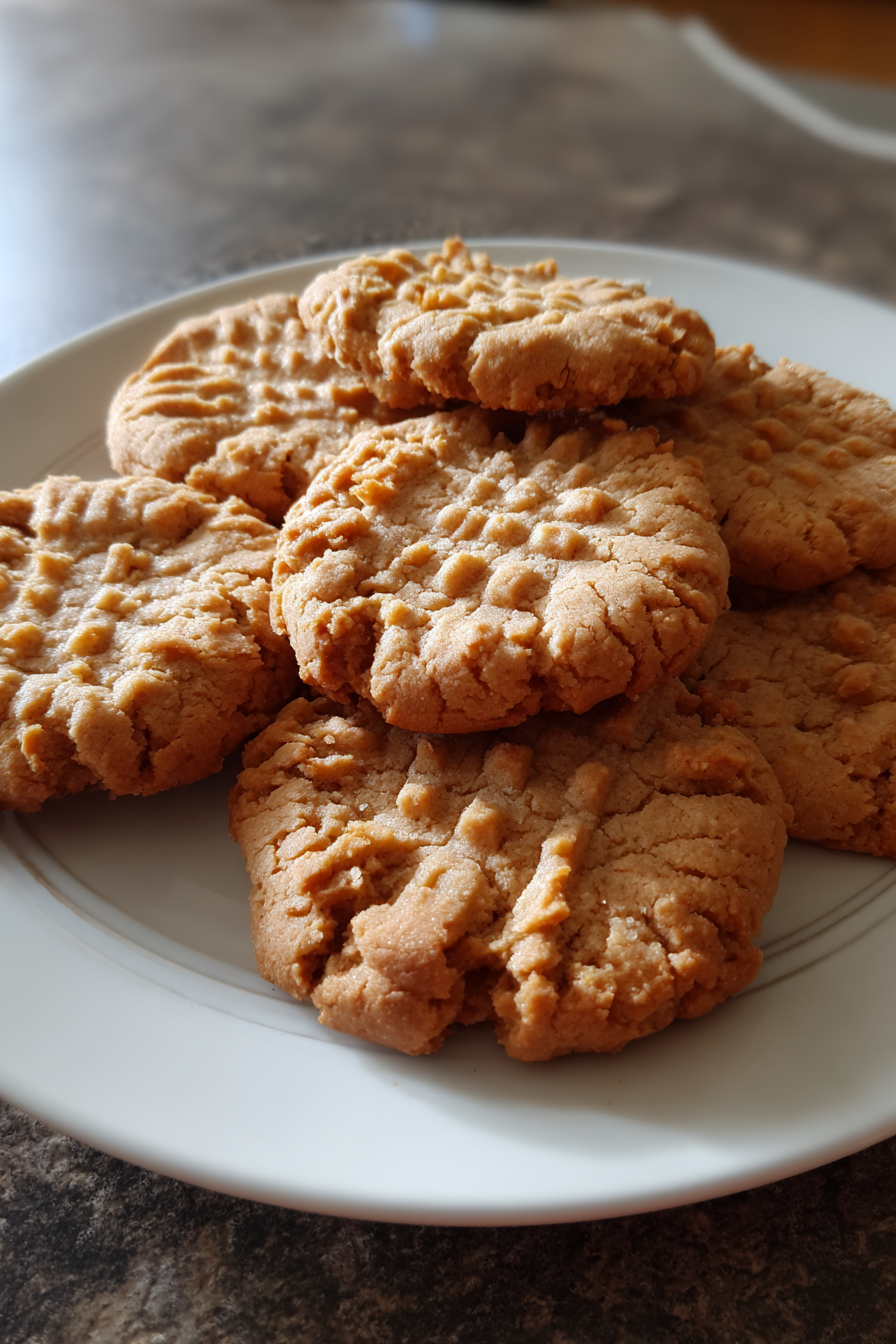
Best Easy Peanut Butter Cookies
Okay, so these “Best Easy Peanut Butter Cookies” hold a really special place in my heart. My grandma, bless her cotton socks, wasn’t much of a baker. She could fry up some amazing chicken, but cookies? Not so much. But she adored peanut butter. One day, probably when I was like ten, I decided I was going to make her the perfect peanut butter cookies. I found a recipe that looked simple enough, and I was so confident. I remember pulling the first batch out of the oven, all excited, only to find they had spread into these sad, flat, almost-burnt puddles. I was so bummed! Turns out, I’d completely skipped chilling the dough because I was too impatient. After a few more tries, and actually reading *all* the steps, I finally nailed it. That day, seeing her face light up with a perfect, crinkly peanut butter cookie, made all those failed attempts totally worth it. Now, these are my go-to, never-fail recipe when I need a little taste of home.
Recipe Card
| Recipe Title | Best Easy Peanut Butter Cookies |
|---|---|
| Servings | About 3 dozen (36 cookies) |
| Prep Time | 15 minutes (plus 30-60 min chilling) |
| Cooking Time | 8-10 minutes |
| Calories | About 120 per cookie |
Ingredients
- 1 cup (2 sticks) unsalted butter, softened
- 1 cup granulated sugar
- 1 cup packed light brown sugar
- 1 cup creamy peanut butter (I swear by Jif or Skippy!)
- 2 large eggs
- 1 teaspoon vanilla extract
- 2 ½ cups all-purpose flour
- 1 teaspoon baking soda
- ½ teaspoon salt
So, about these ingredients. Each one plays a part, and I’ve learned the hard way what happens when you mess with them. Take the butter, for example. It has to be *softened*. Not melted, not cold from the fridge, but room temperature. One time I tried to rush it and microwaved the butter, and it basically melted. My dough was greasy, and the cookies spread like crazy and were super thin. Lesson learned: patience with butter is a virtue!
Then there’s the peanut butter itself. I’m a total sucker for the creamy, sugary stuff like Jif or Skippy for this recipe. I know some folks love natural peanut butter, but for *these* cookies, it’s just not the same. Natural peanut butter, with its oil separation, makes the dough a bit more crumbly and the cookies don’t hold their shape as well. I’ve tried, and while they taste okay, they’re definitely not the “best easy peanut butter cookies” I’m aiming for. Stick to the classic here.
The sugar combo of granulated and brown sugar is important for flavor and texture. The white sugar gives that classic crispness, while the brown sugar adds moisture and chewiness. I once ran out of brown sugar and just used all white. The cookies were crispier, but they missed that soft, chewy center that makes these so good. It wasn’t a total disaster, but it definitely changed the experience.
Eggs are your binder, pure and simple. I once forgot an egg entirely because I was distracted by a phone call – yes, I really did that. My dough was super dry and impossible to roll without crumbling apart. I managed to bake a few sad, dry lumps, but they were definitely not cookies. Eggs make the dough pliable and give the cookies structure. Don’t skip them!
Vanilla extract might seem small, but it adds so much depth of flavor. I usually just eyeball it, but one time I accidentally dumped in almost a tablespoon. The cookies tasted *really* vanilla-y, almost overwhelmingly so. It wasn’t bad, but it wasn’t the classic peanut butter taste I wanted. A teaspoon is just right to enhance everything without taking over.
Flour, baking soda, and salt are your dry team. Make sure to level your flour properly. I used to just scoop it straight from the bag, which packs it down and means you’re using too much. Too much flour makes the cookies tough and dry. Now I spoon it into the measuring cup and level it off with a knife. Baking soda is what gives them that little lift and chewiness, and salt, well, salt just brings all the flavors together. Never skip the salt; it balances the sweetness beautifully!
Directions
- Preheat your oven to 375°F (190°C). Line baking sheets with parchment paper.
- In a large bowl, cream together the softened butter, granulated sugar, and brown sugar with an electric mixer until light and fluffy (about 2-3 minutes).
- Add the peanut butter to the butter-sugar mixture and beat until well combined.
- Beat in the eggs one at a time, mixing well after each addition. Stir in the vanilla extract.
- In a separate medium bowl, whisk together the flour, baking soda, and salt.
- Gradually add the dry ingredients to the wet ingredients, mixing on low speed until just combined. Be careful not to overmix.
- Cover the dough and chill in the refrigerator for at least 30 minutes, or up to an hour. This step is a game-changer!
- Roll the dough into 1-inch balls and place them about 2 inches apart on the prepared baking sheets.
- Use a fork to flatten each cookie ball, making a crisscross pattern. Dip the fork in sugar between each cookie to prevent sticking.
- Bake for 8-10 minutes, or until the edges are lightly golden and the centers are still soft.
- Let the cookies cool on the baking sheet for 5 minutes before transferring them to a wire rack to cool completely.
Okay, let’s talk about those directions, because there are a few places where I’ve personally messed up big time. The creaming step (step 2) is so important! My first few batches, I’d just mix it for a minute and call it good. But that “light and fluffy” part? It really means something. If you don’t cream the butter and sugars enough, your cookies can come out dense and flat. I once didn’t cream enough, and they just didn’t spread right or get that nice, airy texture. You’re basically incorporating air into the butter, which makes the cookies lighter. Take the full 2-3 minutes, even if it feels long.
And then there’s the chilling. Oh, the chilling (step 7)! This is where my very first batch of peanut butter cookies went so wrong. I was so impatient, I skipped it entirely. What happened? My cookies spread like crazy, turning into thin, crispy, almost lace-like things. They were edible, but definitely not the thick, chewy cookies I was aiming for. Chilling the dough helps the butter solidify, which prevents the cookies from spreading too much in the oven. It also lets the flour hydrate, which can lead to a more tender cookie. Don’t be like young me; chill that dough! Even 30 minutes makes a huge difference.
Finally, the fork marks (step 9). This isn’t just for looks, though it does give them that classic peanut butter cookie vibe. Pressing them down helps them bake evenly. I’ve had cookies where I forgot the fork marks, and they came out a little too puffed up in the middle, and not as evenly cooked. Dipping the fork in sugar is a little trick I learned after having dough stick to my fork more times than I can count. It makes the process so much smoother and adds a little extra sparkle to the finished cookie.
After all those years of baking these cookies, what I really love about them is how they’ve become my go-to “comfort food.” If I’ve had a tough day, or if someone in the family needs a pick-me-up, these are what I bake. They’re a “family favorite” because everyone loves them, and the smell of them baking just fills the whole house with happiness. They also make fantastic “leftovers,” if you can even call them that, because they disappear so fast! I used to try to make them healthier, maybe cut back on the sugar or use whole wheat flour. But honestly, for this recipe, the classic version is just *the best*. It’s not an “easy dinner” or “one-pot” meal, but it’s a simple, straightforward recipe that brings so much joy. Sometimes you just need to embrace a little indulgence, you know?
Nutrition Info (per serving)
| Calories | Carbs | Fat | Protein |
|---|---|---|---|
| 120 | 14g | 7g | 2g |
Okay, let’s be real, these aren’t exactly a diet food, and the nutrition info probably doesn’t surprise anyone who loves a good peanut butter cookie. That fat content, especially, means these are a treat, not a health snack. I’ve definitely tried to make them “lighter” or “healthier” in the past. I tried cutting down the sugar by a third, and they just weren’t sweet enough, and the texture was a bit off. I also tried swapping some of the all-purpose flour for whole wheat once, thinking it would add fiber. The cookies came out denser and had a slightly “wheaty” taste that just didn’t mesh well with the peanut butter. If you’re looking for a special diet option, I’d say these probably aren’t the recipe to modify. It’s best to enjoy them as is, in moderation, or look for a specifically designed “healthy swap” recipe that’s already been tested. Sometimes, a cookie is just a cookie, and that’s okay!
Ingredient Swaps
| Ingredient | Substitution |
|---|---|
| Unsalted butter | Salted butter (reduce added salt by ¼ teaspoon) |
| Creamy peanut butter | Crunchy peanut butter (adds texture) |
| Light brown sugar | Dark brown sugar (chewier, deeper molasses flavor) |
| All-purpose flour | Gluten-free all-purpose flour blend (measure by weight for best results) |
| Vanilla extract | Almond extract (use less, stronger flavor) |
So, when it comes to ingredient swaps, some work, and some… well, they just don’t hit the same. If you only have salted butter, you can absolutely use it, just cut back on the added salt a little. I’ve done that plenty of times when I’m out of unsalted, and it works fine. Crunchy peanut butter is a perfectly good swap for creamy if you like that extra bite and texture. It makes the cookies a little more rustic-looking, but the flavor is still spot on.
Using dark brown sugar instead of light brown is also a pretty good swap. It makes the cookies a bit chewier and gives them a slightly richer, more caramelly flavor, which is delicious. My kids actually prefer them with dark brown sugar sometimes! But swapping vanilla for almond extract is where you need to be careful. Almond extract is much stronger. I tried a 1:1 swap once and ended up with cookies that tasted overwhelmingly of almond. Use half the amount, or even less, if you go that route. And for gluten-free flour, you really need a good blend. I tried using just almond flour once, and they totally fell apart. Gluten-free baking is a science, so stick to a tested GF all-purpose blend, and even then, the texture might be slightly different. Sometimes, less is more when it comes to tinkering with a classic.
Tips
- Always use room temperature butter.
- Don’t overmix the dough once the flour is added.
- Chill the dough for at least 30 minutes; it makes a huge difference.
- For perfect crisscross marks, dip your fork in sugar between each cookie.
- Don’t overbake! Take them out when the edges are set but the centers still look a little soft.
These tips? They’re basically the collected wisdom of all my cookie fails. The room temperature butter one is super important. I remember one frantic afternoon, trying to whip up cookies for a last-minute bake sale, and I just used butter straight from the fridge. I tried to cream it, but it was just tearing up my mixer, and when I finally got it somewhat mixed, it was lumpy. The cookies came out dense and uneven. It taught me that sometimes, you just can’t rush things in the kitchen.
And the chilling! Oh man, I probably sound like a broken record, but seriously. The number of times I’ve been impatient and just skipped chilling the dough, only to watch my beautiful cookie balls melt into sad, flat puddles in the oven. It’s so frustrating! I wish someone had really drilled this into me earlier on. It felt like an optional step, but it’s not. It’s a critical step if you want that classic, chewy, perfectly shaped peanut butter cookie. Trust me, that extra half hour in the fridge is worth every minute. Your future self (and your cookies) will thank you.
FAQ
Q: My cookies are spreading too much and are really flat. What went wrong?
A: Ah, been there, done that! This usually means one of two things, or both. First, did you chill your dough? If not, the butter in the dough was too soft, and it melted too quickly in the oven, causing the spread. Second, check your butter! Was it too soft to begin with, maybe melted a little? Or if you used natural peanut butter, it can make the dough oilier, leading to more spread. Always chill the dough, and make sure your butter is just softened, not greasy.
Q: Why are my peanut butter cookies dry and crumbly?
A: This one’s also a common issue! Most likely, you either overbaked them, or you added too much flour. Overbaking pulls out too much moisture, leaving them dry. Keep an eye on them; they should look *just* set around the edges and still a bit soft in the middle when you take them out. They firm up a lot as they cool. Also, make sure you’re measuring your flour correctly – spooning it into the measuring cup and leveling it with a knife, not scooping directly from the bag, which can pack it down and add too much.
Q: Can I use crunchy peanut butter instead of creamy?
A: Absolutely! I actually really like crunchy peanut butter in these sometimes for that extra bit of texture. It makes them a little more rustic and adds a nice nutty crunch. The recipe works perfectly with it. Just keep in mind that the dough might be a *tiny* bit harder to roll perfectly smooth, but it won’t affect the taste or overall success of the cookies.
Q: How do I store these cookies, and how long do they last?
A: These cookies keep really well! Once they’re completely cooled, store them in an airtight container at room temperature. They’ll stay fresh and chewy for about 3-5 days. If you want them to last longer, you can freeze them for up to 2-3 months. Just thaw them at room temperature when you’re ready for a treat!
Q: My cookies didn’t get those classic fork marks, or they just look messy. Any tips?
A: Yeah, that happened to me a lot when I first started! The key is to make sure your dough isn’t too cold (which can make it crack when pressed) or too warm (which can make the fork stick). And here’s my best trick: dip your fork in a little granulated sugar between each cookie press. It prevents sticking and gives them a nice sparkle. Also, don’t press too hard, just enough to flatten them slightly and make a nice impression.
That’s everything I know about making Best Easy Peanut Butter Cookies! Hope you give it a try. And if you mess it up, you’re in good company—I still do it sometimes, especially if I skip the chilling part. Let me know how they turn out!
Best Easy Peanut Butter Cookies
Indulge in these incredibly easy and delicious peanut butter cookies, a cherished family recipe promising a perfect balance of crisp edges and a soft, chewy center. With simple steps and expert tips, you’ll master this classic treat, making it a go-to comfort food for any occasion.
Ingredients
- 1 cup (2 sticks) unsalted butter, softened
- 1 cup granulated sugar
- 1 cup packed light brown sugar
- 1 cup creamy peanut butter (Jif or Skippy recommended)
- 2 large eggs
- 1 teaspoon vanilla extract
- 2 ½ cups all-purpose flour
- 1 teaspoon baking soda
- ½ teaspoon salt
Instructions
-
Preheat your oven to 375°F (190°C). Line baking sheets with parchment paper.
-
In a large bowl, cream together the softened butter, granulated sugar, and brown sugar with an electric mixer until light and fluffy (about 2-3 minutes).
-
Add the peanut butter to the butter-sugar mixture and beat until well combined.
-
Beat in the eggs one at a time, mixing well after each addition. Stir in the vanilla extract.
-
In a separate medium bowl, whisk together the flour, baking soda, and salt.
-
Gradually add the dry ingredients to the wet ingredients, mixing on low speed until just combined. Be careful not to overmix.
-
Cover the dough and chill in the refrigerator for at least 30 minutes, or up to an hour. This step is a game-changer!
-
Roll the dough into 1-inch balls and place them about 2 inches apart on the prepared baking sheets.
-
Use a fork to flatten each cookie ball, making a crisscross pattern. Dip the fork in sugar between each cookie to prevent sticking.
-
Bake for 8-10 minutes, or until the edges are lightly golden and the centers are still soft.
-
Let the cookies cool on the baking sheet for 5 minutes before transferring them to a wire rack to cool completely.
Nutrition (Per Serving)