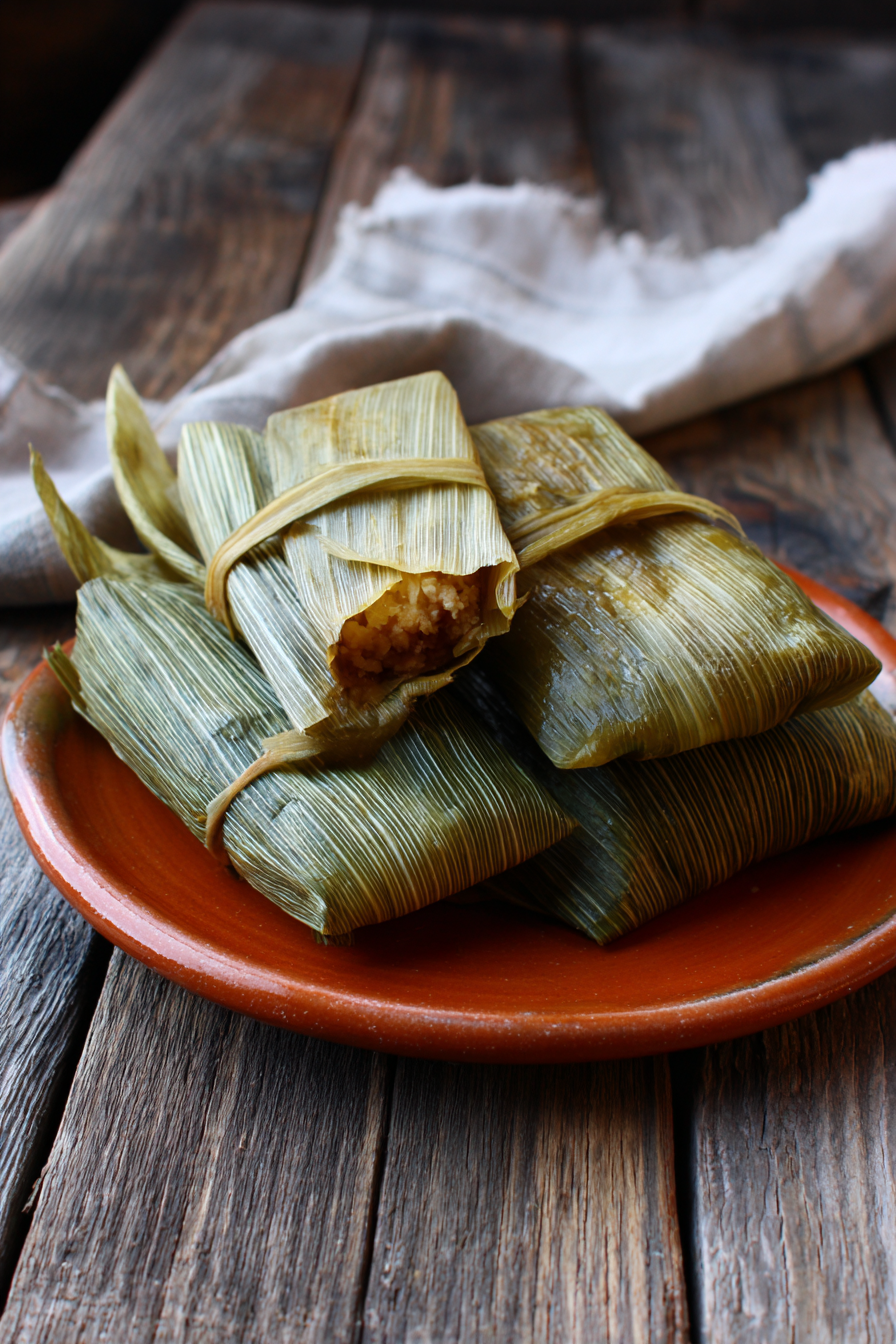
Classic Tamales Recipe Made Easy
Oh man, tamales. Where do I even begin? The first time I tried making “Classic Tamales Recipe Made Easy,” it was for my dad’s birthday. He’d always talked about his mom’s tamales, and I figured, how hard could it be? Famous last words, right? I spent what felt like an entire weekend – no exaggeration – in the kitchen. My masa was crumbly, my pork filling was pretty bland, and I couldn’t for the life of me figure out how to fold those corn husks without the filling oozing out.
I remember calling my Aunt Rosa in a panic, flour (or masa, rather) everywhere, looking like I’d wrestled a ghost. She just laughed and told me it’s a right of passage. They weren’t perfect, not even close, but my dad still teared up a little when he ate one, saying it reminded him of home. That moment, even with all the fumbles, made it all worth it. It’s still a special dish for me, a true labor of love, and over the years, I’ve picked up a few tricks to actually make a Classic Tamales Recipe Made Easy that’s, well, actually easy-ish.
Recipe Card
| Recipe Title | Classic Tamales Recipe Made Easy |
|---|---|
| Servings | About 24-30 tamales |
| Prep Time | 2 hours (plus 2-4 hours soaking husks) |
| Cooking Time | 2 hours |
| Calories | Approx. 300 per tamale (varies greatly with filling) |
Ingredients
- 3 lbs pork shoulder (Boston butt), cut into 2-inch chunks
- 1 large yellow onion, roughly chopped
- 4-5 cloves garlic, smashed
- 2 teaspoons salt, divided (more to taste)
- 1 teaspoon black pepper
- 1 tablespoon ground cumin
- 1 tablespoon dried oregano (Mexican oregano if you can find it!)
- 12 dried guajillo chiles, stemmed and seeded
- 4 dried ancho chiles, stemmed and seeded
- 2-3 dried arbol chiles (for a little kick, optional)
- 3 cups masa harina for tamales (not instant masa for tortillas!)
- 1.5 cups vegetable shortening or lard, softened (about 12 ounces)
- 1.5 tablespoons baking powder
- About 4-5 cups warm chicken or pork broth, divided
- 1 (16 oz) package dried corn husks
Oh, these ingredients! Each one has a story, trust me. The pork shoulder is non-negotiable for me. I once tried making tamales with ground pork, thinking it would be faster. Big mistake. The texture was all wrong, dry and crumbly, and it just didn’t shred right. You need that rich, fall-apart tenderness from a good slow-cooked shoulder.
Those dried chiles are the heart of your filling, and they are NOT to be messed with. The first time, I just threw them in the pot with the pork, thinking they’d soften and release flavor. Nope. They just floated there, tasting like dry paper. You HAVE to rehydrate them properly, and even toast them a little if you’re brave – just don’t burn them like I did once, thinking “a little char is good, right?” My whole kitchen smelled like a campfire gone wrong. Burnt chiles taste bitter, friend, learn from my suffering.
Masa harina for tamales is crucial. Don’t, and I repeat, DON’T grab that instant masa for tortillas by mistake. I did that once. My tamales came out dense, gummy, and totally unpleasantly heavy. It was like eating a brick. The texture is completely different, you need that coarser grind specifically made for tamales. And the lard or shortening? Don’t skimp. It makes the masa light and fluffy. I tried to go “healthy” once and used a tiny bit of oil, and my tamales were sad, dry little things. It’s worth the splurge, trust me. It’s part of what makes a Classic Tamales Recipe Made Easy so good.
Directions
- Soak corn husks: Submerge corn husks in a large pot or bowl of hot water for at least 2-4 hours, or overnight, until pliable. Place a plate or heavy object on top to keep them submerged.
- Prepare pork filling: In a large pot or Dutch oven, combine pork shoulder, half of the onion, 2 smashed garlic cloves, 1 teaspoon salt, and pepper. Cover with water or chicken broth. Bring to a boil, then reduce heat, cover, and simmer for 2-2.5 hours, or until pork is very tender and easily shredded.
- Make chile sauce: While pork cooks, stem and seed the dried chiles. For a deeper flavor, lightly toast them in a dry pan for a minute or two, being careful not to burn. Place toasted chiles in a separate bowl, cover with hot water, and let them rehydrate for 20-30 minutes until soft.
- Blend chile sauce: Drain the rehydrated chiles. In a blender, combine softened chiles, the remaining half onion, 3 smashed garlic cloves, cumin, oregano, and 1 teaspoon salt. Add about 1 cup of the pork cooking liquid. Blend until very smooth, adding a little more liquid if needed. Strain the sauce through a fine-mesh sieve into a bowl, pressing on the solids to extract all liquid (this step is important for a smooth sauce!). Discard solids.
- Finish pork filling: Once pork is tender, remove from pot and shred it using two forks. Discard any large pieces of fat. Add the shredded pork back to a clean pot or large skillet. Pour the strained chile sauce over the pork. Simmer for 15-20 minutes, stirring occasionally, until the sauce thickens and coats the pork well. Taste and adjust salt if needed. Set aside to cool slightly.
- Prepare the masa dough: In a very large bowl or stand mixer, cream the softened shortening/lard with 1 teaspoon salt until light and fluffy (about 5 minutes). This is key!
- Gradually add masa harina and baking powder to the creamed shortening, alternating with about 3-4 cups of warm broth. Beat or mix on medium speed for 10-15 minutes, or until the dough is light, fluffy, and spreadable. The dough should float a small piece in a cup of cold water. Add more broth if needed to reach a soft, peanut butter-like consistency.
- Assemble tamales: Drain the softened corn husks. Lay a husk flat with the wider end facing you. Spread about 2-3 tablespoons of masa dough evenly over the wider half of the husk, leaving a 1-inch border at the bottom and sides, and a larger border at the top.
- Place 1-2 tablespoons of the pork filling in the center of the masa.
- Fold the sides of the husk over the filling, then fold up the bottom narrow end. You can tie them with a thin strip of corn husk or simply stack them folded-end-down in your steamer.
- Steam tamales: Arrange tamales upright in a large steamer pot over boiling water. Make sure the water doesn’t touch the tamales. Cover tightly and steam for 1.5-2 hours, or until the masa pulls away easily from the husk. You might need to add more boiling water to the pot every 30-45 minutes.
- Serve and enjoy! Let them rest for 10-15 minutes after steaming for best results.
Okay, let’s talk about Step 7, making the masa dough. This is where I almost cried on my second attempt. I didn’t cream the shortening enough, just sort of mixed it in, and then I dumped all the masa and broth in at once. My dough was dense, heavy, and sticky, like play-doh after it’s been left out. It was a nightmare to spread and the tamales were just… sad. The “creaming” step isn’t just for show, it’s really important for getting air into the fat, which makes the masa light and airy. And that “float test” – seriously do it! If it sinks, it needs more beating or a tiny bit more baking powder (but be careful not to add too much, or they’ll taste metallic). It’s the difference between fluffy tamales and little masa bricks.
Another big one for me was Step 11, steaming. I was so impatient the first time. I kept lifting the lid every 20 minutes to “check” if they were done. What I didn’t realize was every time I lifted that lid, I was letting out all the steam and adding significant time to the cooking process. It’s like opening the oven door when you’re baking a cake. You just gotta trust the process and let them steam, undisturbed, for at least 90 minutes before even thinking about peeking. And make sure your steamer pot has enough water, but not so much it touches the tamales directly. Running out of water mid-steam means burnt bottoms, and nobody wants that.
After all these years, Classic Tamales Recipe Made Easy holds such a special spot in my heart. It’s not just the tamales themselves, it’s the whole process. It’s definitely a commitment, but I’ve found it’s become one of our favorite family traditions. We turn on some music, everyone gets a job – someone’s spreading masa, someone’s spooning filling, someone’s folding. It’s a proper assembly line, and it flies by when you’re all chatting and laughing. It definitely doesn’t feel like a one-pot dish, but it’s an amazing comfort food that makes a huge batch, which is perfect for meal prep. Just imagine pulling a homemade tamale out of the freezer on a busy weeknight!
My biggest mistake, besides the masa consistency issues, was probably thinking I could do it all by myself without asking for help. It’s truly a dish meant for sharing, from the cooking to the eating. Next time, I think I’d experiment more with healthy swaps in the filling, maybe adding some finely diced vegetables to the pork or even trying a completely vegetarian filling with roasted poblanos and cheese. But honestly, even with all the little mishaps over the years, the joy of a homemade tamale is just unmatched. It’s not just food; it’s a warm hug, a memory, and a reminder of all those kitchen adventures.
Nutrition Info (per serving)
| Calories | Carbs | Fat | Protein |
|---|---|---|---|
| 300 | 28g | 18g | 12g |
Yeah, the nutrition info for these guys can be a bit of a surprise, especially that fat content! It makes sense though, with all the shortening or lard in the masa and the rich pork. I mean, it’s a Classic Tamales Recipe Made Easy, not a diet meal, right? I’ve definitely tried to make them lighter over the years. Using leaner pork like tenderloin (which you have to be careful not to dry out) or even chicken, and sometimes cutting back a *little* on the shortening in the masa, but you can only go so far before the texture suffers. For folks with special diets, you can definitely do vegetarian tamales with black beans and cheese or roasted veggies, and some people even use vegetable oil instead of lard for a dairy-free version, though I find the texture changes a bit. It’s all about balance and what you’re looking for!
Ingredient Swaps
| Ingredient | Substitution |
|---|---|
| Lard | Vegetable shortening, butter (not recommended), or vegetable oil |
| Pork shoulder | Chicken thighs, beef chuck, or a vegetarian filling (black beans, cheese, roasted poblano peppers) |
| Guajillo/Ancho chiles | New Mexico chiles for a milder flavor, or a good quality canned red enchilada sauce (will change flavor significantly) |
| Chicken/Pork broth | Vegetable broth or water |
Okay, let’s get real about these swaps. Swapping lard for vegetable shortening? That works pretty well, honestly. The texture is very similar, maybe a tiny bit less rich, but it’s a good alternative if you’re not a lard fan or can’t find it. But using butter? I tried it once, thinking “butter makes everything better!” Nope. The tamales tasted… buttery, in a weird way, and the masa was a bit heavier. Wouldn’t recommend it. Vegetable oil works in a pinch, but the masa tends to be a little drier and less fluffy, like I mentioned earlier.
For the meat, chicken thighs are a fantastic swap for pork. They shred beautifully and absorb the chile flavor really well. Beef chuck is also good, but can be a bit tougher if not cooked long enough. Vegetarian fillings are where you can get super creative! My black bean and cheese tamales, with a bit of roasted poblano, have actually been a huge hit. They do taste different, of course, but still delicious. The chile swap is tricky. If you can’t find guajillos or anchos, New Mexico chiles give a similar earthy, mild flavor. Using canned enchilada sauce is a shortcut, but just be aware, it changes the whole profile of the tamale. It’ll be quicker, but not quite the same “Classic Tamales Recipe Made Easy” experience.
Tips
- **Don’t skimp on the fat in the masa.** It’s what makes them light and fluffy.
- **Cream your fat and salt first.** This step is critical for a tender masa.
- **Do the float test for your masa.** A tiny piece should float in cold water – if it sinks, beat it more.
- **Don’t overfill the husks.** Less is more here, or they’ll burst.
- **Steam them upright and tightly packed.** This helps them hold their shape and cook evenly.
That first tip, “Don’t skimp on the fat,” is probably the most important thing I wish I knew earlier. I really thought I was being clever and healthy by cutting down on the lard. My tamales were so dense and dry, they literally felt like they were absorbing all the moisture from my mouth. It was a chore to eat them. After that, I learned that some things are just essential to the classic recipe, and the fat content in tamales is one of them. It’s not just for flavor, it’s for texture, for that beautiful, airy masa that just melts in your mouth.
And the “float test” for the masa? Oh man, that’s a game-changer. I spent so much time guessing and praying my masa was right. One time, I thought it looked good, but when I finally steamed the tamales, they were like gummy little rocks. After that disaster, I found out about the float test, and it’s like magic. It tells you if you’ve whipped enough air into the masa. If it sinks, you know you need to keep going. It saved me from countless future tamale failures and is now a non-negotiable step when I make a Classic Tamales Recipe Made Easy.
FAQ
**Q: My masa is too dry and crumbly, what do I do?**
A: Oh, I’ve been there! This usually means you need more liquid. Slowly add a tablespoon or two of warm broth at a time, mixing well after each addition, until it reaches that soft, spreadable consistency, like peanut butter. Don’t go crazy, a little at a time is key so you don’t overdo it.
**Q: My masa is too wet and sticky, can I fix it?**
A: Yep, another common one! If it’s just a little too wet, you can try adding a tablespoon or two of extra masa harina and mixing it in really well. If it’s super wet, you might need to add a bit more of the creamed fat (lard/shortening) along with more masa harina to balance it out. It’s all about slowly adjusting until you get that perfect texture.
**Q: How do I know if the tamales are done steaming?**
A: This is the moment of truth! Gently pull one tamale out of the steamer. Let it cool for a minute or two. If the masa easily separates and pulls away cleanly from the corn husk, it’s done! If it’s still sticky and clings to the husk, put it back in and steam for another 15-20 minutes, then re-test. Patience, my friend! I’ve undercooked them more times than I can count, and they just taste doughy.
**Q: Can I make tamales ahead of time?**
A: Absolutely! This is one of the best things about them. You can prepare the filling and masa dough a day or two in advance and store them separately in the fridge. Or, you can assemble all the tamales and refrigerate them (uncooked) for up to 3 days before steaming. They also freeze beautifully after steaming.
**Q: What if I don’t have a dedicated steamer basket or pot?**
A: No problem, get creative! I used to use a large stockpot with a metal colander placed inside, making sure the colander legs were tall enough to keep the tamales out of the water. You can also crumple up aluminum foil into three balls and place them on the bottom of a pot, then put a heat-proof plate on top of the foil balls to create a raised surface for your tamales. Just make sure the water doesn’t touch the tamales directly.
That’s everything I know about making Classic Tamales Recipe Made Easy! Hope you give it a try. And if you mess it up, you’re in good company—I still do it sometimes.
Classic Tamales Recipe Made Easy
Master the art of traditional Mexican tamales with this simplified recipe, perfect for creating tender pork filling enveloped in light, fluffy masa. A true labor of love that’s worth the effort, delivering a comforting dish ideal for sharing with family and friends.
Ingredients
- 3 lbs pork shoulder (Boston butt), cut into 2-inch chunks
- 1 large yellow onion, roughly chopped
- 4-5 cloves garlic, smashed
- 2 teaspoons salt, divided (more to taste)
- 1 teaspoon black pepper
- 1 tablespoon ground cumin
- 1 tablespoon dried oregano (Mexican oregano if you can find it!)
- 12 dried guajillo chiles, stemmed and seeded
- 4 dried ancho chiles, stemmed and seeded
- 2-3 dried arbol chiles (for a little kick, optional)
- 3 cups masa harina for tamales (not instant masa for tortillas!)
- 1.5 cups vegetable shortening or lard, softened (about 12 ounces)
- 1.5 tablespoons baking powder
- About 4-5 cups warm chicken or pork broth, divided
- 1 (16 oz) package dried corn husks
Instructions
-
Soak corn husks: Submerge corn husks in a large pot or bowl of hot water for at least 2-4 hours, or overnight, until pliable. Place a plate or heavy object on top to keep them submerged.
-
Prepare pork filling: In a large pot or Dutch oven, combine pork shoulder, half of the onion, 2 smashed garlic cloves, 1 teaspoon salt, and pepper. Cover with water or chicken broth. Bring to a boil, then reduce heat, cover, and simmer for 2-2.5 hours, or until pork is very tender and easily shredded.
-
Make chile sauce: While pork cooks, stem and seed the dried chiles. For a deeper flavor, lightly toast them in a dry pan for a minute or two, being careful not to burn. Place toasted chiles in a separate bowl, cover with hot water, and let them rehydrate for 20-30 minutes until soft.
-
Blend chile sauce: Drain the rehydrated chiles. In a blender, combine softened chiles, the remaining half onion, 3 smashed garlic cloves, cumin, oregano, and 1 teaspoon salt. Add about 1 cup of the pork cooking liquid. Blend until very smooth, adding a little more liquid if needed. Strain the sauce through a fine-mesh sieve into a bowl, pressing on the solids to extract all liquid (this step is important for a smooth sauce!). Discard solids.
-
Finish pork filling: Once pork is tender, remove from pot and shred it using two forks. Discard any large pieces of fat. Add the shredded pork back to a clean pot or large skillet. Pour the strained chile sauce over the pork. Simmer for 15-20 minutes, stirring occasionally, until the sauce thickens and coats the pork well. Taste and adjust salt if needed. Set aside to cool slightly.
-
Prepare the masa dough: In a very large bowl or stand mixer, cream the softened shortening/lard with 1 teaspoon salt until light and fluffy (about 5 minutes). This is key!
-
Gradually add masa harina and baking powder to the creamed shortening, alternating with about 3-4 cups of warm broth. Beat or mix on medium speed for 10-15 minutes, or until the dough is light, fluffy, and spreadable. The dough should float a small piece in a cup of cold water. Add more broth if needed to reach a soft, peanut butter-like consistency.
-
Assemble tamales: Drain the softened corn husks. Lay a husk flat with the wider end facing you. Spread about 2-3 tablespoons of masa dough evenly over the wider half of the husk, leaving a 1-inch border at the bottom and sides, and a larger border at the top.
-
Place 1-2 tablespoons of the pork filling in the center of the masa.
-
Fold the sides of the husk over the filling, then fold up the bottom narrow end. You can tie them with a thin strip of corn husk or simply stack them folded-end-down in your steamer.
-
Steam tamales: Arrange tamales upright in a large steamer pot over boiling water. Make sure the water doesn’t touch the tamales. Cover tightly and steam for 1.5-2 hours, or until the masa pulls away easily from the husk. You might need to add more boiling water to the pot every 30-45 minutes.
-
Serve and enjoy! Let them rest for 10-15 minutes after steaming for best results.
Nutrition (Per Serving)