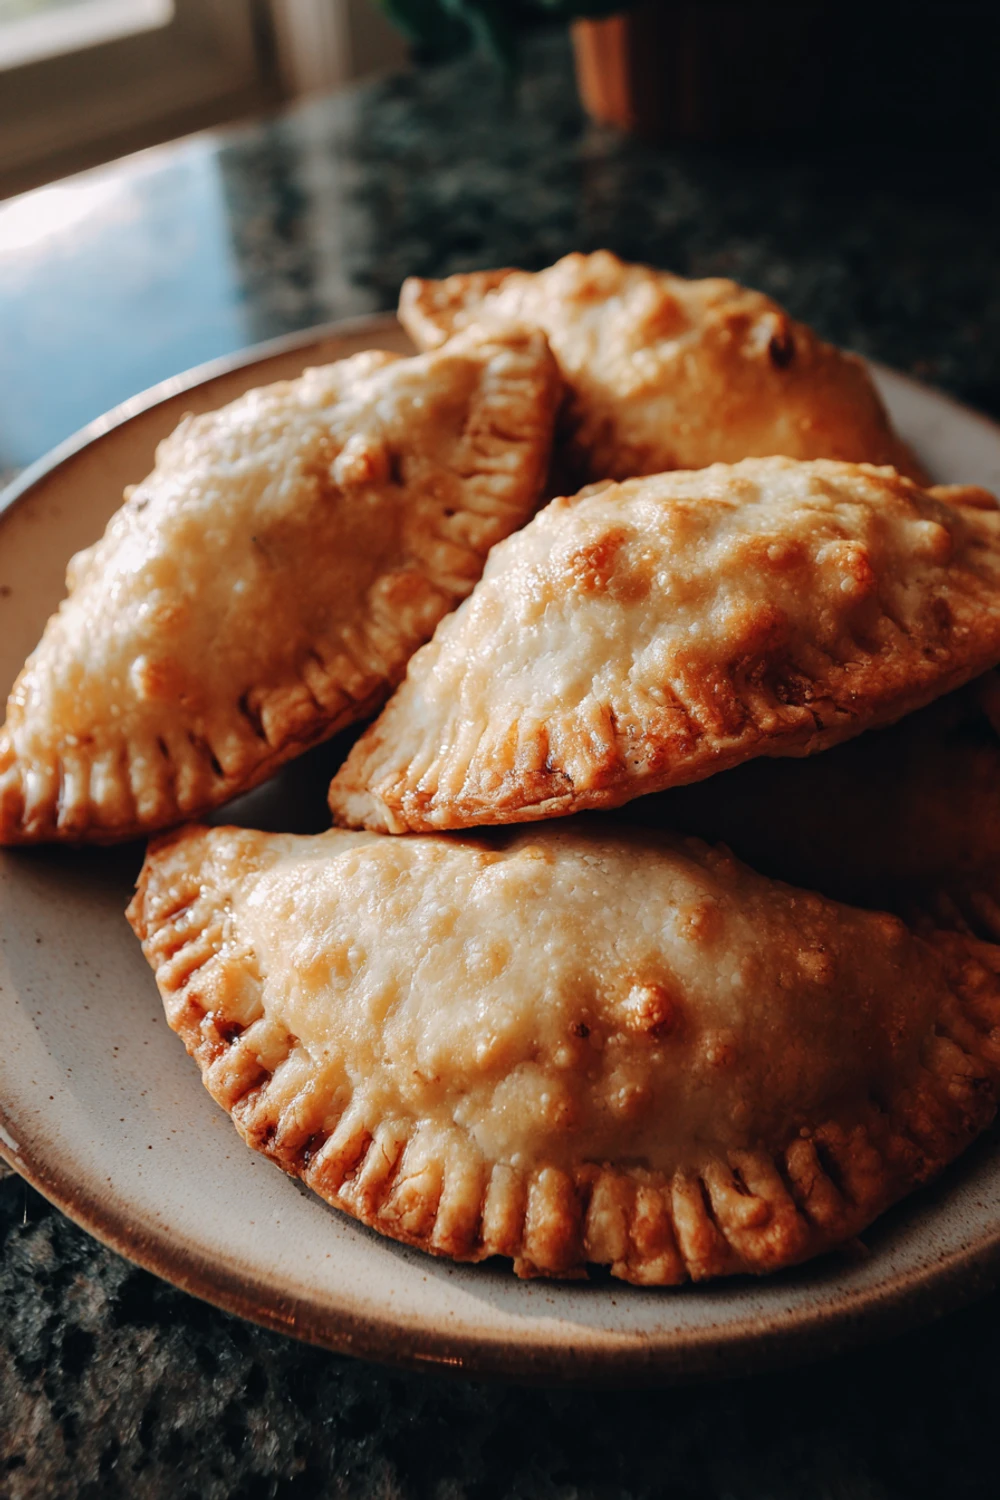
Easy Apple Hand Pies Recipe
I’ll never forget the first time I tried to make these apple hand pies. I was so excited, I skipped reading the recipe twice and just went for it. I ended up with a sticky, leaking mess that looked more like abstract art than food. My kitchen counter was covered in flour and my ego was a little bruised. But my family still ate them, bless their hearts, and told me they were delicious. That’s when I knew I had to master this easy apple hand pies recipe. Now, after many, many tries, I finally have it down.
Recipe Card
| Recipe Title | Easy Apple Hand Pies Recipe |
|---|---|
| Servings | 8 hand pies |
| Prep Time | 30 minutes |
| Cooking Time | 20 minutes |
| Calories | About 320 per pie |
Ingredients
- 2 pre-made pie crusts (the kind you roll out)
- 2 medium apples, peeled and diced small
- 1/4 cup brown sugar
- 1 tbsp all-purpose flour
- 1 tsp ground cinnamon
- 1/4 tsp nutmeg
- 1 tbsp lemon juice
- 1 egg, beaten (for the egg wash)
- Coarse sugar, for sprinkling
The pie crusts are my biggest cheat and I make no apologies. I tried making my own crust once and it was a complete disaster—tough and bland. The store-bought ones are flaky and reliable. And for the apples, use whatever you have! I used Granny Smiths once and they were way too tart. A mix of sweet and tart, like Honeycrisp, is my go-to now.
Directions
- Preheat your oven to 375°F (190°C) and line a baking sheet with parchment paper.
- In a medium bowl, mix the diced apples, brown sugar, flour, cinnamon, nutmeg, and lemon juice.
- Unroll one pie crust onto a lightly floured surface. Use a bowl or large cup to cut out 4-5 inch circles.
- Place a spoonful of the apple mixture onto one half of each circle, leaving a border.
- Brush the edges of the circle with the beaten egg.
- Fold the dough over the filling to create a half-moon shape. Press the edges with a fork to seal them shut.
- Carefully transfer each hand pie to the prepared baking sheet.
- Brush the tops with the remaining egg wash and sprinkle generously with coarse sugar.
- Use a small, sharp knife to cut two or three small slits in the top of each pie.
- Bake for 18-22 minutes, or until they’re golden brown and beautiful.
- Let them cool on the pan for at least 10 minutes before you try to eat one.
The sealing part is where I’ve messed up the most. If you don’t get a good seal, the filling will bubble out and make a huge, caramelized mess on your pan. It still tastes good, but it’s a pain to clean. Press that fork down hard! And the slits are not just for looks—they let the steam escape so the pies don’t explode. I learned that the hard way, too.
My favorite thing about this recipe is how it makes the whole house smell like fall. It’s the ultimate comfort food, especially on a lazy weekend. I love making a double batch and freezing some before baking. They’re a perfect easy dinner side or a sweet treat for lunchboxes. They never last long as leftovers in my house, that’s for sure.
I’ve definitely had my share of failures. One time I was in a rush and didn’t let them cool at all. I bit into one and burned the roof of my mouth so bad I couldn’t taste anything for two days. The apple filling is like molten lava when it first comes out. Patience is not my strong suit, but it’s required here.
What would I change next time? Maybe try adding a tiny bit of cardamom to the filling for a different flavor. I’m always tweaking things, even when I probably shouldn’t. It’s a family favorite now, and my kids love helping me press the forks into the edges. It’s a fun, messy activity for everyone.
Nutrition Info (per serving)
| Calories | Carbs | Fat | Protein |
|---|---|---|---|
| 320 | 45g | 14g | 3g |
Okay, so these aren’t exactly a health food. I was a little surprised by the fat content, but that’s the butter in the crust for you. I’ve tried using a low-fat crust before and it just wasn’t the same—it was kinda sad and pale. For a lighter option, you could maybe use phyllo dough, but that’s a whole other level of difficulty I’m not ready for.
Ingredient Swaps
| Ingredient | Substitution |
|---|---|
| Brown Sugar | White sugar plus 1 tsp molasses |
| Apple | Pears or peaches |
| Cinnamon | Apple pie spice blend |
| Lemon Juice | Orange juice or apple cider vinegar |
I’ve tried the pear swap and it worked great, but they were a bit juicier so I added an extra tablespoon of flour to the filling. The peach version was a total summer hit. But do not, I repeat, do not try to use frozen berries without thawing and draining them first. I created a purple soup that leaked everywhere. It was a disaster.
Tips
- Don’t overfill the pies! A heaping tablespoon is plenty.
- Chill the assembled pies for 15 minutes before baking. It helps them hold their shape.
- If the edges aren’t sealing well, dip your finger in water and moisten the dough first.
The overfilling tip is one I learned the extremely messy way. I thought more filling would be better, but it just guarantees a leak. My baking sheet had a permanent apple-sugar stain until I finally replaced it. Chilling them seems like an extra, annoying step, but it makes a huge difference in getting that perfect, flaky crust.
FAQ
Can I make these ahead of time?
Absolutely! You can assemble them the night before, keep them covered in the fridge, and just pop them in the oven in the morning. The egg wash might make them a tiny bit soggy, but I’ve done it and they still baked up fine.
Why did my pies burst open?
Oh, I feel this one. This usually means either you overfilled it (guilty) or you didn’t cut steam vents in the top (also guilty). The steam has to go somewhere, and if it can’t escape easily, it’ll just blow the side out. It still tastes good, though!
Can I freeze them?
Yes! Freeze them after assembling on a baking sheet, then once they’re solid, toss them in a freezer bag. Bake from frozen, just add a few extra minutes to the baking time. It’s a lifesaver for a quick dessert.
That’s everything I know about making these Easy Apple Hand Pies! Hope you give it a try. And if you mess it up, you’re in good company—I still do it sometimes. Happy baking!
Easy Apple Hand Pies
Flaky, portable hand pies filled with a sweet and spiced apple filling, perfect for a quick dessert or snack.
Ingredients
- 2 pre-made pie crusts (the kind you roll out)
- 2 medium apples, peeled and diced small
- 1/4 cup brown sugar
- 1 tbsp all-purpose flour
- 1 tsp ground cinnamon
- 1/4 tsp nutmeg
- 1 tbsp lemon juice
- 1 egg, beaten (for the egg wash)
- Coarse sugar, for sprinkling
Instructions
-
Preheat your oven to 375°F (190°C) and line a baking sheet with parchment paper.
-
In a medium bowl, mix the diced apples, brown sugar, flour, cinnamon, nutmeg, and lemon juice.
-
Unroll one pie crust onto a lightly floured surface. Use a bowl or large cup to cut out 4-5 inch circles.
-
Place a spoonful of the apple mixture onto one half of each circle, leaving a border.
-
Brush the edges of the circle with the beaten egg.
-
Fold the dough over the filling to create a half-moon shape. Press the edges with a fork to seal them shut.
-
Carefully transfer each hand pie to the prepared baking sheet.
-
Brush the tops with the remaining egg wash and sprinkle generously with coarse sugar.
-
Use a small, sharp knife to cut two or three small slits in the top of each pie.
-
Bake for 18-22 minutes, or until they’re golden brown and beautiful.
-
Let them cool on the pan for at least 10 minutes before serving.
Nutrition (Per Serving)