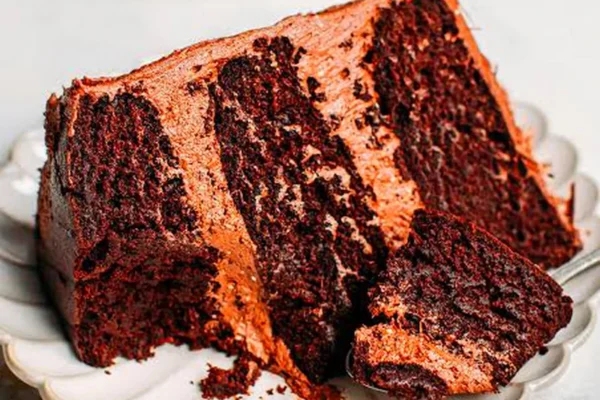
Easy Chocolate Fudge Recipe
Okay, so I gotta tell you, this Easy Chocolate Fudge Recipe isn’t just some random dessert for me. It’s tied to one of my earliest baking disasters! I was maybe ten, trying to impress my mom with a homemade treat, and I found this old recipe card for “Quick Fudge.” I didn’t know much about candy making, or even what “soft ball stage” meant. I just kinda boiled it until it looked… bubbly? Let’s just say my first batch was more like chocolate cement, and I almost broke a spoon trying to get it out of the pan. My mom, bless her heart, pretended it was the best cement she’d ever tasted. It took a few more tries, and a lot of burnt pots, but eventually, I figured out the tricks. Now, this easy chocolate fudge recipe is one of my go-to’s, and it always reminds me of that sticky, crumbly first attempt.
Recipe Card
| Recipe Title | Easy Chocolate Fudge Recipe |
|---|---|
| Servings | About 36 pieces |
| Prep Time | 10 minutes |
| Cooking Time | 10-15 minutes |
| Calories | 150-200 (approx. per piece) |
Ingredients
- 1 1/2 cups granulated sugar
- 3/4 cup (1 1/2 sticks) unsalted butter
- 2/3 cup evaporated milk (not sweetened condensed!)
- 12 ounces semi-sweet chocolate chips (or chopped chocolate bar)
- 1 teaspoon vanilla extract
- Pinch of salt
Let’s talk about these ingredients, ’cause even seemingly simple stuff can go sideways. Take the granulated sugar, for instance. I once thought, “Oh, brown sugar is richer, I’ll use that!” Nope. It changes the texture, makes it chewier, and not in the classic fudge way. Stick to plain white sugar for this one, trust me.
The butter is another one where you don’t wanna skimp. I made the mistake of using margarine once, thinking it was the same thing, just cheaper. Big mistake! The fudge turned out greasy and kinda oily, and it just didn’t set right. Real butter gives you that creamy, melt-in-your-mouth texture that margarine just can’t replicate.
And then there’s the evaporated milk. This is crucial! My sister, who’s not much of a baker, tried to make this recipe once and grabbed sweetened condensed milk by accident. Her fudge was so ridiculously sweet and gooey it never firmed up. Evaporated milk has less water than regular milk, and it’s what makes the fudge thick and creamy. Don’t swap it for anything else!
For the chocolate chips, I usually go with semi-sweet ’cause it’s a good balance. But I did try using some super cheap, waxy chocolate chips once when I was trying to save a buck. The fudge was okay, but it had this weird, almost artificial taste, and it didn’t melt as smoothly. You really taste the chocolate in fudge, so investing in decent quality chips or a good chocolate bar is totally worth it.
Vanilla extract might seem small, but it’s a flavor enhancer. The one time I forgot to add it, the fudge tasted… fine. But it just wasn’t as deep or well-rounded. That little bit of vanilla really makes the chocolate sing. And don’t even think about skipping that tiny pinch of salt! Salt actually makes sweet things taste sweeter and helps balance out the richness of the chocolate. Without it, the fudge can taste a little flat, almost too one-note.
Directions
- Line an 8×8-inch baking pan with parchment paper, leaving an overhang on the sides for easy lifting. Lightly grease the paper.
- In a heavy-bottomed saucepan, combine the sugar, butter, and evaporated milk.
- Bring the mixture to a full rolling boil over medium heat, stirring constantly.
- Once boiling, reduce heat slightly and continue to boil, stirring occasionally, for 5 minutes. (If you have a candy thermometer, aim for 234-238°F, soft ball stage).
- Remove the saucepan from the heat.
- Immediately stir in the chocolate chips, vanilla extract, and pinch of salt until the chocolate is completely melted and the mixture is smooth.
- Pour the fudge into the prepared pan.
- Let cool completely at room temperature for at least 2-3 hours, or until firm. Do not refrigerate immediately.
- Once firm, use the parchment paper overhang to lift the fudge out of the pan. Cut into squares and serve.
Oh boy, these directions hold so many memories of my own messes! Step one, lining the pan, seems simple, right? Wrong! I’ve been in a rush so many times and skipped the parchment, just greasing the pan. And then, trying to get the firm fudge out was like trying to chip concrete off the sidewalk. I practically ruined a pan and my knuckles. Seriously, that parchment paper is your best friend here, don’t skip it.
Steps 3 and 4, the boiling part, that’s where the magic (or the disaster) happens. I’ve messed this up more times than I can count. My first few times, I’d either under-boil it, and the fudge would stay gooey and never really set, or I’d over-boil it, and it would turn into this crumbly, dry mess that tasted okay but had the texture of sand. The candy thermometer is a total game-changer, but if you don’t have one, just know that “full rolling boil” means it’s bubbling all over, not just around the edges, and when you lift your spoon, it coats the back of it nicely. Five minutes feels short, but it’s usually just enough to get it to that soft-ball stage without getting it too hard. I once just guessed, thinking “longer is better for setting,” and ended up with fudge so hard it could chip a tooth.
And step 6, stirring in the chocolate *off the heat*. This is key! If you stir the chocolate in while it’s still boiling, it can seize up or get grainy. You want that residual heat to gently melt the chocolate into a smooth, glossy river. I remember one time, I was distracted and left it on the heat for a minute too long while stirring in the chocolate; the whole thing went from smooth to a weird, clumpy, grainy mess in seconds. Learned that one the hard way, for sure.
After making this Easy Chocolate Fudge Recipe countless times, it’s become a true family favorite, especially around the holidays. It’s such a comfort food, you know? The smell alone, when that chocolate and vanilla hit the hot mixture, just instantly transports me back to my grandma’s kitchen. It’s a fantastic homemade treat to share, and even when I’ve had a minor mishap (like that time I used expired vanilla and the fudge tasted a little off), it’s still usually devoured in minutes.
It’s also great for when you need a quick dessert that looks impressive. I love how simple it is to whip up, yet everyone thinks you’ve spent hours slaving over it. Plus, it makes a really generous batch, so there’s always plenty for friends, family, and of course, some cheeky leftovers for me! I wouldn’t change a thing about the core recipe, it’s just so reliably delicious.
This fudge is just pure indulgence, and that’s okay sometimes. It’s a wonderful treat to make for special occasions or when you just need a little something to lift your spirits. It’s definitely a testament to how the simplest ingredients can create something truly magical, a true classic comfort food for sure.
Nutrition Info (per serving)
| Calories | Carbs | Fat | Protein |
|---|---|---|---|
| 180 | 25g | 9g | 2g |
Okay, let’s be real, looking at these nutrition numbers, nobody is making this Easy Chocolate Fudge Recipe for a healthy snack! Does it surprise me? Not really, it’s fudge! It’s sugar, butter, and chocolate, so it’s gonna be a treat. I’ve definitely tried to make “lighter” versions before, you know, with sugar substitutes or trying to swap in dark chocolate and reduce the butter. And honestly? It just wasn’t the same. It lacked that creamy texture and rich flavor. My advice for people with special diets or just trying to watch their intake is to simply enjoy a smaller piece. It’s meant to be an indulgence, not a daily staple. Don’t mess with the classic, just savor it!
Ingredient Swaps
| Ingredient | Substitution |
|---|---|
| Semi-sweet chocolate chips | Milk chocolate chips, dark chocolate chips, or chopped chocolate bars |
| Vanilla extract | Peppermint extract (for holiday fudge), almond extract (use less) |
| No additions | Add chopped nuts (walnuts, pecans), mini marshmallows, or sprinkles |
| Unsalted butter | Salted butter (omit pinch of salt in recipe) |
Alright, let’s talk swaps! Not all swaps are created equal, and I’ve learned that the hard way. Swapping semi-sweet for milk chocolate chips works great if you like a sweeter, milder fudge. Dark chocolate chips are fantastic if you want a more intense, less sweet flavor, but sometimes it can be a little *too* rich for some folks. I once tried using cocoa powder instead of melted chocolate, thinking it would be the same, but it was a disaster! The texture was like a dry, pasty mess, definitely not creamy fudge.
For flavorings, peppermint extract for the holidays is a winner, but be careful with the amount—a little goes a long way, or it’ll taste like toothpaste! Almond extract is good too, but again, use maybe half the amount of vanilla, ’cause it’s strong. As for adding things, nuts are a classic and always welcome. I once tried to add dried cranberries, thinking it’d be festive, but they got kinda chewy and weird in the fudge, so stick to nuts or things like mini marshmallows. And if you only have salted butter, it’s fine, just make sure to skip that extra pinch of salt in the recipe, or it can end up too salty.
Tips
- Invest in a candy thermometer for perfect consistency every time.
- Patience is key – especially when cooling the fudge.
- Don’t over-stir the mixture after adding the chocolate.
- Use fresh, good-quality ingredients for the best flavor.
- Prepare your pan properly with parchment paper.
Seriously, these tips are like the wisdom I wish I had when I first started making this Easy Chocolate Fudge Recipe. That candy thermometer? Lifesaver. For years, I just eyeballed the “soft ball stage” based on bubbles and guesswork. Sometimes it was perfect, sometimes it was too soft, sometimes too hard. I’d curse under my breath every time it didn’t set right. Finally, my grandma gave me an old candy thermometer, and suddenly, my fudge was consistently perfect. It’s not expensive, and it takes all the guesswork out of the most critical step.
And patience, oh my goodness, patience! I cannot tell you how many times I’ve made a batch of fudge, gotten impatient, and tried to cut it while it was still slightly warm or not fully set. The results? A gooey, sticky, melted mess that looked like it had been run over by a truck. One Christmas, I was in such a hurry to package fudge gifts that I sliced into it maybe an hour too early. It wasn’t completely ruined, but the edges were mushy, and the pieces didn’t hold their shape. I had to scrape it into little containers and call it “fudge spread.” Let it sit, seriously, for the full time, or even longer if your kitchen is warm. It makes all the difference for clean, perfect squares.
FAQ
Q: Why is my Easy Chocolate Fudge Recipe grainy?
A: Ugh, the dreaded grainy fudge! This usually happens for a few reasons. Either you over-boiled the mixture, so the sugar crystals got too big, or you stirred it too much after you took it off the heat and added the chocolate. You want that smooth, gentle melt for the chocolate, not vigorous stirring. Also, sometimes if the sugar crystals get on the sides of the pan during boiling and you don’t wash them down, they can fall back into the mix and cause graininess. Just scrape down the sides of the pot with a wet pastry brush during the boiling stage.
Q: My fudge won’t set! What did I do wrong?
A: This is the absolute worst feeling, looking at a pan of chocolate soup! Most likely, your mixture didn’t boil long enough to reach the proper temperature (that soft ball stage, remember?). It means there’s too much moisture left, and the sugar won’t crystallize properly. It could also be that you accidentally used regular milk instead of evaporated milk, which has way more water. There’s not much you can do once it’s poured, unfortunately, but sometimes if you put it in the fridge for a long, long time (like overnight), it might firm up enough to be scoopable, even if it’s not sliceable. You could always serve it over ice cream and call it a sauce!
Q: Can I double this Easy Chocolate Fudge Recipe?
A: You totally can, but be warned: you’ll need a much bigger pot! I learned this the hard way when I tried to double it in my regular saucepan. The mixture boiled up and over, making an epic, sticky mess all over my stove. It also takes significantly longer to reach the boiling point and then to reach the correct temperature, so be prepared for a longer cooking time. And make sure you have a large enough pan to pour it into—a 9×13-inch pan is usually good for a double batch.
Q: How do I store homemade fudge?
A: Once it’s completely cooled and cut, store your fudge in an airtight container at room temperature for up to a week. If you want it to last longer, you can keep it in the fridge for a couple of weeks, but sometimes it can dry out a little. For really long storage, you can even freeze it! Just wrap the individual pieces tightly in plastic wrap, then put them in an airtight freezer-safe container or bag. It’ll keep for a couple of months, just thaw them at room temp before serving.
That’s everything I know about making Easy Chocolate Fudge Recipe! Hope you give it a try. And if you mess it up, you’re in good company—I still do it sometimes.
Easy Chocolate Fudge Recipe
Discover the classic taste of homemade chocolate fudge with this easy-to-follow recipe, perfect for sharing. This rich, creamy confection comes together quickly, making it an ideal treat for any occasion or a nostalgic journey back to simple baking.

Ingredients
- 1 1/2 cups granulated sugar
- 3/4 cup (1 1/2 sticks) unsalted butter
- 2/3 cup evaporated milk (not sweetened condensed!)
- 12 ounces semi-sweet chocolate chips (or chopped chocolate bar)
- 1 teaspoon vanilla extract
- Pinch of salt
Instructions
-
Line an 8×8-inch baking pan with parchment paper, leaving an overhang on the sides for easy lifting. Lightly grease the paper.
-
In a heavy-bottomed saucepan, combine the sugar, butter, and evaporated milk.
-
Bring the mixture to a full rolling boil over medium heat, stirring constantly.
-
Once boiling, reduce heat slightly and continue to boil, stirring occasionally, for 5 minutes. (If you have a candy thermometer, aim for 234-238°F, soft ball stage).
-
Remove the saucepan from the heat.
-
Immediately stir in the chocolate chips, vanilla extract, and pinch of salt until the chocolate is completely melted and the mixture is smooth.
-
Pour the fudge into the prepared pan.
-
Let cool completely at room temperature for at least 2-3 hours, or until firm. Do not refrigerate immediately.
-
Once firm, use the parchment paper overhang to lift the fudge out of the pan. Cut into squares and serve.
Nutrition (Per Serving)