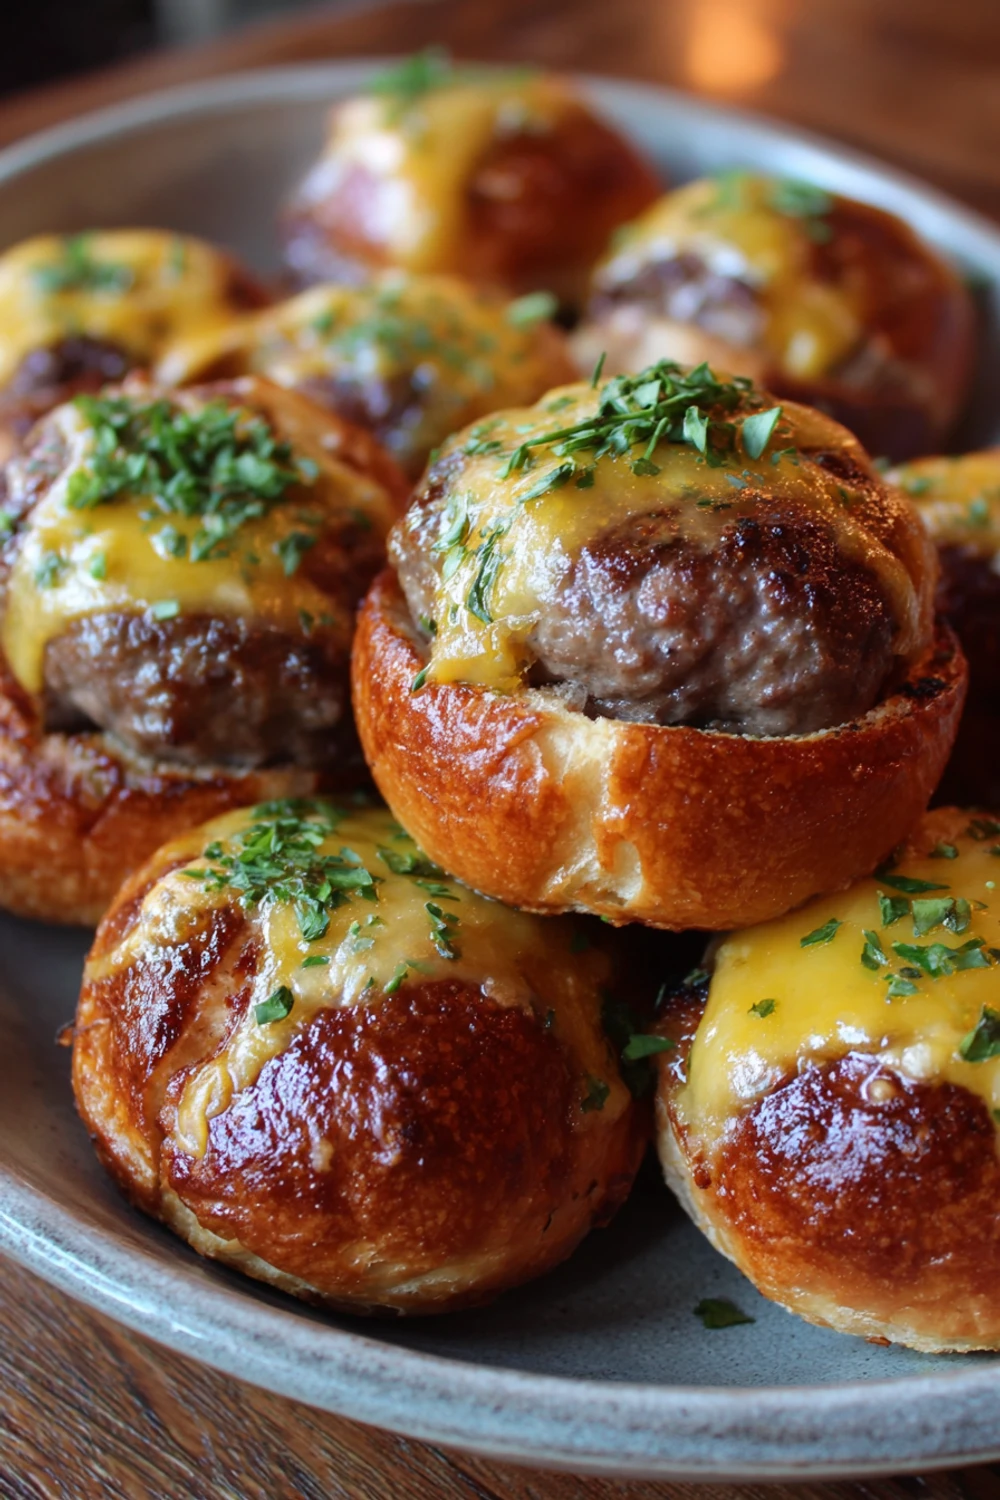
Garlic Butter Beef Cheeseburger Rollups Recipe
The first time I tried making these Garlic Butter Beef Cheeseburger Rollups, I almost set off every smoke alarm in my apartment. I was so excited to impress my then-boyfriend, now husband, and I figured how hard could it be? I used this super cheap, thin beef and way too much filling. The whole thing burst open in the pan, cheese and beef juice everywhere, and it looked like a crime scene. But you know what? He still ate it and said it was the best messy thing he’d ever had. That’s when I knew this recipe was a keeper, even when you totally botch it.
Recipe Card
| Recipe Title | Garlic Butter Beef Cheeseburger Rollups Recipe |
|---|---|
| Servings | 4 |
| Prep Time | 20 minutes |
| Cooking Time | 25 minutes |
| Calories | Approx. 580 |
Ingredients
- 1.5 lbs thin-sliced sirloin or top round beef
- 1 tbsp olive oil
- 1 small yellow onion, finely diced
- 2 cloves garlic, minced
- 8 oz cream cheese, softened
- 1 cup shredded cheddar cheese
- 1 tbsp Worcestershire sauce
- 1 tsp paprika
- Salt and black pepper to taste
- 4 tbsp butter
- 2 tbsp fresh parsley, chopped
- Toothpicks, for securing
Let’s talk about that beef. I once tried to save a buck and got this super thin “sandwich steak.” Big mistake. It shredded the second I tried to roll it. You need something thin but still sturdy, like top round. And the cream cheese? Don’t you dare use it cold from the fridge. I did that once and spent ten minutes trying to mix rock-hard cream cheese with the other stuff. It was a lumpy, frustrating mess. Let it sit on the counter for a bit first.
Directions
- First, get your beef laid out on a cutting board. I like to put down some plastic wrap so it doesn’t stick. Pat it dry with a paper towel, that’s a tip I learned the hard way.
- Heat the olive oil in a skillet over medium heat. Toss in your diced onion and cook it for about 5 minutes, until it gets soft and kinda see-through.
- Now, throw in the minced garlic and cook for just one more minute. You just want it fragrant, don’t let it burn! Burnt garlic is the worst.
- Grab a mixing bowl and plop in the softened cream cheese, the cheddar, the onion and garlic mix, Worcestershire sauce, paprika, and a good pinch of salt and pepper.
- Mix it all up until it’s totally combined. It should be a nice, spreadable paste.
- Take a good spoonful of this cheesy filling and spread it evenly over one piece of the beef. Leave a little border around the edges so it doesn’t squirt out the sides.
- Now, carefully roll that beef up nice and tight, starting from the short end. It’s like rolling a tiny, delicious carpet.
- Secure the whole thing with a couple of toothpicks. Don’t be shy, really stick ’em in there so it doesn’t come undone.
- Melt the butter in that same skillet over medium-high heat. Once it’s foamy, add your beef rollups. Don’t crowd the pan, do this in batches if you have to.
- Sear them for about 3-4 minutes per side, until they get a beautiful golden-brown crust all over.
- Once they’re all seared, you can pop the whole skillet into a 375°F oven for about 10-12 minutes to make sure they’re cooked through. Or, just lower the heat on the stove and cover the pan for a bit.
- Take them out, let them rest for 5 minutes. This is crucial! Then sprinkle with the fresh parsley before serving.
The rolling step is where I had my biggest disaster. I got greedy and overstuffed one, and when I went to roll it, the beef just tore right down the middle. Filling went everywhere. I had to basically make a deconstructed version in the pan, which was still tasty but not pretty. So don’t overfill them! A thin, even layer is your best friend. And those toothpicks are not optional. I thought I could skip them once and ended up with beef pancakes.
I love making this for a weeknight because it feels fancy but it’s really not that hard. It’s become our go-to comfort food when we’re craving something cheesy and beefy. The leftovers are surprisingly good, too, though they never last long in my house. My husband will sneak them cold from the fridge, which I used to think was weird, but now I do it too.
If I were to change one thing next time, I might try adding some finely chopped mushrooms to the filling for a little extra earthiness. I tried spinach once and it made the filling too watery, so I don’t recommend that unless you really wring the spinach out. This is one of those easy dinner recipes that you can play with, but the classic version is just perfect as it is.
Nutrition Info (per serving)
| Calories | Carbs | Fat | Protein |
|---|---|---|---|
| 580 | 5g | 45g | 38g |
Okay, so it’s not a salad. I know the numbers look a little heavy, but it’s a hearty meal! I’ve tried making it lighter by using low-fat cream cheese and less cheddar, and honestly, it just wasn’t the same. The texture got kinda rubbery. If you’re watching carbs, it’s actually pretty great as-is. For my gluten-free friends, just double-check your Worcestershire sauce, as some brands have wheat.
Ingredient Swaps
| Ingredient | Substitution |
|---|---|
| Beef | Thin chicken cutlets or even large slices of eggplant |
| Cheddar Cheese | Pepper Jack, mozzarella, or Swiss |
| Cream Cheese | Ricotta cheese (but drain it well!) |
| Worcestershire Sauce | Soy sauce or tamari |
I’ve tried a bunch of these swaps. The chicken version is actually really good, but you have to be even more careful not to overcook it or it gets dry. Using pepper jack cheese gives it a nice little kick that we love. The one swap that totally failed was when I tried using ricotta instead of cream cheese. I didn’t drain it enough and the filling was a soupy disaster that leaked everywhere. Learn from my mess!
Tips
- Pat your beef dry with a paper towel before you start. A wet surface is a slippery surface, and the filling will just slide right off.
- Don’t skip the sear! That initial browning in the butter is what gives it so much flavor and helps keep everything sealed inside.
- Let them rest for a full 5 minutes after cooking. I know it’s hard to wait, but if you cut into them right away, all that juicy goodness will run out onto the plate.
- If you’re worried about the beef tearing, you can sometimes ask your butcher to pound it a little thinner for you. It’s a lifesaver.
The resting tip is one I learned after a major fail. I was so hungry and proud of my perfectly browned rollups that I sliced into one immediately. A river of cheesy, buttery juice flooded the plate, and the rollup itself went from juicy to kinda dry. It was a tragedy of impatience. Now I set a timer and force myself to wait. It makes all the difference in the world.
FAQ
Can I make these ahead of time?
Oh yeah, for sure. You can assemble them completely, stick them on a baking sheet, and pop them in the fridge for a few hours before cooking. Just let them sit out for 15-20 minutes before they go in the pan so they’re not ice cold. I do this when we have friends over and it makes me look way more organized than I am.
My filling keeps leaking out. What am I doing wrong?
Welcome to the club! This usually means you’re overfilling them or not leaving a border. It could also be that your pan wasn’t hot enough for a good sear. Really press down gently when you first put them in the pan to get that crust forming and sealing the edge. And for the love of all that is holy, use the toothpicks.
What do you serve with these?
We’re simple folks. A big pile of mashed potatoes is our favorite, because that garlic butter sauce from the pan is incredible on them. Or just some simple roasted broccoli or a green salad. It’s a rich dish, so something fresh or plain on the side balances it out perfectly.
That’s everything I know about making Garlic Butter Beef Cheeseburger Rollups! Hope you give it a try, and if you mess it up, you’re in good company—I still do it sometimes. Just call it a “deconstructed” version and nobody will know the difference.
Garlic Butter Beef Cheeseburger Rollups Recipe
Tender beef slices stuffed with a creamy cheese filling, seared in garlic butter for an impressive yet surprisingly easy comfort food dinner.
Ingredients
- 1.5 lbs thin-sliced sirloin or top round beef
- 1 tbsp olive oil
- 1 small yellow onion, finely diced
- 2 cloves garlic, minced
- 8 oz cream cheese, softened
- 1 cup shredded cheddar cheese
- 1 tbsp Worcestershire sauce
- 1 tsp paprika
- Salt and black pepper to taste
- 4 tbsp butter
- 2 tbsp fresh parsley, chopped
- Toothpicks, for securing
Instructions
-
Lay beef slices on a cutting board with plastic wrap and pat dry with paper towel
-
Heat olive oil in skillet over medium heat, cook diced onion for 5 minutes until soft and translucent
-
Add minced garlic and cook for 1 minute until fragrant
-
In mixing bowl, combine softened cream cheese, cheddar cheese, onion-garlic mixture, Worcestershire sauce, paprika, salt, and pepper
-
Mix until completely combined into a spreadable paste
-
Spread filling evenly over each beef slice, leaving border around edges
-
Roll beef tightly starting from short end
-
Secure with toothpicks
-
Melt butter in skillet over medium-high heat until foamy
-
Add beef rollups in batches, searing for 3-4 minutes per side until golden brown
-
Transfer to 375°F oven for 10-12 minutes or lower heat and cover pan to cook through
-
Let rest for 5 minutes before sprinkling with fresh parsley and serving
Nutrition (Per Serving)